Posts Tagged ‘Steel Phalanx’

With Human Sphere N3 right around the corner and the Onyx First Contact Force rapidly approaching, I decided that it would be nice to at least give a basic primer on how I like to construct Fireteams and what considerations I take into account when I build them.  Now, Onyx is more like a “normal” sectoral for me, as the other factions I play are Steel Phalanx (who can get as many fire teams as they have points for), Tohaa (who can also get as many fire teams as they have points for), and Vanilla Nomads (who can’t form Fireteams).  As a result, I’m not quite as accustomed to regular 5-man Core Fireteams and Haris Fireteams, as Onyx will be the first time I have access to these more “normal” style Fireteams.  That being said, all of the concepts that I take when I build Enomotarchos and Triads still apply to Core and Haris Fireteams and I hope that this will be helpful for those of you who are still trying to wrap their head around Fireteams.

Roles of Fireteams

There are a variety of roles that Fireteams can fulfill.  When I’m thinking about what I want to use a Fireteam for, the first thing I think about is how many points I want to sink into it.  The more points I sink into the Fireteam, the more it needs to be a multi-functional Fireteam.  The general uses of Fireteams is split into 2 major types: the button pushers, and pain train Fireteams.  As we go through these, recognize that some of the various types of Fireteams will have some overlap in terms of roles, and the higher you go in points, the more important this becomes.

Button pushers are teams of multiple specialists, oftentimes only taking a single heavier weapon to ensure that they aren’t completely worthless in a firefight if they need to go in and get work done.  Cheap Forward Observers and Paramedics are oftentimes the primary unit types taken in these Fireteams due to being able to get a number of cheap specialists into a very order efficient team.  With HSN3, Hackers will become more attractive in Fireteams due to being able to hack without being kicked out of the Fireteam, but you still do pay a premium for most Hackers that are linkable, likewise with Engineers, I don’t find myself too often linking Engineers unless they have a secondary role due or I’m fielding a lot of TAGs, HI and REMs.  That being said, there are some Hackers and Engineers that are in excellent point brackets and for the “button pushing” support Fireteams, it is not unusual to have 4 different specialists and a single big gun.  Here are some examples of button pushing Fireteams:

  • Nesaie Alke (Enomotarchos), Thorakitai Paramedic, Thorakitai Paramedic, Thorakitai Forward Observer – 67 points, 1.5 SWC.
  • Acmon (Enomotarchos), Dactyl Doctor, Dactyl Doctor, Dactyl Engineer with Flammenspeer – 97 points, 0.5 SWC.
  • Myrmidon Officer Chain of Command with Boarding Shotgun (Enomotarchos), Machaon (Enomotarchos), Myrmidon Spitfire, Myrmidon with Chain Rifle – 120 points, 2.5 SWC.
  • Nexus Operative with Spitfire, Umbra Legate Hacker, Unidron Batroid Forward Observer, Unidron Batroid Forward Observer, Unidron Batroid with Plasma Sniper – 123 points, 3 SWC.
  • Nexus Operative Hacker, Unidron Batroid Forward Observer, Unidron Batroid Forward Observer, Unidron Batroid with Plasma Sniper, Unidron Batroid with K1 Combi Rifle and Tinbot A – 96 points, 2.5 SWC.
  • Makaul, Kosuil Assault Pioneer with Boarding Shotgun, Aelis Keesan with K1 Combi Rifle – 69 points, 1 SWC.

These are all solid examples of Fireteams where the main point of them is to push buttons.  Many of them are more defensive or supportive in nature as opposed to offensive in nature, being able to act as a defensive core until they are needed to push a buttons, oftentimes later in the game, and at which point, you can take advantage of their order efficiency to go and accomplish mission objectives.  When picking the “big gun” for the button pushing Fireteams, I like to go for high burst assault weapons like Spitfires, Boarding Shotguns, Plasma Rifles and Plasma Carbines, as you will typically be in closer ranges with these Fireteams when you are moving up to complete objectives.

The second type of Fireteams are pain trains.  These are highly offensive Fireteams that are centered around causing as much as damage as possible, while still having a specialist in order to accomplish mission objectives if need be.  Your weapon range bands are extremely important for this type of Fireteam, as always being in a favourable Range Band is highly beneficial for trying to get the most damage output during your active turn, as well as giving you extremely favourable AROs on the reactive turn.  These Fireteams are usually highly mobile, being able to rapidly reposition into favourable firing positions as needed.  Here are some examples of “pain trains”:

  • Hector Lieutenant with Plasma Rifle (Enomotarchos), Phoenix (Enomotarchos), Myrmidon with Chain Rifle, Myrmdon Assault Hacker – 158 points, 2.5 SWC.
  • Hector Lieutenant with Plasma Rifle (Enomotarchos), Phoenix (Enomotarchos), Machaon (Enomotarchos), Myrmidon with Chain Rifle – 165 points, 2.5 SWC.
  • Nesaie Alke (Enomotarchos), Thorakitai HMG, Thorakitai Feuerbach, Thorakitai Paramedic – 84 points, 4.5 SWC.
  • Umbra Samaritan Assault Hacker, Rodok HMG, Rodok Missile Launcher, Rodok Paramedic, Rodok Paramedic – 140 points, 3 SWC.
  • Umbra Samaritan with Breaker Combi Rifle, Rodok HMG, Rodok Missile Launcher, Rodok Assault Hacker, Rodok Paramedic – 141 points, 3.5 SWC.
  • Umbra Samaritan Assault Hacker, Xeodron with Red Fury, Xeodron with K1 Combi Rifle – 161 points, 1.5 SWC.
  • Mobile Brigada Hacker, Mobile Brigada HMG, Mobile Brigada Missile Launcher, Mobile Brigada Multi Rifle, Mobile Brigada Boarding Shotgun – 197 points, 4.5 SWC.

These are all solid examples of Fireteams where their main role is to attack.  The presence of the Assault Hacking Devices in a lot of these link teams is not just to provide a specialist presence, but to provide an offensive specialist for the list.  Any non-assault Hackers are there to provide supportware such as Fairy Dust or Assisted Fire to act as support for the heavy firepower brought on by the “pain train”.  Doctors and Paramedics are also excellent in these Fireteams as they will be able to help keep your big guns up and running, and it is not unusual to have 1 or 2 Doctors or Paramedics in these Fireteams as well.  Once you have killed what you need to do with the pain trains, the specialist will be there to complete 1 or 2 quick objectives to get you some objective points.

All of these Fireteams are good on both offensive and defense, having good weaponry at every range band and different ammo types for different situations that may pop up.  If you are using a big offensive Fireteam, it is very important that it is flexible and can deal with any threat that your opponent can bring to bear against you, while still being able to push a button if it is all you have left on the table.  You need to very strongly consider having armaments that are useful in both active and reactive turn with offensive Fireteams so that the crux of your offensive capabilities isn’t restricted to just your active turn.

Range Band Stacking

This is a very important concept for building Fireteams, and something that is extremely easy to overlook.  This is something that we all do for lists as a whole, and is a concept that you need to apply to any Fireteams that you build as well in order to maximize their effectiveness.  This is even more important in lists that run multiple Fireteams and is something that you need to really pay attention to in order to make sure that you aren’t handicapping yourself unintentionally.  The more Fireteams you run, the more complicated your range band stacking becomes.

One thing that we all do when we build lists is we make sure that we have all of our range bands covered in our lists.  That way, we aren’t completely handicapped at range bands that a canny opponent can easily exploit if you don’t have them all covered.  When I build Fireteams, I like to ensure that I have at least one mid-to-long range gun, one mid-to-close range gun, and at least one mid range gun.  Occasionally, in 5-man links, I like to have a long range gun as well to cover even more range bands.

There is one particular weapon that covers so many of these range bands, that it is my personal favourite weapon when used in a Fireteam, the humble Spitfire.  Spitfires are the perfect weapon for acting as the “glue” for a link team.  It has high burst, and a range band that is very easy to work with to ensure that you don’t have any blind spots (the other one that is a personal favourite of mine is an X-Visor Plasma Rifle, but only 1 model has that combination of equipment).  Combi-Rifles can also help cover the close-to-mid range bands, and are about as standard of a gun as you can get, while HMGs are excellent at covering the mid-to-long range that Spitfires can’t get into +3 range.  For covering the close range of a Fireteam, I personally like using either Direct Template Weapons or Shotguns due to the extremely likely chance of hitting at those ranges.  Once again, this covers one of the only blind spots that the Spitfire has and is an excellent support for when people get too close to your Spitfire.

At long range, there are a wide variety of weapons that are excellent, ranging from Missile and Rocket Launchers, Sniper Rifles, and depending on the role that you want that Fireteam to accomplish is something that you may or may not need. For example, in a button pushing Fireteam, I rarely find the need to include a long range weapon, as the Fireteam is usually so close that it is simply not optimal to include them.  In these Fireteams, Spitfires, Feurbachs and HMGs will make up the maximum range of the weapons that I include as they are not needed to operate outside of the 36″, and in many cases, the 24″ optimal range of the Spitfire is more than enough.

Range band stacking also goes into how you position your Fireteam.  Remember that you can be up to 8″ away from the Link Leader.  This means that you don’t need everyone clustered in a line where a single template can eliminate your entire Fireteam.  An example of what I mean is that often, I will deploy Hector and the Myrmidon Hacker or Machaon relatively close, but often with a building separating them so that they don’t get killed by a single template.  8″ in front of Hector, I will put the Myrmidon with Chain Rifle.  8″ behind Hector, I will put Phoenix.  This allows me to have a +3 to ARO from at least 1 of them regardless of what wanders into LOS of my Fireteam.  If I have a Myrmidon Officer with a Boarding Shotgun, I will setup the Boarding Shotgun 8″ in front of Hector. If I have a Spitfire, it will go in the mid range where Hector sits.  Once again, that means that no matter what walks into range, there is always a gun that is at +3 or better to hit.

When you have multiple Fireteams, you want to make sure that not only have you layered your range bands for each of your Fireteams properly, but you also need to check to make sure that you have covered all of your range bands across your list as well.

Deploying and Positioning Fireteams

One of the most important things about Fireteams after building them is how to position them on the table.  Fireteams are incredibly powerful, but it is extremely easy to position them poorly and get them all killed.  Somethings that you need to be very wary of:

  1. Do not cluster up your Fireteams.  You have 8″ off the Link Leader to play with, take advantage of it.  Otherwise, a single impact or circular template will kill your whole Fireteam.
  2. Don’t deploy or position in straight lines.  You don’t want to lose everything to a single shotgun blast.
  3. Be very cognitive of what your next action with your Fireteam is gong to be.  Remember that only models that are within 8″ of the Link Leader are part of the Fireteam.
  4. Be wary of any and all template weapons your opponent has.  They can cause serious problems when trying to move your Fireteam, as any models who contact an area the template hits at any point during their move are subject to the damage.

These are some basic positioning things with Fireteams that you want to avoid, because it’s a very easy way to lose a Fireteam if you fall into any of these traps.  While the majority of Core Fireteams are comprised of very similar troops, there are some factions where you can mix up the models in the Fireteam.  These allow you to get into some very interesting positional mind games with your opponent.  For example, a favourite tactic of mine is to put Hector in cover protecting the mid-range band, with Phoenix sitting up behind him 8″ and a Chain Rifle Myrmidon hiding behind a building.  I often do this to exploit poor range bands on the opposing side.  They can’t see the Chain Rifle Myrmidon to shoot it.  If they want to get in +3 of either Hector or Phoenix, they will need to eat a a Chain Rifle or Nanopulsar from the Myrmidon.  Regardless of what the opponent chooses, they are put in a tough position.  They can either shoot at Hector, who will be rolling at 3 over the opposing target number because of his X-Visor always putting him in a more favourable range band than the opponent.  If they win the roll off against Hector, they have to somehow damage Hector who will be in cover, and is ARM5 BTS6, with 2 Wounds and No Wound Incapacitation.  Either that, or they can try to win the Face to Face roll against Phoenix who has ODD, and will be in cover.  This means that they can either try to wound Hector, who is significantly harder to wound, or they can try to somehow hit Phoenix, who is significantly harder to hit.  If they want to increase their odds of even winning the firefight, then they need to also take an armour save from the Myrmidon’s Direct Template weapons (or the Myrmidon Officer’s Boarding Shotgun).

That was only one example of what range band layering can do, but it takes a few times of putting it on the table to get the hang of doing it.  Due to the fact that everyone gets the link team bonuses, you want to ensure that you are maximizing the link team bonuses on both the active and reactive turns, and this is an example of how range band layering allows you to do that.

Dealing with Fireteams

Fireteams are not indestructible.  They have some weaknesses that you are able to exploit. Outside of templates as mentioned above, one common thing that I like to do to deal with Fireteams is picking an ARO target who isn’t the link leader.  This may seem counter-intuitive at first, but rememer that on the active turn, Fireteam members all declare the same second half of their order.  This means that if the link leader elects to shoot, all the other Fireteam members will participate by supporting the Link Leader, since only the Link Leader shoots during the active turn.  You can exploit this by declaring a shoot ARO against someone other than the Link Leader.  What this means is that if the link leader chooses to shoot, then you get a normal roll against the model that isn’t the Link Leader, and while you will be getting hit by normal rolls back, you may potentially be able to strip one of their link team bonuses.  If the active player wants their Fireteam member to dodge, then the link leader also has to dodge, which then means that you aren’t getting shot back.

Something you don’t want to do however, is to try to drop smoke and shoot a Fireteam member if they are covering an objective in ARO.  If they are 4 or more, and have access to Sixth Sense LV2, they will be able to ARO you back through the smoke without penalty (likewise for Direct Template Weapons).  However, if you drop smoke on top of the objective and they don’t have MSV, you’ll be able to just drop smoke, complete your objectives and then back out again.

I hope you guys have enoyed this little primer to Fireteams!  As always, feel free to comment or let us know if we missed something important.

’til next time!
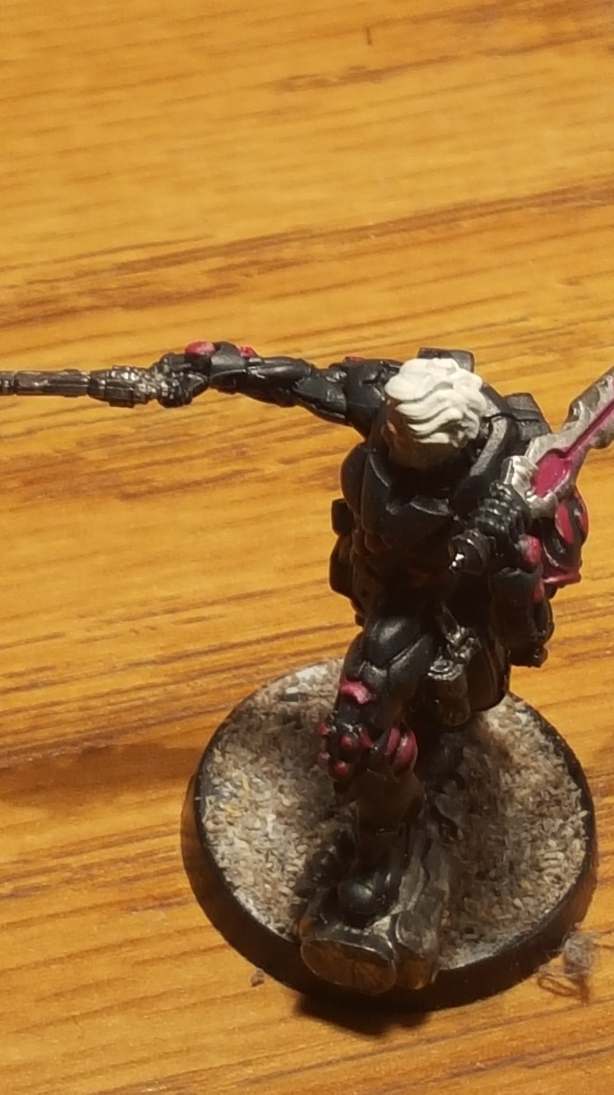
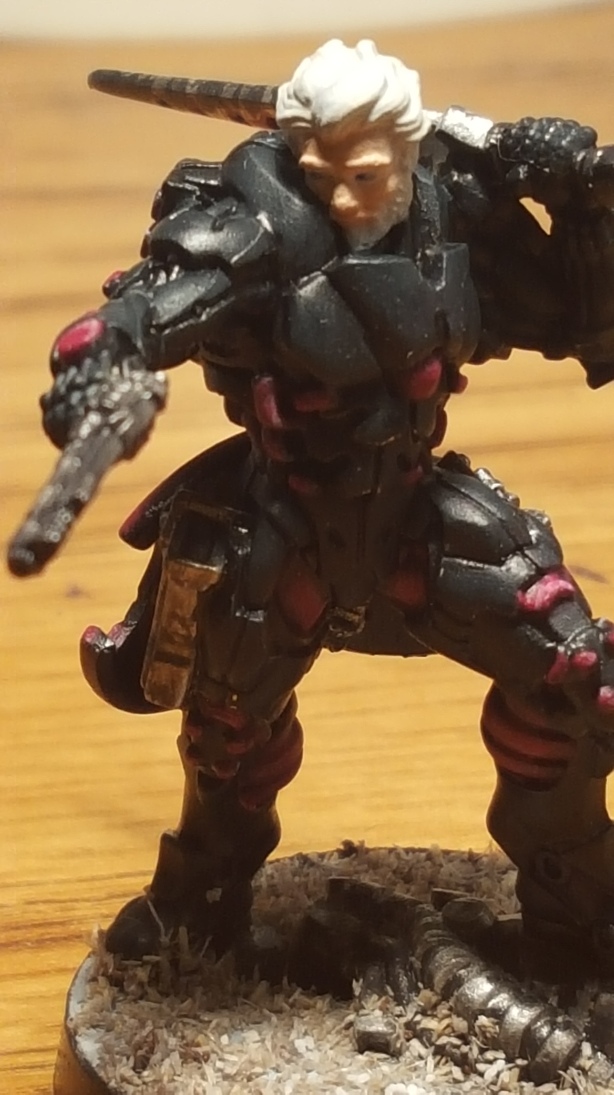
It’s no surprise that I’ve been extremely excited for Hector, Homeridae’s Champion.  In fact, I literally waited at the store on the day they came in to pick it up before work that day so that I could assemble him that very evening and start getting some paint on him!  I’ve been super excited ever since the initial reveal of Hector and both his rules and the model are simply fantastic.  I am simply of the opinion that he is the biggest game changer for Steel Phalanx with his Plasma Rifle, Strategos LV1 and Hoplite Armour.  I’ve referred to him as “The New God of Aleph” before, but I think a more apt title for him is simply “The Hero”.

20160327_011810

Strategos is such a huge boon to Steel Phalanx, that often runs lower order count than many other factions, and due to the fact that their lieutenant is often in a link team, you rarely get to use the lieutenant order.  With Hector, this has changed.  With Hector as your lieutenant, Strategos LV1 allows you to turn your lieutenant order into a regular order, meaning that you can now use that order to activate your link team without breaking it, something that previously was not possible.  The extra order is huge for Steel Phalanx and it allows you a lot of additional mobility.  While this makes the lieutenant very obvious, I’m quite certain that anytime you include Hector, your opponent will automatically (and correctly) assume Hector is the lieutenant anyways.

While I know some may call into question his survivability, as he lacks a lot of the very common Steel Phalanx defensive measures (no ODD, no Mimetism), what he brings with his Hoplite Armour is a very durable unit that doesn’t rely on ODD or mimetism.  In fact, where this is actually a huge benefit for Hector is that a lot of the common answers to Steel Phalanx are things such as MSV to see through ODD, templates to circumvent the -6 to hit, or bringing fire to burn off the ODD.  Hector doesn’t have weaknesses to these things, both of which are very common for dealing with Steel Phalanx.  Much like Achilles V2, Hector provides a very different question to your opponent, and as a result, they may not have what is needed to deal with Hector in their answer to Steel Phalanx.

Plasma ammunition is my favourite ammunition type in the game.  Call me spoiled by Unidrons, but anytime I can run plasma, I run plasma.  This makes it pretty ubiquitous that I always run Hector with a plasma rifle due to the over-saturation of Spitfires in Steel Phalanx.  It’s very simple and direct in application, but brings a lot of flexibility to the Steel Phalanx with the 2 firing modes.  The X-Visor is also very good in this regard, as you can do things like go into suppressive fire if his link gets broken without having to worry about the -3 penalty.

Speaking of links, Hector is an Enomotarchos.  However, because he is simply the champion of all of the Homeridae, he can create fire teams with Myrmidons, Thorakitai and Dactyls alike.  This affords him incredible flexibility as far as how you can integrate him into lists as he plays really well with all of the Homeridae link options by adding something unique to each one.  To the Myrmidons, he adds a really hard to remove unit that doesn’t have the same weaknesses as the rest of the Myrmidons, while bringing an excellent mid-range weapon to win fire fights with.  The Thorakitai get to add a presence that is effective beyond 16″, and Dactyls get actual fire power to help compliment their Adhesive Launchers.

Hector brings a lot to the Steel Phalanx and while he’s not an unbeatable force in anything he does, taking advantage of his flexibility that will really allow you to get the most out of him.  He is very potent in everything he does, even though he isn’t the ranged monster that Phoenix is, or the melee dervish that Achilles is.  What Hector affords you is tactical flexibility.

With that bit of an introduction out of the way, here’s are several lists built around “The Hero”!

Steel Phalanx
──────────────────────────────────────────────────

Group 1   10 / 0 / 1
HECTOR Lieutenant Plasma Rifle, Nanopulser, Stun Grenades + 1 TinBot A / Heavy Pistol, EXP CC Weapon. (71)
PHOENIX Heavy Rocket Launcher, Nanopulser, Smoke Grenades / Assault Pistol, DA CCW. (2 | 35)
MACHAON Combi Rifle, Nanopulser, Zero-V Smoke Grenades / Pistol, DA CCW. (0.5 | 38)
MYRMIDON Chain Rifle, Nanopulser, Smoke Grenades / Pistol, AP CCW. (16)
PENTHESILEA Combi Rifle, Contender, Nanopulser / Pistol, Monofilament CCW. (44)
ALKÊ Spitfire, Nanopulser / Pistol, CCW. (1.5 | 26)
THORAKITES (Forward Observer) Submachine gun, Chain Rifle, Flash Grenades / Pistol, Knife. (13)
THORAKITES Paramedic (Medikit) Submachine gun, Chain Rifle, Flash Grenades / Pistol, Knife. (14)
THAMYRIS Hacker (Hacking Device) Marker, Nanopulser / Assault Pistol, Knife. (0.5 | 25)

Group 2 0
NETROD Electric Pulse. (4)

4.5 SWC | 300 Points

Now, the first Hector list was built to be run with 2 of my favourite models in the entire faction, Hector and Penthesilea (the bootleg special edition version).  The list is designed for Direct Operation Missions where it needs to excel at mid-to-close ranged fire fights, and you also get to bring an extremely fast flanker in Penthesilea who can run around and pick off cheerleaders and crunchy opposing specialists.  The big issue I have with this list is that a lot of pressure is put on the Myrmidon link team.  Granted, it is a very potent link team with Hector, Phoenix, and Machaon, but using the link team and Penthesilea correctly is pretty much the key to effectively running the entire list.  The Thorakitai are there to provide back up, and push buttons, while acting as a defensive core for the list.  I have thought about trying to get a second Myrmidon link team in there (or my absolute favourite link team in the entire faction, which is the Dactyl link team), and while I do feel that’s something that I could potentially do, I haven’t found a way to make it work with double Myrmidon and still be able to get Penthesilea into the list yet.

However, one thing that I’ve been really loving about Steel Phalanx is that no matter what permutation of heroes I use, every single list that I come up with seems to be fun, regardless of whether or not it will be effective!  This is a huge draw towards Steel Phalanx for me as it really lets me personalize my lists the way I like to.  The sheer flexibility of the link teams is also a big deal for me, as it means that you can really swap out the Enomotarchos of the Fire Team in order to really alter the way it functions.  Need a long range presence?  Phoenix is your go-to guy!  Want a close ranged presence?  You have Ajax!  Need some strong mid-range presence and flexibility?  You have Hector and Eudoros!  This doesn’t count the various Myrmidons, Myrmidon Officers and Machaon who can fill in various roles such as specialists and also provide a larger variety of guns!  The best part is, that’s just the Myrmidons!  That doesn’t even factor in things like the Dactyl and Thorakitai Fire Teams who bring about even more permutations of weapons and specialists to the mix!  Hector plays perfectly into this flexibility as he can create fire teams with any type of unit and this means that no matter what your core list concept, if you want to stick Hector in, he can always fill a role for you.

The second list is built more for Special Operations Missions:

Steel Phalanx
──────────────────────────────────────────────────

Group 1   10 / 0 / 0
HECTOR Lieutenant Plasma Rifle, Nanopulser, Stun Grenades + 1 TinBot A / Heavy Pistol, EXP CC Weapon. (71)
PHOENIX Heavy Rocket Launcher, Nanopulser, Smoke Grenades / Assault Pistol, DA CCW. (2 | 35)
MYRMIDON Hacker (Assault Hacking Device) Combi Rifle, Nanopulser, Smoke Grenades / Pistol, AP CCW. (0.5 | 31)
MYRMIDON Chain Rifle, Nanopulser, Smoke Grenades / Pistol, AP CCW. (16)
ALKÊ Spitfire, Nanopulser / Pistol, CCW. (1.5 | 26)
THORAKITES (Forward Observer) Submachine gun, Chain Rifle, Flash Grenades / Pistol, Knife. (13)
THORAKITES Paramedic (Medikit) Submachine gun, Chain Rifle, Flash Grenades / Pistol, Knife. (14)
NETROD Electric Pulse. (4)

Group 2 0
DACTYL Doctor (MediKit) Combi Rifle, Adhesive-Launcher, Nimbus Grenades / 2 Breaker Pistols, Knife. (23)
ACMON Combi Rifle, Panzerfaust, Nimbus Grenades, D-Charges / 2 Breaker Pistols, Knife. (27)
DACTYL Engineer Combi Rifle, Adhesive-Launcher, D-Charges / 2 Breaker Pistols, Knife. (23)

4 SWC | 300 Points

This is a 14 order list that brings a lot of specialists in a 3 link team configuration.  It is incredibly order efficient and has a whopping 7 specialists, while still having the killing power of Hector and Phoenix.  The only models that aren’t linked are the 2 Netrods, which don’t need orders anyways, and with Strategos, you get to convert the lieutenant order into a regular order for your link teams to use.  The mix of adhesive launchers, plasma, heavy rocket launcher and spitfire allow you an adequate amount of fire power as well, which still allows you to take advantage of the natural strengths of Steel Phalanx.  With each link having at least 1 specialist and at least 1 strong weapon for both active and reactive turn, wherever you need your specialists to be, they will be able to get there.

The only thing that makes me really sad about this list is that I ended up needing to take the Myrmidon Assault Hacker to get a hacker into the list, as opposed to being able to take Thamyris, who is my preferred hacker.  I do feel that perhaps there is a solid build where you can get both Thamyris and a Myrmidon Assault Hacker in order to take full advantage of the repeaters that Thamyris brings, however, that may be more suited to a Direct Operations style list, where you can take advantage of opponents who bring TAGs and Heavy Infantry.  While I would prefer to have been able to get Machaon into the Myrmidon link as well, the points didn’t quite work out.

Those are 2 extreme ends of the spectrum, but it goes to show just how good Hector is, and the various ways he can be used.  The third type of list would be for Joint Operations and I am currently still in the process of trying to come up with something that I feel good about for Joint Operations Missions.  What I can tell you about it for now is that it starts with Hector leading a Dactyl link!  Filling out the rest of the list with the proper and appropriate support is the difficult part now without the list just turning into one of the other 2 lists.  Thankfully, a lot of the elements that are in the first 2 lists are also fantastic for Joint Operations as you will be in need of both specialists and extremely killy elements, and thankfully, killing is one of the specialties of the Steel Phalanx.

Next time, I’ll show you guys the Joint Operations list that I’ve been cooking up!

’til next time!


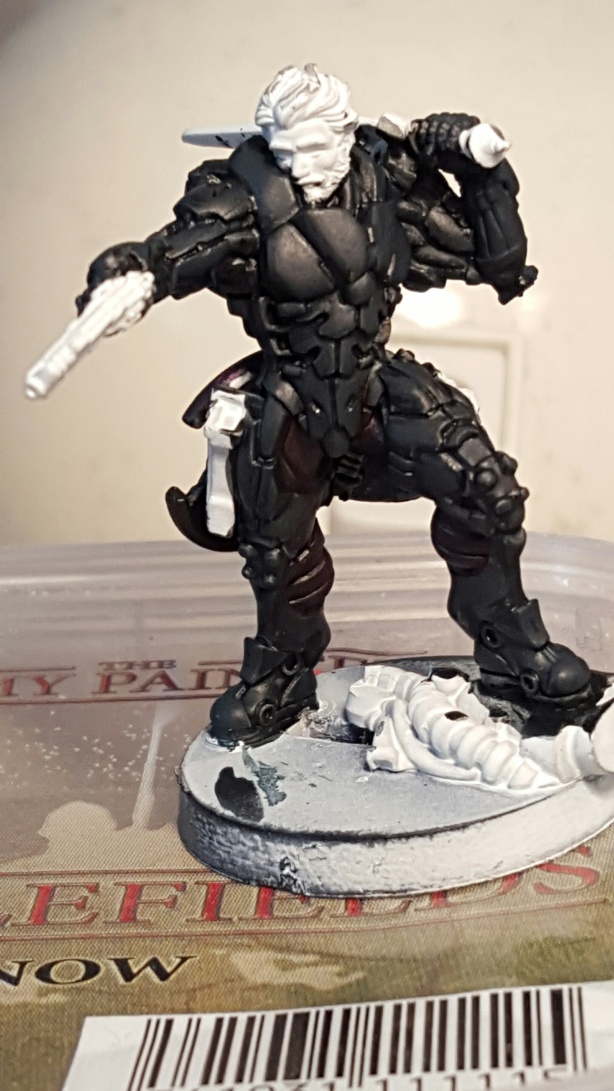
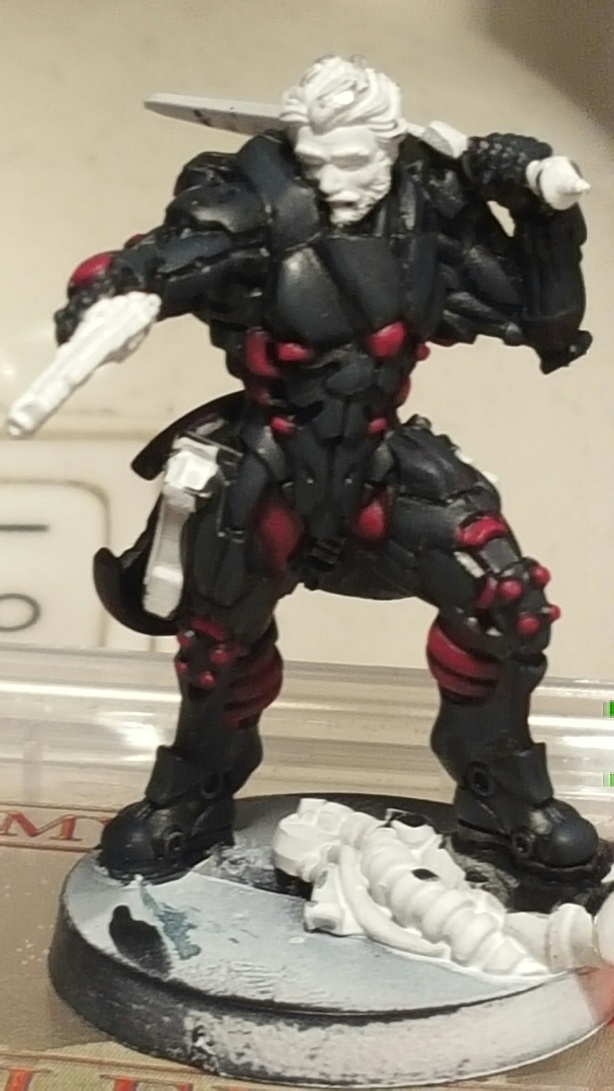
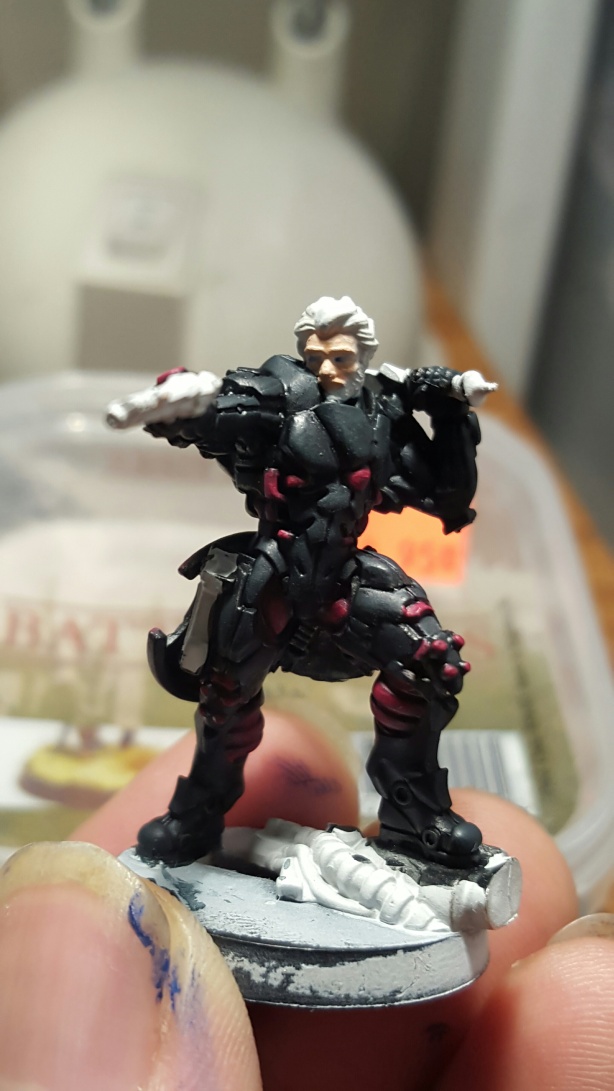
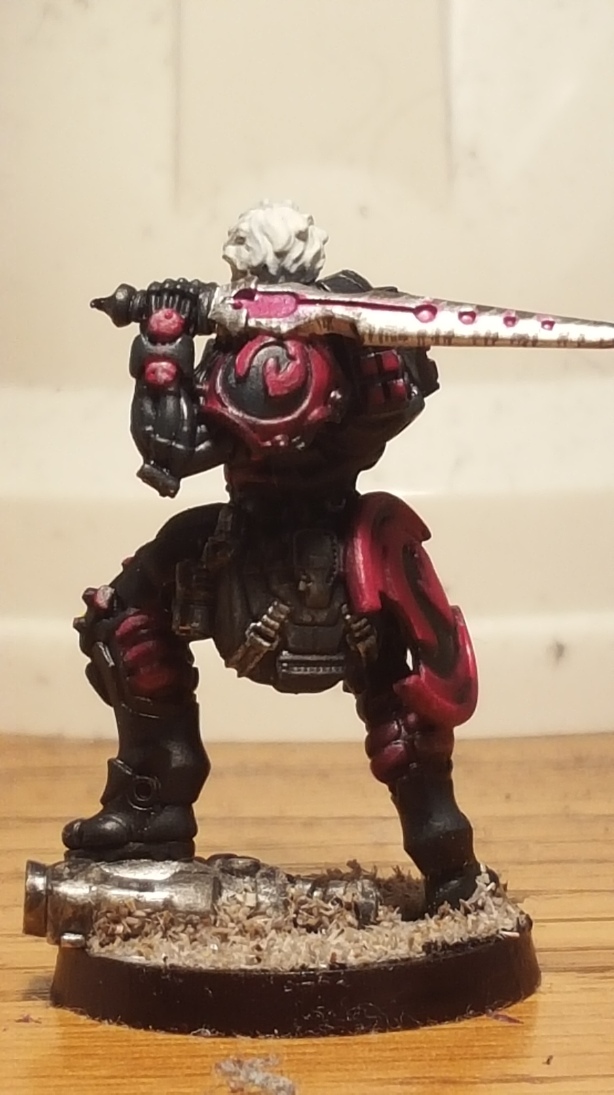
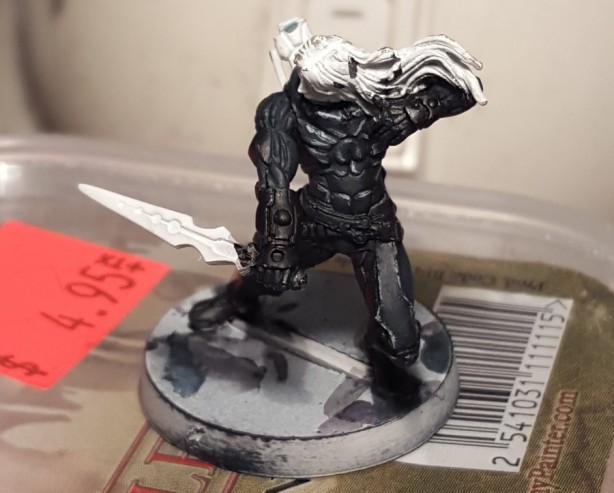
Hector has me excited, not only to play lots of Steel Phalanx, but also to paint again!  It is an absolutely gorgeous model that can definitely stand as a centerpiece for an army.  That being said, here are some step-by-step progress photos!

20160320_123238_resized

When painting black, one of the most important things that you can decide on is the contrasting undertone colour.  If you look at any black surface, you’ll notice that black is very rarely a flat black, but instead is a fairly complex shade that often has an undertone to it.  When light reflects off a black surface, you often notice a colour to the sheen that it gives off.  For example, a lot of black leather actually has green undertones to it.  As it fades, you notice it more and more.

This meshes very well with my painting style and the techniques that I use.  I paint using a glaze technique that can add a tint to any surface with any colour you want.  For the black, I have only used a grand total of 2 pigments: Vallejo Gloss Black and  Vallejo Dark Sea Green. I wanted the black to have a greenish tint to it, without making it actually look green.  As it will be the primary colour of my Steel Phalanx, which will be going with a very leather based look for their body suits, I wanted the green undertones to match what most black leather looked like.

For the base coat, I did Vallejo Gloss Black mixed with a tiny drop of Vallejo Dark Sea Green.  While the Gloss Black overpowers everything you add to it, the idea is to setup the colour so that you can glaze over it while creating a very smooth transition between the glaze and the base (you can do it with just a Gloss Black as the base, but your eye does pick up on the colour depth subconsciously and it makes the glaze steps take significantly longer to get the desired effect).

For the glaze, I used Vallejo Dark Sea Green at a ratio of 5 parts water to 1 part pigment.  The initial glaze layers look almost like a grey instead of a green, but that is exactly the desired effect that you want.  As you will see in some later, I have gone over with a heavier glaze in some places so that when you look at it under a strong light, some of the plates actually do come up as an extremely dark green.  However, it still appears black and adds that depth of colour that you want when working with a shade as extreme as black.  For the edging, I put a thin line of Vallejo Silvergrey and glazed over the Silvergrey with the Dark Sea Green to tie it all back together.  This way, the edging is much more subtle and doesn’t stick out.  One of the things that greatly bugged me when I was first learning to paint and I was shown edge highlighting.  Edge highlighting is something that bothers me when it’s not done well, as it looks extremely unnatural.  By glazing over the extreme edge highlights, you tie it all back together wile still getting the accentuated edges.

20160320_225211_resized

The next step was to add the magenta in.  I prepped the areas that I wanted the magenta by putting a thin downed layer of Vallejo Royal Purple.  I didn’t do a very heavy layer of Royal Purple as the area didn’t need to be completely purple.  It needed to be purple enough to act as the shadows for the magenta as I was going to be glazing on the magenta.  One thing about different paint lines is that you will need to water them down different amounts.  For the magenta, I used the P3 Murderous Magenta and in order to get the same opacity as Vallejo paints, which have a much heavier pigment, I only had to mix it 3 parts water to 1 part pigment.  Once again, I glazed on the magenta over the purple, using more and more thin layers as I got further away from the shadows.  The idea is to gradually increase the amount of pigment on the layer without completely drowning out the colour underneath it.

20160325_005759_resized

Next we add some facial details.  The skin is done with a base of P3 Midlund Flesh and several glaze layers of P3 Ryn Flesh.  Going back to the same techniques, the hair is supposed to be a grey.  However, you can’t pick out the details due to the light diffusing out all of the subtle glazes and shading.  However, the formula I have used for the hair is P3 Frostbite for the base, followed by a shade of Vallejo Grey Sky.  This was followed up with several glazes and highlights of Vallejo Silvergrey.  For the magenta accents, I followed up by putting a tiny line of Vallejo Silvergrey in the areas where the light would naturally cause the brightest reflections, added a thin line of P3 Ryn Flesh beside the Silvergrey and then glazed back over the 2 colours with P3 Murderous Magenta again to help tie it all back together.

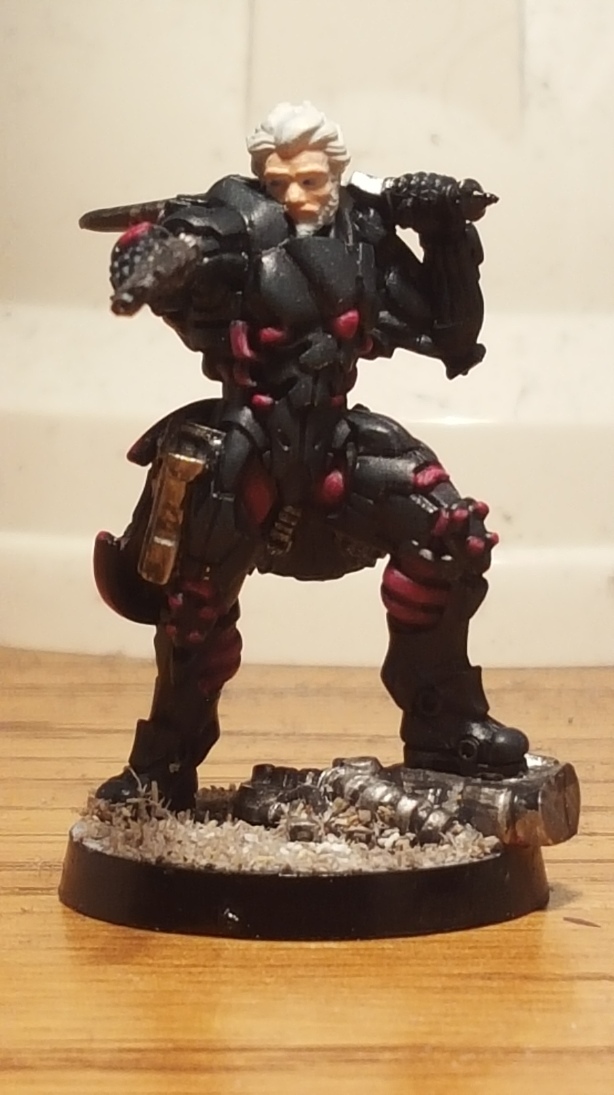
Afterwards, just finish it off with a few light details and we have a fully painted Hector!

20160327_011810

20160327_011828

20160327_011843

20160327_011901I hope you guys have enjoyed this little painting tutorial!  As always, please don’t hesitate to ask if you guys have any questions!

’til next time!


Alright, so I decided to take part in a painting challenge here locally!  It runs for 3 months and we have 3 months to paint up a submitted 300 point list that we will then play in a tournament afterwards with.  Since we have to start from unpainted, I decided not to do Combined Army (as most of them are already base coated in some capacity), but rather to do the army for one of my favourite models in the entire Infinity line, Achilles V1.  Since I was able to get some painting time in today, here is a work in progress picture of the model who will be leading the charge for me, Achilles.
20160205_115551

I’ve only done work on the black so far, but the goal is to go for a black leather body suit look.  I’m rather happy with how it’s turning out so far though, even though, and I’m going to be keeping with the silverish-white on the hair.  However, since I haven’t actually done the hair yet, here’s what I did for the blacks:

  1. Base coat with Vallejo Gloss Black mixed with a barely noticeable drop of Vallejo Dark Sea Blue to provide a bit of depth on the black.
  2. Glaze heavily watered down layers of Dark Sea Blue over the flat black panels, gradually going heavier towards the areas where the light would naturally hit at the highest points.  Due to the fact that the Gloss Black will still dominate any glazes that you put over top of it, it allows you to add depth without tinting the colour too far away from black.
  3. Do a spot highlight of Vallejo Dark Grey.
  4. Finish off with an extreme edge highlight of Vallejo Silvergrey.

I’m going to do another light glaze of Vallejo Dark Sea Green to blend all the highlights back together with the body suit base colour, and will be using a dark brassy/gold colour for the metal plates on the body suit.

Thankfully, the time frame will allow me to paint at a pace that I’m comfortable with, and that I can accommodate given my work schedule and other life commitments.  So without further ado, here is the list that I will be painting up!

Steel Phalanx
──────────────────────────────────────────────────

Group 1  10 / 0 / 0
ACHILLES MULTI Rifle, Nanopulser / Pistol, EXP CCW. (73)
PHOENIX Heavy Rocket Launcher, Nanopulser, Smoke Grenades / Assault Pistol, DA CCW. (2 | 35)
MACHAON Lieutenant Combi Rifle, Nanopulser, Zero-V Smoke Grenades / Pistol, DA CCW. (0.5 | 38)
MYRMIDON Hacker (Assault Hacking Device) Combi Rifle, Nanopulser, Smoke Grenades / Pistol, AP CCW. (0.5 | 31)
MYRMIDON Chain Rifle, Nanopulser, Smoke Grenades / Pistol, AP CCW. (16)
ALKÊ Spitfire, Nanopulser / Pistol, CCW. (1.5 | 26)
THRASYMEDES (Fireteam: Enomotarchos) Submachine gun, Light Rocket Launcher, Nanopulser, Flash Grenades / Pistol, Shock CCW. (0.5 | 30)
THORAKITES (Forward Observer) Submachine gun, Chain Rifle, Flash Grenades / Pistol, Knife. (13)
THORAKITES Submachine gun, Chain Rifle, Flash Grenades / Pistol, Knife. (12)
DACTYL Engineer Combi Rifle, Adhesive-Launcher, D-Charges / 2 Breaker Pistols, Knife. (23)
YUDBOT Electric Pulse. (3)

5 SWC | 300 Points

Single combat group list built around the reason I own Steel Phalanx, Achilles.  While I normally don’t feel comfortable with less than 12 orders, the previous list that I built that ran 12 orders had some issues with regards to the fact that I was spending points on spare orders and intentionally missing out on options that were good for the list in order to get 2 Netrods into the list.  The second combat group was originally 2 Netrods!  This seemed like a fairly inefficient use of points to me, and as a result, I decided to spend those points from the Netrods, and looked into optimizing my main combat group instead.

I felt that an engineer was rather important and given that I have a nonsensical hatred of the Thorakitai engineer, I decided to fit in my favourite engineer, which is the Dactyl engineer (I didn’t have points for Acmon, I tried everything, but the points wouldn’t work out).  While I ended up trading out a Hacking Device for an Assault Hacking Device, Fairy Dust is all I ever used my hacker for anyways, and at least the Assault Hacking Device fits more with the offensive nature of the list, while not going all-in on Achilles just in case the opponent has a way to stop him.  Meanwhile, the engineer with the Yudbot is capable of helping fix up Achilles in case he gets hit with something that can stop him in his tracks.  Furthermore, Adhesive Launchers are hilarious and add quite a lot to the weapon spread of the list, bringing the support weapons up to: 1 MULTI rifle, 1 Heavy Rocket Launcher, 1 Spitfire, 1 Light Rocket Launcher, and 1 Adhesive Launcher.  It runs a double link team for additional order efficiency and has Achilles at the helm.  It’s a list with a lot of killing potential, and while it doesn’t run a ton of specialists, it runs enough to hit all the classifieds.  You have answers to light infantry, heavy infantry, TAGS, and while I’m sure this isn’t “the greatest list ever”, it is a ton of fun and plays almost all of my favourite Steel Phalanx models in a single list.

I’ll be dropping more photos in the next few weeks as I get more paint on models.

Until next time!