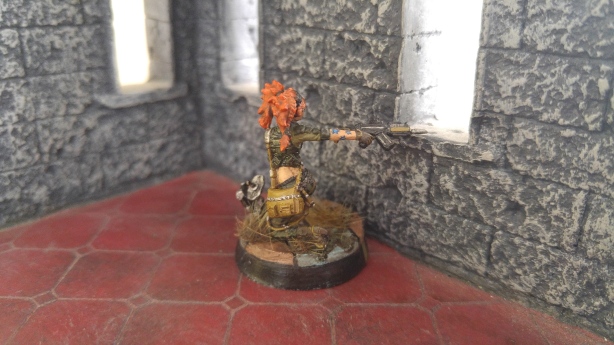
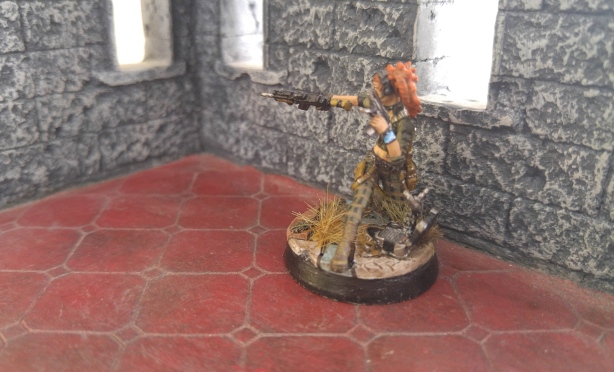
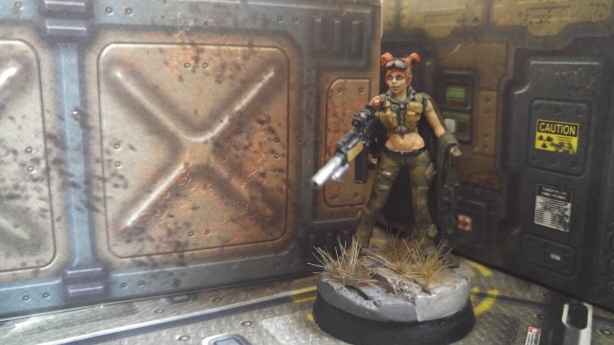
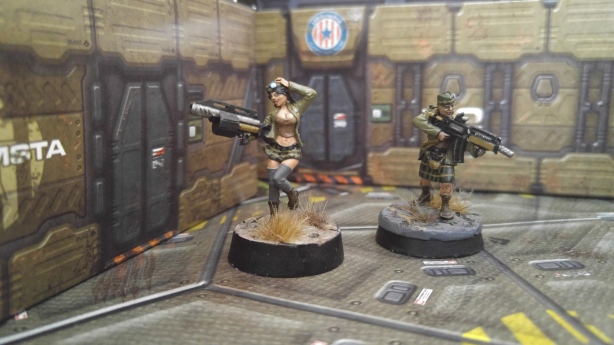
Posts Tagged ‘Lazarus0909’

Time for another update!

Since my last post I got a handful of nice models done as part of our friendly wager (See here https://midnightcarnivalwmh.wordpress.com/2016/04/30/a-friendly-wager/ and my first progress post here https://midnightcarnivalwmh.wordpress.com/2016/05/21/painting-progress-1/). I’ve been very happy with the way these models turned out, with a bunch of really cool recent releases,  a couple of box exclusive sculpts and even a couple of larger models.

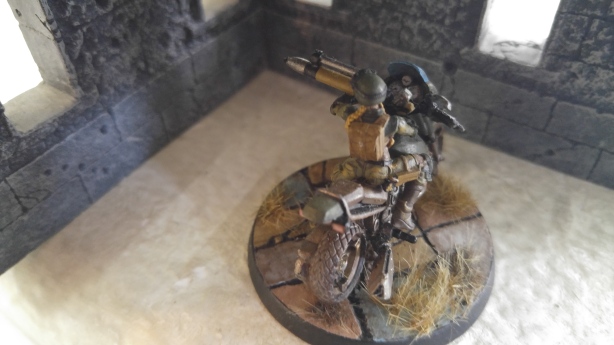
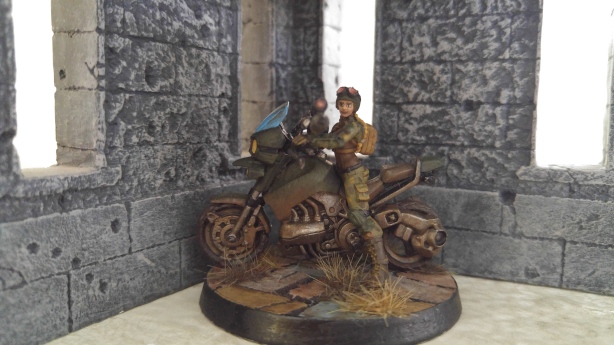
First up then is one of my favorite sculpts in the US range, the Maverick biker.

20160709_125052.jpg

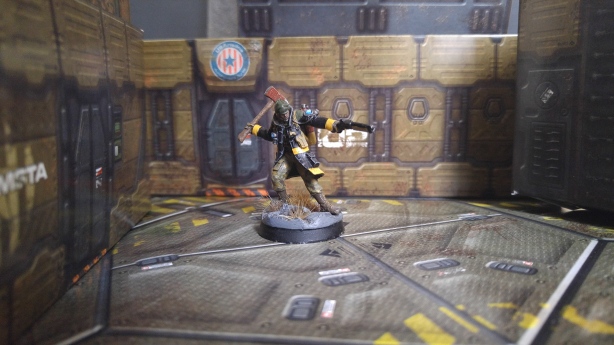
Zoom zoom!

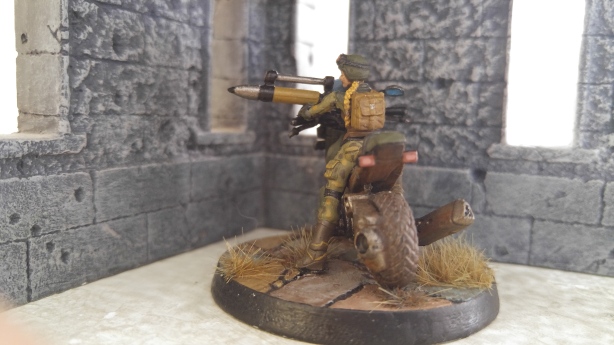
This model was a lot of fun to paint, with all the machinery you don’t get to focus on with most Ariadna models and a healthy amount of dirt and grease to really add to her character. One of the loadouts that first caught my attention was the Light Rocket Launcher/SMG setup, which brings some unique firepower options that aren’t easy to get elsewhere in Ariadna without breaking the bank. Unfortunately there is no sculpt for this loadout yet, but as you can see here, a quick bit of conversion work on the weapon was all it really took.

20160709_125112.jpg

– Taking aim and….

Finally all I really needed was some details – the dials really add a nice bit of freehand to the model and the windshield and lights are definitely a nice eye-catcher.

20160709_125227.jpg

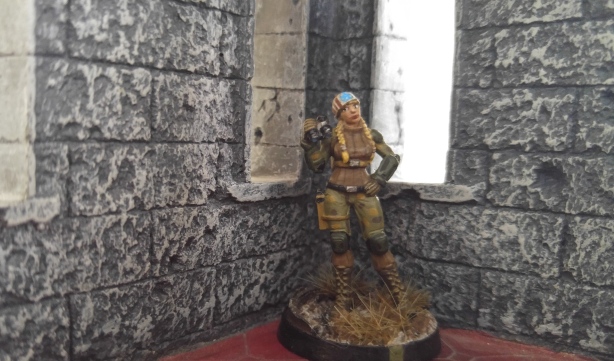
Of course no Maverick sculpt would be complete without a paintjob of her lovely dismounted version.

20160709_125418 (2).jpg

– Seriously you guys, come and pick me up!

I must confess to have never actually dismounting my biker during the game (and unless I use the FO profile and need her to reach some obscure objective, that probably won’t change). That being said, she makes a lovely HVT model and the little bandana + braids she has gives her a lot of character.

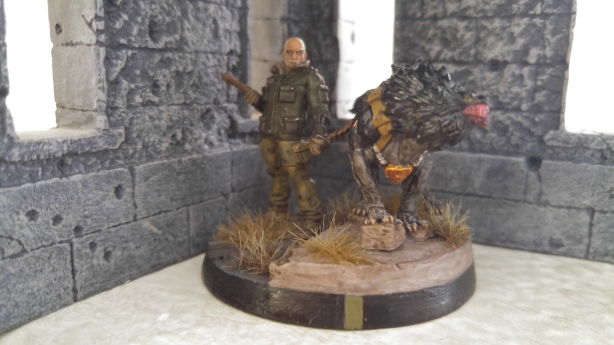
Next up is another larger based model, Colonel Voronin.

20160709_124912.jpg

– Grrrr!

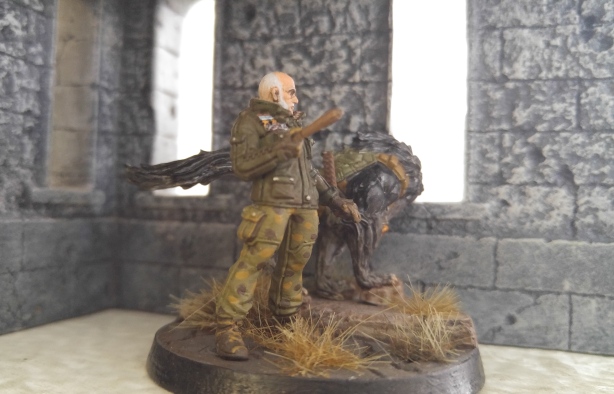
This guy also is full of details and I had a lot of fun painting him. In particular I’m very happy with how his face turned out, capturing his weathered senior officer look and contrasting nicely with the much more animated pet Antipode by his side.

20160709_124936.jpg

– Leading tactically from a prone on a roof position near you….

One thing you might also notice is I stuck the dog higher up on the curb, as it made the dog more imposing and it fits in nicely with the uncontrollable look of the much bigger adult Antipodes that I have in every list right now.

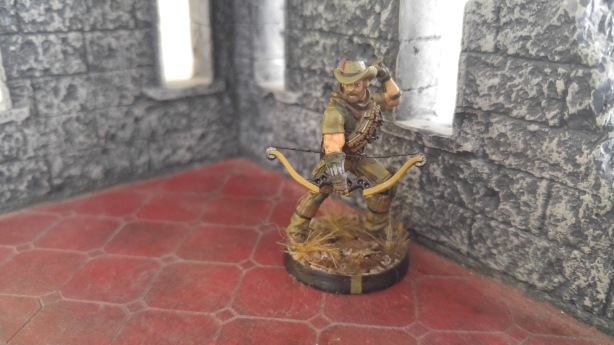
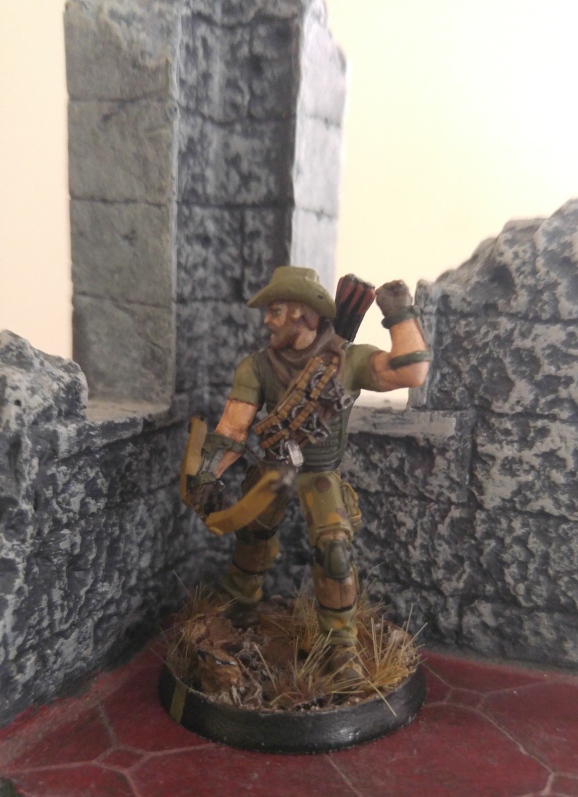
Moving on to another favorite sculpt of mine is the incredible Hardcase.

20160709_131049.jpg

– The cheapest and most annoying source of camo markers…

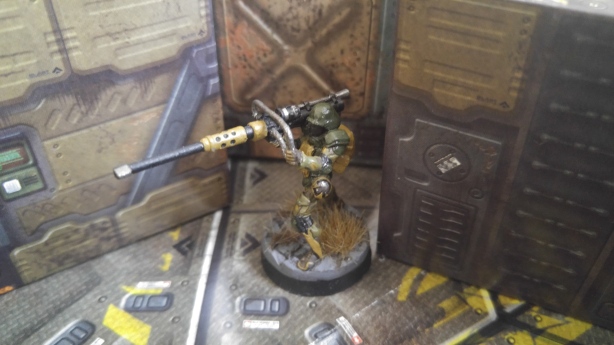
I loved everything about this guy when he first dropped, but as I started painting him the lack of string on the bow was really starting to annoy me. One quick bit of thread glued round the spools and done, ready to skewer some fool quietly with double action ammo.

20160709_130022.jpg

­– Uncle Ted reporting in!

Of course I never actually use the bow really in favor of the rifle or shotgun either profile carries, but hey, it’s nice to have for an ARO I guess!

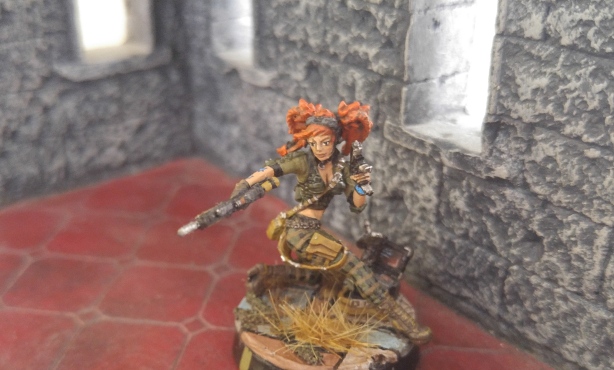
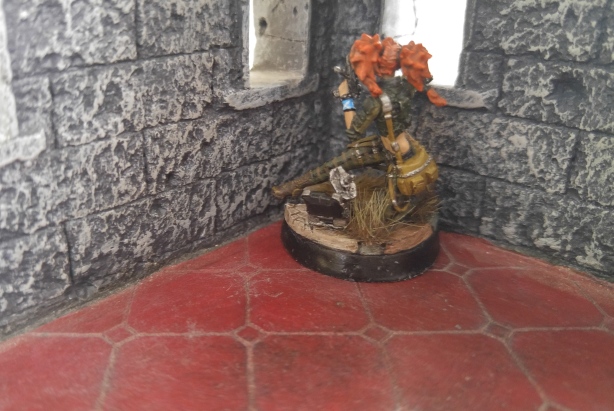
Finally I come to one of my favorite sculpts, the lovely Isobel MacGregor from the Ariadna side of the Dire Foes range.

20160709_130913.jpg

– Who said Ariadna couldn’t have Hackers…

20160709_130633.jpg

I actually plan on entering this lovely lady into a local painting competition, so I really went all out with the details. The face is one of the best I’ve managed to do, and she has quite a bit of freehand, from the computer console and Scottish flag wristband to the tattoos on her arm and of course the tartan pants.

20160709_130651.jpg

– Almost rivalling Uxia with the sheer quantity of equipment here… (T2 Rifle, Flash Pulse, E-Maulers, D-Charges, Defensive Hacking Device, Pistol, Knife…)

20160709_130709.jpg

I’m seriously happy with the way she turned out, and obviously  she’s pretty happy with her new paintjob too, as the last few games have demonstrated with her uncanny accuracy with that lethal T2 Rifle (great for Nimbus zone) and numerously successful taken objectives.

Anyway that’s all for me right now, and with only 17 models to go to meet my wager goals, I’m well on the way to having this lot done by Christmas. Unfortunately as our local store recently started a journeyman league for WMH I’ll be taking a little break from painting infinity to get some more Skorne painted up, but I’ll be back with some more US and Scots by August, don’t you worry!

🙂


One thing MidnightCarnival and I discussed pretty early on in the Mk3 Cryx release was trying to do something of a comprehensive faction review of Cryx in Mk3. All over the internet people have been extensively discussing many of the changes, but as part of our effort to chip in, we felt something that was more of a discussion and an analysis than a simple, dull, changelog would make for better reading.

So as part 1 of this article series, we turned to look at Cryx warjacks.


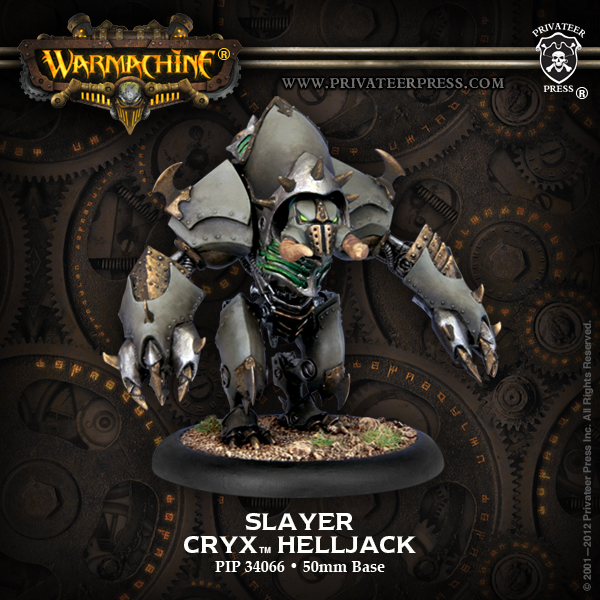
Slayer
34066_slayer_web

Lazarus – Okay okay, Lets do something sensible with this! Basic Slayer, go!

MC – It got cheaper, it got more boxes. I mean…. it still has the same output. It gained hard head, but I mean, it got cheaper and better

Lazarus – I love it now. I hadn’t realized till today, but it has a lot of utility, simply for being the only thing in it’s pt bracket and ARM cracking being more of a premium.

MC – It still loses it’s arms. But at least you’re paying less for it.

Lazarus – Right and thing is, fragile tho he is, he fills more of a role now, simply because of the way WJP work out (and people are taking more heavies, for which hes kinda adept at taking out?

MC – The way I’m seeing the slayer is as a fire and forget missile

Lazarus – Agreed. And two nodes are only 12 pts usually. So the slayer suddenly comes in handy if ur sitting there thinking, eh, i dont want much more jack wise than this? Or alternatively, single node casters can get a Slayer, Node and usually something like a Harrower for 30. Whereas DJ would leave u short on WJP.

MC –  I’m liking slayers in pairs honestly

Lazarus – Yeah, i could see that. Esp low pts levels when you need ARM cracking.

MC – Paired slayers are ok because they’re cheap, disposable and require them to put a big gun into it

Lazarus – And yeah im noticing fragile tho they are, theyr more functional now. Powerup leaves them pretty independent tbh.

MC – Power up is the reason why I’m ok with taking them as a pair.

Lazarus – Little bit sad about the “2 extra boxes” rumor being untrue mind. But yeah with Banes being such a problem child to deliver, the Slayer I think actually has a place now. Esp if u don’t have ARM debuffs and esp in a more jack friendly meta, where they can usually alpha at least. Which is such a weird place to be in.


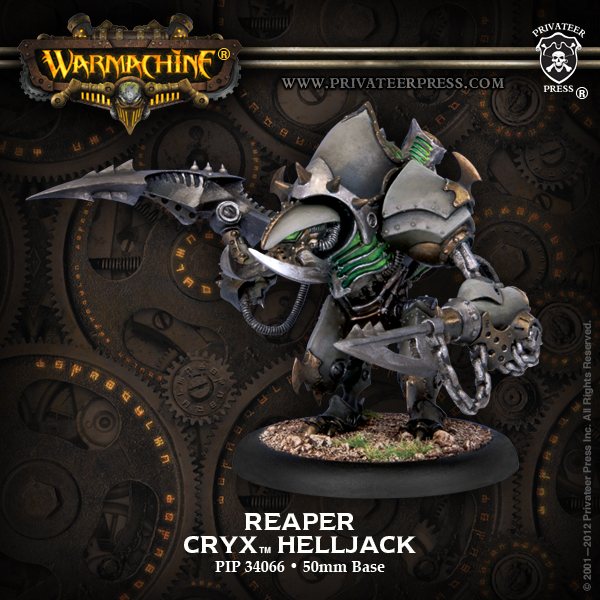
Reaper
34066_reaper_web

Lazarus. So the Reaper. Identical apart from standard tusk changes (1″ rng, Hard head), and just a touch cheaper.  Honestly, i like it. But god i wish it was 12pts. Would that be fair to say? If it was 12, id love it to pieces

MC – I like the reaper. I still think the reaper is just as good as it has been. And I think the reaper is pretty fair where it is. You’ll never use hard head mind you, but it’s still got a place as far as beingt able to pull people around

Lazarus – You see, at 12 it’d be an easy sell for fitting a great space between springing a little extra for the Inflictor and dropping pts for the Slayer. But im not sure trading the gun for the Inflictors Shield is worth it for the same cost atm? Even if sustained is better.

MC – I think it can be because if people are going to be taking more heavies and less colossals again, then the reaper will have targets

Lazarus – True. It’s very much a meta question. And ofc the eternal Malice comparison we’ll get to haha.


Corruptor

MC – I think the thing I’m most excited for with the corrupter is the change to the necroburster. Ahe arc node warrior model having 360 is really good. So, here’s a funny thing for you. You shoot an opposing unit with the corrupter, and have venethrax channel 2 dead weights through the new arc node. That kills 2 more infantry models and can make 2 opposing heavies forfeit movement or action. So if they have the infantry close to their jacks at all, you can seriously screw them for it, in particular, say…choir boys

Lazarus – The corruptor got a lot better. Im a little surprised at the cost, but he got majorly buffed. Extra POW, bigger blast, 360 arc, bigger heal, immunity corrosion (eh). It’s a big list of changes

MC – For me, the biggest change by far is the 360 arc. That just opens up so many tactical options for getting spells where people don’t want you to have them

Lazarus – It’s bascially everything we always wanted for the jack – Reliable healing. Check (Esp now Skarre cant have the necrosurgeon do it!) – Really good arc node. Check – Huge ranged anti infantry AND viable anti-heavy gun (esp now the Levi got nerfed). Check. And better in melee to boot.

MC – Is the gun really enough though? For dealing with heavies. I really like it for shredding infantry.

Lazarus – No. But I like the utility of it.

MC – Ok, that’s fair then. It’s got great utility uses, just not a good anti-heavy gun.

Lazarus – I guess I meant vs heavies, I had the following in mind. Generally speaking, it’s a weakness of some dedicated anti-infantry pieces that they can’t do anything to heavies if the troops are dead. However,this thing can sit in the 12″ sweet spot and put a boosted 14 into something, maybe take a column with some luck (Read: Debuffs)

MC – Just hit the warbeast with mortality first, haha

Lazarus –  Agreed. So the anti-heavy gun part i mean as backup. As in, if u dont need a node right now, or don’t need to pop troops. A better example maybe would be solo busting (along with the harrower) because hes got a 18″ unassisted threat with a solo killing gun for 0 focus needed (powerup). Thats nice to have. So all in all, he can do a little of everything basically.

MC – Yeah, I’m not sure he’s got a very dedicated role, but at least he’s cheap. Side note…I may be comparing every warjack to either being used with venethrax or shade3 because they’re probably 2 of our best casters for running warjacks

Laarus – Put it this way. I don’t know where to take him, yet (Venny maybe). But the key point is, now i WANT to take him. Which is a huge improvement.

MC – For sure


Leviathan

MC – So, I have 1 issue with the levaithan, and only 1 Let’s see if you can guess what that single issue is

Lazarus – Well the ROF is rele the only difference. But im gonna go out on a limb and say the problem is the same one it had end of mk2 – Seppy exists now.

MC – Yeah, see, that’s just it. The sepulchre exists and is straight up better because the sepulchre is a ROF4 effectively, while the leviathan is now ROF D3. And if there’s one thing I dislike greatly, it’s an unreliable ROF

Lazarus – I agree entirely. I can’t stand unreliability. If it had Reload at least… But i worry that I’m done w the Levi. Into the trash heap i think it goes I think. I already had problems with it in Mk2 struggling to find a role.

MC –  I don’t think it’s quite THAT bad. But it’s pretty bad without being able to get a reliable ROF2 or ROF3. Hell, if it was straight ROF2 and cheaper, I would be fine

Lazarus – See thing is, im not taking it. I’d rather a corruptor now (Wow, up is down lol!)

MC – You know, I think the only time I’ve ever said I’d rather take a corruptor over something is over a seether.

Lazarus – Or more importantly, a Harrower. Boom. Now THERES a jack….for the SAME cost!


Harrower

MC – Best non-character jack in the faction. I’ve said it all throughout MK2, and I stand by that. I still think it’s the best non-character jack we have

Lazarus – See and thats why im never looking at a levi again at this rate. I just dont care when i can take a Harrower for that price. So lets get this lovefest outta the way. I think it’s unanimous, we both agree the Harrower is friggin amazing

MC –  It gets so dumb with murderous. Shade3 gives them murderous, if you don’t need the hit buff, then it gets dark shroud

The fact that it collects souls within 5″ that convert during it’s activation rather than at the start of turn is pretty damn good

Lazarus –  Murderous from 3shade yeah. Coven, ugh im too bitter to discuss them still 😉

MC – Ok, fair. But, like the harrower with terminal velocity, or you know, 2 harrowers with terminal velocity

Lazarus – Its just so much better at what it does, and now cheaper too.

MC – Yeah, and when they made it cheaper, I was ecstatic

Lazarus – The only thing u gotta be careful of is… 1 – Greater collection range not boning other models (rarely a problem) and  2.) Souls only convert next turn, so u need to make sure u actually live that long. But other than that, totally worth it. The other big change is to ghost shot, which is actually much better. You spend the soul and not only gain ghost shot, the shot is fully boosted too! (!!!). So u whack a bunch of guys, churn up souls, and send a fully boosted shot into some solo, clustered troops (boosted damage on the WHOLE AOE!) or whatever. Crazy crazy good

MC – Yeah, I just can’t believe they made it better honestly. It was already nuts in MK2, and then they made it better and cheaper.

Lazarus – Also, Harrower is +1 rng now. Because, reasons? And the gun is magical. Haha

MC – Pretty sure I’m starting most of my battlegroups now with 2 harrowers. Yeah, it’s really really goodI don’t understand why they needed to buff it, but given that I’ve had for a really long time now, I’m in no way shape or form complaining


Desecrator

Lazarus – Ok, Desecrator?

MC – I still dont like it. Accumulator “our most nerfed unit”

Lazarus – At least it works on all banes. But yes (I never understood why it had that anyway). Grievous Wounds is nice tho. And +1 RNG helps, tho it rele needed to be rng 12.

MC – Accumulator satyxis makes way more sense on the crabs

Lazarus – I know right? heh

MC – Grievous wounds is solid. The big thing to note is that grievous wounds stops repairs now

Lazarus – Oh, and the jack is cheaper.

MC  – Yeah. I can already tell you the new grievous wounds is going to annoy the hell out of me when I’m playing gargossals

Lazarus – So yeah. I mean the Desecrator didn’t get fixed exactly, but it did get some help. It basically only ever needs 1 focus now (and even then, only for melee) and it got a bit of a bump. But i think i wont have room for it most of the time? So def on my “maybe” pile, as i used it w eLich a few times before I guess…

MC – Oh ok, I just haven’t really seen any appeal to it

Lazarus – Ironically, i think the corruptor kinda kills the desecrator, as i can just whack troops that way now, and yeah, utility. But im months from knowing that for sure, as both are highly “meta” dependent pieces

MC – I just don’t see the point in the desecrator

Lazarus – It doesnt do anything i need doing atm. But if GW and scather gets needed, ill look into it

MC – I also think that things may not be as pillowfisted as they first appear at least as far as an assassination value goes. And see, crab chassis is still the superior chassis because of pathfinder, and steady also, the slightly better damage grid

Lazarus – Pretty much. And now ghost walk is a lot less prevalent…


Inflictor

Lazarus – Anyway, let’s do the Inflictor 😀

MC – Still the same amazing warjack. Shield guard is even better now than it was before

Lazarus –  Tho u cant catch sprays. So there is something to keep in mind there. And without soul drive, he is no more focus efficient than other choices. That being said, durable, cheap, reach still means sold basically

MC – To be fair……….every jack got soul drive. Power up basically killed the need for soul drive to exist as a rule

Lazarus – Well agreed. Im just saying hes no longer filling that niche as focus efficient jack compared to anything else… Lol thats for the desecrator now 😉 kidding…

MC – Haha! I think the slayer is definitely the new focus efficient slot. But the fact that he kept shield guard is huge. And yeah i always like the inflictor. Hes less bonkers on morty now, but venny loves him mre than ever basically

Lazarus – And now, the Seether. Sigh


Seether

MC – The seether is still unplayable trash. I mean, on the PLUS side…. it’s only 3 points more than a slayer. On the downside….skornergy and it got worse

Lazarus – yeah on the Seether im inclined to agree. I dont want it

MC – My opinion on the seether hasn’t changed. Uncontrollable rage is straight up bad. I mean, it’s not HORRIBLE because the slayer chassis has no guns anyways…

Lazarus –  Yeah i just wish it was free charges, not MUST charge.

MC – But it feels like a fluffy rule that’s just terrible

Lazarus – So the bigger problem is Barathrum, who is a straight upgrade. Unless pts are very tight, im taking him every time

MC – Well, I’nm taking a harrower everytime really. If I want an infantry killer, the harrower is straight better because of reach and thresher… Also, needing to charge makes hard head completely pointless

Lazarus – That too. Berserk without reach or overttake as well….:(

MC – And countercharge?  Venethrax exists, and barathrum has it anyway. I legit can’t say anything good about the seether. I’m trying, but there’s literally nothing good to say. They basically found a way to make a bad model WORSE.

Lazarus – Ok, so if we are trying to be fair to the seether mind… Hes a LOT cheaper (now only 1.5 pts equiv over the slayer vs 3 pts more), he does more damage now (+1 pow), he’s less vulnerable to crippled systems (no chain attack) and uncontrollable rage, ironically, can be controlled. He just runs 0.01″ basically. Really the loss of DEF is what is silly. It should have gone UP, not DOWN

MC – It needs to go back to 14/17 like it was in MK1. That was part of what made the seether actually good in mk1

Lazarus – Im not optimistic on the seether. But as ill now have parts for one, via the multi kit, ill certainly test it.


Nodes

Lazarus – Ok lights. Nodes all together? (Seeing as theyr mostly similar)

MC – Yeah, that makes sense. Especially given that most of the nodes lost their combat capabilities. I mean, realistically, when it comes to the nodes, they’re effectively better for their primary purpose. The defiler and the ripjaw losing combat capabilities sucks, but them being cheaper is a fine trade off

Lazarus – Yeah basically nodes just got more streamlined in their role. The loss of DEF is what hurts the most i think actually, but that’s a problem for all Cryx lights

MC – It is, but at the same time, I think the decrease was pretty much across the board. Like, if you notice, most of the high def got neutered

Lazarus – Yeah pretty much. The one model u rele have to watch now w nodes is bloody Kell. Who can just look at one funny and straight up remove the node. Hitting on 4s, auto 3 damage x2. Bye bye node. Irritating.

MC – Yeah, it’s actually a big problem. But see, part of that makes me wonder if a third node may be potentially worthwhile? Though to be fair, I think at that point, I can just take a corruptor and have a flexible third node

Lazarus – Nodes being cheaper doesnt mean as much as it wld in mk2 mind. It basically just means a slightly better jack choice for the rest of your WJP now in practice. And iv thought about 3+ nodes, but the lack of external utility beyond arcing makes me have doubts now more than I even did in Mk2 about nodes, as they cover fewer bases now.

MC – Yeah, thats my thought too. Corruptor all the way now lol. Basically, the defiler and ripjaw lost the most in that respect.

Lazarus – Defiler the most, being a full 2pts more

MC – Yeah, defiler still has uses though. Sprays are better now than ever, but the problem is that it’s spray got weaker

Lazarus – Ripjaw traded the super weird vice lock for powerful attack, which is annoying. Losing Vice Lock is a shame, but he might get used for one simple reason – hes only 1pt more than a Deathripper, and sometimes, u will have a point somewhere (esp if its a WJP). The fact that he’s only Crit ARM piercing though is what kills it utterly for me.

MC –  I liked vice lock though, it had a lot of really weird cornercase applications that were really really good. So to me, the ripjaw lacks appeal because if I want a combat jack, I’ll take a stalker now or cankerworm. And for 1 point, you can take a soultrapper

Lazarus – Hey, there’s always spare WJP! And thats the thing w cryx jacks i find odd, that some of them could have been so much more appealing in the new high WJP meta if they were costed in the right bracket. But yeah, i dont like luck, so I’m not interested largely 😉

MC – Altho now at least it can potentially armor pierce on all attacks

Lazarus – Hehe yeah, i guess….

MC – To me though, the nodes are strictly nodes now

Lazarus – Basically. And Defiler losing 2 pow is yeesh btw

MC – It’s a big hit It still has a place because there are still things that you want to spray down

Lazarus – The one that saddens me most though is the nightwretch. It being auto 3″ AOE is good, but it utterly KILLED the Deathripper vs Nightwretch debate by being 1pt more now. Game over, Deathripper wins.

MC – Right, like the others, it’s more of an opportunity upgrade. For a node, yeah, I think the deathripper is probably straight up a better choice being the cheapest node, and 9 times out of 10, the nodes did nothing but arc.

Lazarus – See now its between paying 1pt to upgrade a DR to a NW or a Ripjaw.

MC – Which means that in those exact same situations, a deathripper is the better choice

Lazarus – And most of the time, i wont pay that pt unless i have it spare


Scavenger

MC – I’m not sure if the scavenger really has a place. My biggest issue with the scavenger at the moment is that when I put it next to the stalker, there’s nothing appealing to the scavenger

Lazarus – In theory, I should like the Scavenger. It kept most of what it needed to, and got a touch cheaper too. Generally like before u still want the Stalker, but now they arent priced the same. That being said, the only casters that rele bothered with the Scavenger before (Morty and Coven) both changed and took a hit respectively, which definitely alters their use case. So im putting it under “decent, but i just dont know where to actually put it?”

MC – The bigger issue is the fragility. Unlike the Stalker or Helldiver it doesnt have a defense mechanism, and it’s not as cheap as a node (while being closer to the action as a melee piece). That means i think they just die. And it lost a point of defence didn’t it?

Lazarus – Yeah. I think pretty much every cryx light did.

MC – See, and to me,that seals the deal. The stalker still has stealth. And while i get that flight is a really good rule, we have a unit of these guys now. And the scavenger is even more fragile than it was before

Lazarus – Yeah actually thinking about it more i think ur right, the loss of DEF and not having Ghostly + TV on the same caster anymore wrecks the terror bird. Maybe, maybe Coven will still work, but its gonna be tight

MC – If goreshade1 still had shadowmancer being the same, then I could maybe see a spot there. But with the change there, I wouldn’t even consider it there now


Stalker

Lazarus – Ok, stalkers?

MC – Sure. Stalkers are STILL absolutely amazing. The biggest benefit for them came from the change to backstrikes and then them gaining leap.

Lazarus – I agree. Stalkers are amazing. However, I will say they have had a definite role switch. They’re very very good for sniping out support models now They are now arguably MUCH better at solo hunting or picking off UAs than going after casters. The loss of AA and the changes to grevious wounds, combined with the way that camping works and having to spend a focus to leap (fewer attacks), means that assassination is generally off the table. That being said, they are AMAZING at cleaning up the backfield. So i see them closer to a Cryx Raek than their old role?

MC – For sure, and raeks are amazing as well. Stalkers and raeks are crazy good

Lazarus –  Exactly. So stalkers are really good and will see plenty of gametime. You just have to use them differently.

MC – Venethrax with 4 stalkers

Lazarus – Yes. Still good with Morty (the ovverrun changes, AD + leap means they can get to the opponents DZ in almost a single turn lol). And Coven aint bad with them still ofc either.

MC – I still love them with shade3. But the big issue I have with them now wide shade3 is that I no longer play him for assassination first. Which means that the purely assassinatino module is gone. That being said, stalkers on aiakos are still delicious

Lazarus – Oh yes. And 3Shade. But i think ur right, his focus away from being assassination is likely to see them dropped for attrition pieces.

MC – For sure, also, stalkers should not be 8 points. And this is where the comparison with the scavenger happens. See the scavenger flies, but the stalker will just leap instead

Lazarus – That’s true. Also worth a note – them gaining AD means the combo with leap is just ridiculous threat improvement. They’re already 6″ further up turn one and now threat +5″ further

MC – Yeah, AD is another thing is just another thing that they gained that they didn’t need

Lazarus – i think its more a problem that the Scavenger needs to be 6 than the stalker needs to be 9. And Scavenger should have kept the higher DEF. Ya know, for being more movable

MC – I own 4 stalkers already, and I’m so glad I do.

Lazarus – Oh, AND stalker gained 1″ reach, while the Scavenger kept 0.5 :(. So we’re actually talking a 5.5″ increase in threat AND a 6″ increase in board position. Nuts. Ok, so onto the Shrike


Shrike

MC – So…the scavenger is bad…and shrike is a slightly better scavenger

Lazarus – Well the shrike did get massive improvements, which we should discuss at least. Its only nerf was losing 1 DEF, as did most cryx jacks. But its:

– Cheaper

– Free tramples now

– Boosted attack rolls

So its at least not a “terrible” choice, as now it can reliably wipe any infantry it hops over.

MC – But it didn’t gain any defensive tech, and that’s where my big issue with it.

Lazarus – Now i dunno if that’ll be enough by itself, but im at least not writing it off like its mk2 version. And i agree, thats still a concern. Now its more of a “probably not” choice than a “garbage pile” choice.

MC – I dunno, I still think it’s really bad because cryx lights need something to not be die to hand cannons. And stalkers have that, but shrike and scavengers don’t.

Lazarus – Right. So i think it’ll depend for me how the meta pans out. If we see a lot of boosted attack shooting for example, shrikes are worthless.

MC – And with bigger battlegroups, I think it’ll be the case

Lazarus – Esp now that a lot of cheap jammers are out. But ill reserve judgement for now because it def got better at what it does and cheaper, so im more inclined to at least consider it, even if as you said, its still probably a “nah, stalker” choice overall.  Ill also note that the nerfs to biles also greatly impact it’s consideration as well.

MC – Yeah, and that’s just it….compared to the stalker, both the other 2 options are just not good

Lazarus – They are cheaper tho. It might be all they have going for them – a situation where u can’t fit a stalker, but u wouldnt mind a solo hunter or some such. It’s at least enough to leave them on the “reserve” bench i think, but im inclined to agree.


Helldiver

MC – Holy crap…did burrow get nerfed

Lazarus – Indeed. Im not gonna lie, im kinda glad that even tho i have 2 Scavengers (lol) that i dont have any helldivers

MC – I’m pretty sure burrow got completely gutted. It lost a lot of vectors, and basically….I’m at a point with the helldiver where I’m not sure I would ever take it over a stalker. Not being able to attack the turn it unburrows is a huge hit, not being able to reburrow is an even bigger one

Lazarus – I would never buy one. So that probs says it all

MC – I own 2….I think they may be relegated to being slam targets. Except with the new change to the throw rules, that’s not even necessary

Lazarus – Yeah i just think they got hit too hard with the nerf bat. Burrow in general did, and while the dig in + drag below trick is cute, id rather Barathrum for that than 2 helldivers say.

MC – Probably the second most heavily nerfed model we have

Lazarus – But, i will confess that not actually owning any, my advice concerning helldivers isnt worth all that much. Altho i doubt experience counts for much either given how much they changed

MC – They lost too much

Lazarus – The thing is, overall, im just not sure what their targets are supposed to be now?

MC – They basically got gutted and while I agree that they needed to do something about them, they got hit to the point where they’re pretty much pointless. Even if they took away the ability to re-burrow and retained the ability to attack the turn they unburrow, that would have been fine. But the fact that they took BOTH of that away, means that there’s nothing for helldivers to do now

Lazarus – I agree. Or even if the burrow marker could move faster than a hilariously lousy 3″ a turn! Then it wouldnt matter if it had to forfeit

MC – You saunter up really slowly, then get shot the turn you unborrow. Great, you spent points doing nothing

Lazarus – Yup. Its silly

MC – Basically, the only combat light so far that I would even consider is the stalker

Lazarus – Heres the problem with the Helldiver – compare to the mk2 Razorworm. Also had AD, similar-ish stats, had dig in and drag below. Even had the advantage of the fury system and an animus (admittedly 4 pts). And nobody took it, nobody. It was hot garbage. So its basically a shitty razorworm with a terrible burrow rule attached. Nobody is gonna care.

MC – Pretty much. Stalkers and cankerworm all day, every day

Lazarus – There is one other light im taking, and thats our next choice

MC – We have 2 really really good combat lights, and 3 godawful ones


Cankerworm

Lazarus – Cankers! The loveable guy is just straight up better and i adore cankers

MC –  He’s actually better, which I didn’t think was possible, but he got better

Lazarus – Yup. I was shocked. Him being 9 pts is an AMAZING price point. Gotta shave 1 pt off a Slayer? Boom. Got a spare point? Upgrade a stalker. Boom.

MC – Kept everything about him that made him great, still has one of the best damage grids in the game

MC – I think in every case, I would take cankerworm before a slayer. Stealth is a much bigger deal now and cankerworm still has it. Granted, his bond is worse now.

Lazarus – Yup. Id argue the mild loss of reposition (straight 5 vs full advance) is rele no biggie. I much prefer Salvage/Adapt now for being less clunky and now will come up more often.

MC –  The salvage and adapt changes are way simpler now

Lazarus – Oh, and not costing a focus!

MC –  Yeah, and salvage is just better now. Which again, could not understand why they did that, but I won’t complain. He’s still a 9 point autoinclude for me in lich3

Lazarus – I think its that all imprints are gone. Which is big for Nightmare, who we’ll get to soon heh. And yeah agreed. Also, interesting i think he opens up in a big way for morty, as he no longer breaks tier ofc.

MC – He’s also going to shine with more jacks on the table

Lazarus – But yeah largely being the same with minor buffs basically means hes as good as everr with the new advantage of agressive price points for list construction and more jack heavy meta

MC – “Please give me your gun victor” Oh, and free focus is great


Malice

Lazarus – So only something a bit different on the char spectrum. Malice

MC – Ok, I’m at a loss with malice again because malice got better, and at the same time, I have the same malice vs reaper issue

Lazarus – Malice does confuse me a bit. The inability to immediately use souls for attacks is minor,  but the loss of starting soul via well of souls is more problematic.

MC – Possession is better, don’t get me wrong

Lazarus – Why, as u can control chars now?

MC – Teah, especially with more people taking character jacks across multiople lists. Taking over ruin and then having him cleave butcher in half will be glorious, especially when you combine that with a few machine wraiths

Lazarus – Shes also now in an uncomfortable points bracket with many other great choices

MC – Possession is actually fantastic. But the reaper has a 2″ sustained attack weapon and hits harder

Lazarus – Agreed. The bigger problem i think is ur gonna have to set it up more, because the lack of starting soul means u do have to order of operations correctly (or trapper, which has its own issues) to get her going

MC – I still think I’d rather have a reaper in all honesty

Lazarus – But yeah otherwise her role is similar – good at dragging heavies as a setup for your army. If the meta is less gargossal friendly then she has more opportunities to shine.

MC –  I’d rather drag something in and kill it Rather than drag something in, move something else closer to expose it and then probably lose 2 of my feather armoured heavies

Lazarus – Probably? The other interesting point is that now shes only 1 pt off a Reaper, not 2. And yes, tho Malice is more likely TO drag somebody (+1RAT and +2 POW)

MC – Malice is definitely better at it, but the reaper will output more damage overall. The reaper will drag in and do a TON of damage. Malice will drag in…and probably miss at least 1 attack? Reaper will do half of a heavies boxes to it probably

Lazarus – So it depends right. Malice does 2 more damage on the drag, vs. the Reapers +1 POW. But, if the reaper is more likely to boost the harpoon (either hit, damage, or both) vs. Malice, then i don’t know

MC – Yeah, reaper will more likely boost at least one of the rolls, but won’t need to boost the attacks after. Malice definitely feels like an actual utility heavy, but I’m not paying 14 points for that

Lazarus – Both boost vs ARM 19 heavy- Reaper should do 3 damage with the harpoon, Malice 5. Then free attack, Reaper does 4 Malice 3. Then bought attacks x2 (8 vs. 6) . So we’re talking a difference of 1 damage.

MC – But it’s that you need to roll to hit with malice, whereas the reaper doesn’t. So if your target is a higher DEF warbeast, the reaper is significantly better

Lazarus – And yes, the Reaper is auto hitting vs. Mat 7. However, Malice is more likely to hit with the drag. So calculating THAT is tricky.

MC – 15 points for malice even, not 14

MC – I will say, the open fist does have some good uses over just the piston. And yeah, soul harvester being a 5″ collect is actually quite good

Lazarus – Agreed gathering in 5 is still a nice buff for her.

MC –  So it’s not that malice is bad, it’s just that I’m willing to give up sustained attack and 2″ melee range

Lazarus – Yeah. Im def leaving her in my maybe pile. She is very good, and potentially amazing if the meta favors her in the future.


Erebus

Lazarus – Now my favorite choice – Erebus. Who i would argue is an absolute god in Cryx now.

MC – Erebus got real good, specifically with scaverous. He’s good with other casters too, but you really see him shine with scaverous. And 1″ melee range is a big deal when you have overtake..

Lazarus – Stationary is incredible, immunity cold is sometimes clutch, and 1″ reach benefits him more than any other standard jack because of overtake, as you said.

MC – Stationary is fantastic

Lazarus – Oh and Morty. I love him w Morty. And im also gonna make a case for Venny

MC – See, this is the thing, erebus has the defensive stats that the reknown chassis should have had

Lazarus – Straight up stationary is rele rele big for us, as we lost a lot of setup type abilities, and most of our heavies can’t 1 round (but can cripple) handily, which stationary is great for. Even if ur target lives to shake, his great defensive stats and them being 1 less focus/fury means he might actually survive retaliation. All it takes now is a crippled cortex to make him completely safe, or crippled arms which with one less focus (shake) means he ain’t going anywhere. And yes, on the renown chassis, agreed!

MC – When you combine that with scaverous’ Knowledge of the Damned ability, poltergeist and Starcrossed from wrongeye and snapjaw, your opponent is going to have a really hard time digging out erebus.

Lazarus – So Erebus, who i already had a soft spot for, got amazing id argue. He’s unique for being an AMAZING soultion to medium wound infantry, and i think we’ll still see things like MOWs a lot now Ah, and I almost forgot – Terminus ravager trick as well is just better

MC – Especially since you can stick deathward on erebus too. 14/20, poltergeist, force your opponent to reroll successful hits, pick the column you take damage on….AND he can collect souls for scaverous to power knowledge of the damned. And yeah, he’s really strong for medium based infantry

Lazarus – Yup. Autoinclude w Scavs. I already liked him there, but even more so now

MC – The 1″ melee range chain with overtake to get the train started is real good for scaverous. And I would make a case for all of the heavies basically wanting to be with their assigned casters because of how good the bonds are

Lazarus – Also last point w Scavs – TK + Erebus. Love… Totally diffuse opposing heavies from being able to touch him, line up perfect chains. Hilarious

MC – Even better though is that erebus kills a guy, gives a soul to scaverous, you can use that soul immediately to reroll any misses. that is a VERY strong duo now. And of course, also abuse that with starcrossed to deal with any retaliation they may have


Barathrum

Lazarus – Ok. Now an interesting choice. Barathrum. Who is now priced correctly I feel

MC – I don’t know how I feel about barathrum. He’s actually very very good for his points. 15 points is where he should be, and dig in and the same solid defensive stats means he gets there

Lazarus – I like Barathrum a lot more (but I was always a fanboy of everything but his price).

MC – Same ol’ AD

Lazarus – And countercharge

MC – Countercharge is good, drag below is cute.

Lazarus – He lost souldrive but it doesnt matter because powerup

MC –  Again, I think this is a case of better with his assigned caster, because unyielding is a big deal

Lazarus – Yeah he got a lot more sensible w Terminus, which made no sense in mk2.

MC – You could put him with skarre2 or scaverous as well, who can help him with an armour buff, or deneghra1 who can crippling grasp whatever tries to get into him.

Lazarus – Drag below did get a slight nerf – it can’t work on beasts anymore, just warriors. BUT the fact that u now don’t take free strikes anymore probably means that Drag below is still better most of the time than it used to be.

MC –  So I mean, stilt legs will see play. And that’s true, drag below is probably better than I’m seeing at first glance

Lazarus – Yeah the free strike immunity is very important for him. In the minimal games i played in mk2 with him, i felt he was much stronger once he had Ghostly. This is even more important in mk3, where ghostly is actually harder to come by with fewer Ghost Walk options.

MC – I still really like him with terminus more than other casters, especially since ravager on him is going to be strong still.

Lazarus – Oh, and standard hard head. So basically, Barathrum got better overall, and cheaper. Morty, Coven and Venny are my other places im playing him, and im still thinking maybe gaspy3.

and at that point, you’ve already been engaged and can trigger berserk now

it doesn’t stay, that’s right

but you’ve gotten a free advance mid combat action and then continued your attack string


Nightmare

Lazarus – Anyway onto our next biggie. Nightmare. Whos an interesting devil, but id argue is overall better

MC – Ok, denny’s my girl, and I gotta say…I still love nightmare with her. Again, I go back to stealth being a big deal right now, so as he gains stealth with her, on a heavy with prey, and a chain attack, that’s a big deal. Especially as he has 2 open fists for being able to do all power attacks and hard head to benefit from the power attacks that don’t use his fists

Lazarus – Lost reach though, which blows. And he traded combo strike for chain attack G&S. But, getting effectively cheaper, stealth being better and just being STRAIGHT ghostly is massive. Oh, and +1 POW. Because heh why not? So Nightmare better im gonna say?

MC – Nightmare definitely got better. I’m ok with losing the combo strike for chain attack. It gives him more of an identity

Lazarus – I agree. Chain Attack is always good (at the very least it’s free damage from a headbutt, often knockdown) whereas Combo was only even an option that you used some of the time. I want to say that unless you’re tackling high-end ARM, you’ll still output more damage with all the initials + headbutt than you would with the combo anyway, especially now you’ve got the extra POW over old Nightmare.

MC – Oh and especially with the seether losing chain attack, nightmare just basically said “i’m better than you in every way, suck it”. So I mean, I liked nightmare before, and I like him even more now

Lazarus – Haha yes, true. Massively more expensive tho ofc than the Seether. Seether is still outdated because Barathrum tho, who outdamages it

MC – Especially since chain attack: Grab and smash ACTUALLY has synergy with hard head, unlike on the seether where uncontrollable rage and hard head are skornergy

Lazarus – Haha actually YES

MC – Pretty sure I’m always taking nightmare with a deneghra

Lazarus – Esp D2

MC – Both 2 and 3. Really, power up made it so that he works well with all the deneghras

Lazarus – Agreed. It was always his main issue w D1 and D2, so that helps a fair bit


Deathjack

Lazarus – Ok, now – DJ?

MC – Ok, so deathjack got hit the same way that all spell slaves got hit. Even though necromancy is better than spell slave because you don’t have to worry about the focus limitation on the spell, the fact that deathjack can’t upkeep cycle is a big deal. He lost 360 arc, which is…..maybe a buff? Snacking is worse than his healing mechanic before and hard head is whatever

Lazarus – He did. And yeah the snacking also turns off his ability to gather souls which is the bigger problem, namely, losing cull soul

MC – But he did keep the good defensive stats, still hits just as hard, and still keeps skulls of hate. Losing cull soul is weird… I still love deathjack personally, and I think deathjack will still have a place with some casters. For example…deneghra2 will still adore him

Lazarus – And more importantly, tho we lament these small nerfs, we need his arm cracking. Nightmare did close the gap, but hes still our hardest hitting heavy and we’re likely to need that in mk3

MC – Venethrax will adore him because he can cast mortality. He still allows for double hellmouth on D2. So there are some setups he’s designed for.

Lazarus – Yeah the spell slave changes mostly hurt people like Coven, 3Lich etc.

MC – He lost his place in lists where you need him to help cycle upkeeps early on. I think now, you’ll see deathjack reserved for lists that actually have spells for him to cast, basically, non-upkeeps, so things like mortality, influence, hellmouth, and here’s a big one….he gives venethrax an extra deadweight. I think he’s still brutally strong but I think he no longer belongs in skarre2. He’s still really strong in terminus, but skarre2 lost perdition, and she has mostly upkeeps now. And deathjack can cast ravager for terminus

Lazarus – So im going caster by caster here in terms of Spell Slave (not considering him as a beatstick in this)

Agathia – Nope

D1 – Nope

D2 – Yes

D3 – Probably

Shade1 – Less likely?

Shade2 – Nah

Shade3 – Nah

pGaspy – Nah

eGaspy – Nah

3Gaspy – Nah, no need now

Terminus – More likely now, but i think Barathrum first, Erebus 2nd, so probs no

pSkarre – Maybe

eSkarre – Much more dubious i agree. Not so much for the upkeep spells, which sucks, but the feat and loss of Perdition

Scavvy – No room? Still very strong but i dont think i have space

Sturgis – Don’t care

Venny – Great

Morty – Also great

Coven – Nah, better choices

MC – I wouldn’t take him in scaverous. Venethrax and  e/3 deneghra are his best casters right now

Lazarus – So that’s my main list. Now obv some of those casters might still reach for DJ for pure muscle beatstick reasons, but thats also more of an investment than Barathrum or Nightmare, at a full 8 and 5 pts more respectively

MC – See, once again, I think the reason for deathjack will fall to “is there something useful for him to cast”. He can still cast overrrun which is nice

Lazarus – But yeah he lost a lot of utility and i think the bumps in other character powerhouses (who are often cheaper) and nerfs to spell slaves will see him as a much more situational piece than how he was used in mk2.

MC – But we have a surprising number of upkeeps. And I think that’s what it comes down to, is how good the spell slave will be

Lazarus – Yeah so Morty, D2 and Venny are my main ones now for him. The rest im just leavign to meta decisions

MC – Venethrax, deneghra2, deneghra3 are places where I can definitely see him being good. And terminus. I’m not sure I like him in lich3 anymore, I mean, don’t get me wrong, deathjack with unyielding is scary, but deathjack literally cannot cast anything on asphyxious3’s spell list that isn’t hellfire/hex blast, and I’m not paying 23 points for that. Lich can just cast it himself, since you aren’t gaining anything more.

Lazarus – See Terminus im gonna vote no – I still want Erebus for the Ravager trick (even better now, as is Erebus) and Barathrum.

MC – It’s got to pull weight like deneghra2 getting double hellmouth or venethrax getting a 3rd deadweight

Lazarus – Agreed. So yeah i stand by my list of 3 🙂


Wraith Engine

Lazarus – Anyway i should discuss the Wraith Engine. I played this piece a fair amount in mk2, so I’m quite familiar with how it worked and the various strengths and weaknesses. Chief among them of course was durability, because at only ARM 18 and the same number of boxes as a node, it was really made of glass.

Now the thing is, in Mk3, I dont think people appreciate btw that the wraith engine may well have been nerfed. It gained inscrutable (admittedly nice)  speed and straight incorp. However, it lost apparition (better than 1spd) the ability to create clouds (huge!) and cleave is worse than just gathering souls quite a bit. The cloud production was just really significant for it, both in keeping itself alive and protecting other elements of the army. . So ill test but im not optimistic atm

MC – Yeah, I was thinking about that a lot lately, and I think it may have actually gotten worse

Lazarus – So ultimately, a lot is resting on the machine wraith creation ability. The utility of that is very hard to gauge as it is so completely different from everything we had before. And I rele hope it works basically, but I feel like the Wraith Engine will live and die on the ability to create new Machine Wraiths being useful. Im gonna try it, but the loss of clouds worries me and its gonna need to stand on the abilitiy to put wraiths in play

MC – I think I’ll largely defer to you on all things Wraith Engine related haha.


Colossals

Lazarus – So next up then – Kraken

MC – So the kraken kept the one thing I hated most about it, and more or less stayed the same

Lazarus – I never rele played either Cryx colossal, so my feedback is gonna be pretty limited tbh

MC – Ok, so, here’s the thing. The kraken’s flayer cannon is STILL D3+1 shots. 2-4 is….fine? But the sepulcher gets 2-6. That being said, the hellblaster is still a very very strong gun, with a potential POW17 AOE5 at RNG16 is a solid option, especially with kill shot. With appropriate support, you can kill a lot with it very quickly, but it’s still not killing another colossal. The good thing is that it still has better threat range than most colossals, especially under venethrax with terminal velocity and the 4″ reach is very very good.

Lazarus – My big question mark is mostly going to be how the meta handles colossals in general

MC – Oh and amphibious may actually be a thing now. And see, this is the thing, it hits straight harder than the sepulcher because of meat fueled, but its ranged weapons are not as good. Whereas the sepulcher has utility purposes, as well as still being a reasonably strong combat unit, the unicorn horn is interesting though because it is our longest ranged weapon.

Lazarus – Yeah as the levi basically got taken out imo, ranged power is gonna be more of a premium

MC – But then, we come to the other colossal which actually is better for cracking armour but doesn’t handle infantry as well. The kraken also has to be the model that kills to be able to throw things into the furnace which is another knock against it, but that’s neither here nor there in all honesty. It is a prime target for infernal machine still, but the kraken is stronger in melee for armour cracking for sure, going up to a whopping 22 with just a few kills. Factor in something that can swing armour and you’re in for some serious armour cracking

Lazarus – And yeah see thats the other thing. The changes to DJ n Banes makes them less desireable, which might make the colossals more necessary if ARM cracking is more important, plus they’ll play better in a meta that has issues breaking ARM with fewer tools out there in other factions

MC –  So, speaking of armour cracking, the sepulcher actually lost melee armour cracking. The spawned mechs and brutes have to forfeit action when they’re put into play, but it actually GAINED in the ranged cracking department because of the changes to how ROF works, especially since it can get 2-6 impaler shots and the big gun on the sepulcher kept the crit paralysis. It lost 1″ on it’s corpse collection range, but the chain weapon on the sepulcher also has pull, which the kraken doesn’t have. So with more of a push towards spamming armour, I may be leaning with the favourability towards the sepulcher still, even though the kraken did get a bigger pie plate to deal with infantry. That being said, the 2 colossals are now significantly closer in power level now than they were before

Lazarus – I agree with that. Before Seppy was so far ahead it was hilarious, but the closing of the gap was needed

MC – Yeah, and the sepulcher also contributes to a stronger attrition game, which the kraken doesn’t. Oh, and the sepulcher has arcing fire

Lazarus – So verdict – think both will see strong play

MC – For sure. Again, venethrax, maybe denny3

Lazarus – But im still kinda glad i wont be forcing them in, because it lets me try so many other things in lists

MC – For sure, I do think that as we progress through though, we’re going to find that the gargossals are going to become more and more key in Mk3

Lazarus – I think their usage is gonna depend on the broader meta questions, but yes in principle i agree

MC – Agreed


Conclusion

So that was the end of our conversation about Cryx jacks. Mk3 has brought a lot of very exciting changes to the game, and it’s good to get some initial analysis of the models we have available to us. At the very least, it should make an interesting comparison in the years to come when opinions change about certain models and their usage gets revised

If people enjoy this more casual review format, next time, we’ll do a piece on units and continue the conversation. 🙂 Until next time!
Intro

20160410_133427

Last time we discussed the use of camo models in the Ariadna shell game, going over some of the uses, tricks and psychology involved in spamming them on the table. However, in the vast majority of lists you play, camouflaged models certainly won’t be everything you run, and even the most wacky builds tend to have at least a few models left over that aren’t simply hiding beneath a token.

In part 2 of this series, we’re going to now turn to look at how the rest of the list plays and fits into the overall strategy of guerilla warfare that Ariadna is famous for.  Indeed we’ll need several other models in the “supporting cast” to get those camo-models working to best effect, and while they initially appear pretty mundane in usage by comparison, they can definitely be pretty slippery as long as we put some effort in.


Cheap Orders

First and foremost, we should probably mention early on that a lot of these “non-marker” models are going to be the things hidden in your backfield, and their job for much of the game is primarily to provide cheap orders. Some common examples, which we’ll break down in a minute, include Volunteers (Chain Rifles), Muls (Minesweeper), Line Kazaks (FO), Dozer and the 112. I’ve also seen some people include Metros, but I’m generally not much of a fan unless you REALLY need the 1 pt saving, because otherwise they’re inferior to Line Kazaks in every way.

Anyway, aside from providing a cheap order when they’re standing around, all of these have some nifty bonus uses, which we’ll look at in turn.

20160410_122037

1.) Volunteers (Chain Rifles)Backfield defense. With shotguns providing deadly close range ARO’s and Chain Rifles being a nice template, these handy little Scots are 6 points each, and a bargain. One of the main practical uses they end up having is being a defense for Airborne Deployment (AD), because it changes the odds on safe landing zones for many troopers, and bad scatters can punish models that much more. The most important thing of course is to then guard them from longer range bands, which we’ll get to in a minute.

20160410_122956

2.) Muls (Minesweeper) Baggage. Useful for Quadrant Control type scenarios, stocking up on mines and the activation bonus on Beaconland, these Muls are even cheaper orders at a mere 5 points each. Without a weapon their use is otherwise quite limited, but being REMs, they can at least be repaired (to achieve that valuable Classified Objective) and don’t block LOF when they go unconscious, letting you occasionally use them as “riot shield” to go round blocking narrow corridors and other lines of fire.

20160410_124243

3.) Line Kazak (FO)Specialist/Rifle. The cheapest specialist we can get, these models cost a bit more at 10 points each, but you really appreciate having them around in the late game once casualties come in and you still need to complete objectives. The rifles are also certainly welcome to both support the range bands of Volunteers and occasional participation in coordinated Suppressing Fire. Finally, FO also unlocks both Flash Pulse (particularly useful as a long range ARO) and to complete certain classifieds, so they tend to be quite flexible models no matter what they do. A lot of scenarios like Beaconland for instance require a bunch of these to get enough Beacons on the table, so while they may not make it into every list, I certainly like having them in at least one of the two to cover all my bases.  

20160410_123631

4.) Dozer (Mul Controller)Mul Controller/Engineer/Rifle. Aside from being a prerequisite for the Muls, the Dozer tends to spend most of the game behaving like the Line Kazak above, unless you need him in particular for his engineering duties. He’s a little pricey at 14 points, but that does open up the Muls as a viable cheap order for the list, and he’s frankly an absolute godsend for cheap D-Charge detonation alone for several missions/classifieds when you’re trying to avoid triggering any ARO’s, as he’s often in a safer position than anybody else to do that.

20160410_125355

5.) 112Doctor/Backfield Defense. In many ways similar to the Dozer, this guy is primarily a backup specialist and cheap order without doing much else. 12 points is a very reasonable asking price though all things considered, and in any deployment setups where you have viable long range attackers (HMGs, Snipers etc) a chance to bring them back into play has saved my skin more times than I can count. Doctor is also a very rare and useful skill in Ariadna, and while I like the Kazak Doctor for the Rifle, the saved point and Shotgun tend to be more useful in his role at being a backfield order, much like the Volunteers above.


Holoprojector

Of course, not all visible models are what they seem, because we have in Ariadna a particularly fantastic bit of a trickery in a list like this – Holoprojector. Limited currently to just the SpecOps model, Holoprojector is nevertheless an amazing bit of kit in a build like this, because the small amount of visible models remaining could be something else entirely. For now, I’ll focus primarily on Holo1, as it’s cheap enough and subtle enough to require a bit of discussion in terms of loadout and role, whereas the higher cost and more straightforward nature of Holo2 tends to make for much more typical gameplay.

20160410_125737

– SpecOps Holoprojector… Aka, not all is what it seems in the Ariadna Shell game…

So how does it work, at least in the context of this list? Well the first thing we need to consider here is loadout, because what the holoprojector model is actually toting makes a hell of a difference in terms of how it plays. Annoyingly, Holo1 is a 3 cost EXP upgrade, making it generally a pain to build around when much of the great SpecOps tech costs an even amount.  I’ve experimented with a few of the below and all are interesting setups for the remaining 9 EXP in and of their own right:

– AP HMG (9) OR HMG (8) + Specialist (1).

– Molotok (6) + Utility Skill (Minelayer, Doctor, Engineer, Hacker) (2) + ___

– Chain of Command (8) + ___

– Inferior Combat Jump (6) + ___


The first couple are fairly straightforward, toting around a big gun to reveal in the active turn and give your opponent a shock when a harmless cheerleader opens up. Downgrading your firepower/range bands to increase specialist skill utility is of course another great option, but you will have to consider that it might expose you to good opposing range bands or spoil the surprise if you need them primarily for the specialist skill. Chain of Command of course is excellent for any aggressive Lt setups, and the fact that your backup is safely hidden as something else makes it hard to pin down early on. Finally, the deployment skills are mostly for good laughs (while risky, a jetpack landing 112 is always good for a laugh), and though opponents will probably KNOW it’s a Holo1, the rest of the loadout remains a mystery all the same.

Loadout of Holo1 is only the first step though, and we now need to pick a model that we’re pretending to be. Of course there are some limitations – we can’t be anything with a different Silhouette (2), it has to be an Ariadna model, and of course we probably don’t want to exceed our “visible AVA” or deploy a visible model (that’s normally a camo token) vs. the more savvy opponents. Because doing certain skills (shooting, laying mines or whatever) reveals the user, we also would prefer not to be a model that would typically do things in these situations, as opponents might get increasingly suspicious of something like a big gun that never fires, an Irmadinho who isn’t Impetuous, a Specialist who doesn’t score and so on.

20160410_134606

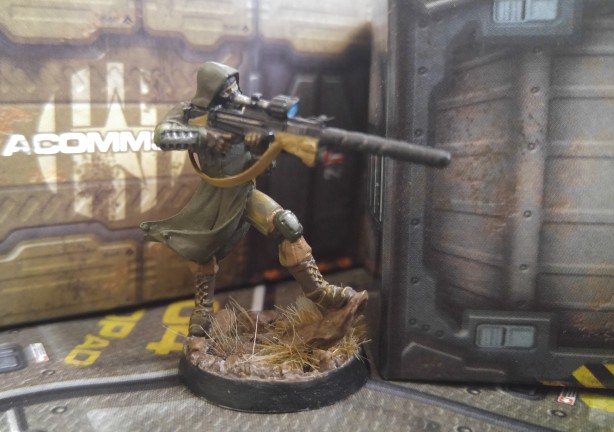
– Although Tankhunters are normally deployed as a camo marker, deploying the SpecOps as one of these has still given an opponent a good scare now and again. (Just consider next game actually deploy as a real tank hunter out of camo to keep people on their toes!)

So the main use for the reversal is usually two-fold. Either disguise as something weak (a cheerleader) and be dangerous, or disguise as something big and dangerous (a Sniper, HI, HMG etc) and not be. As long as you as the player still deploy and generally play the miniature as what it is supposed to be, most opponents will be none-the wiser. In other words, keep your sniper in a threatening spot, but not in such a good place that they start to wonder why it hasn’t been used (hopefully the way it changes opposing gameplay alone is enough).  Similarly, your cheerleader needs to be safely tucked away as normal, but able to get into the fight quickly in order to take advantage of the ambush. Of course it only works if opponents take the bait and play accordingly, so some acting will be required.

Once you get good at it, all the double bluffs start to come into play. My helpless looking guy really is a helpless looking guy. This normal looking Kazak standing here and acting all suspicious actually isn’t a holoprojector guy, he really is just a normal FO Kazak and now he just scored on the objective. Seriously good stuff, and IMO, well worth the low cost of entry to include the model in your list.


Deployment and AD   

While the usage of the visible models is pretty clear (even if they aren’t always what they seem!), what we haven’t yet discussed is how their function on the table factors into our deployment. As you can imagine, NOT having Camo in a list like this makes you an attractive and easy target, so generally speaking these guys need to be tucked safely away (out of LOS) and often stay that way for much of the game until their bonus uses come into play. Fairly straightforward stuff so far. But now we need to start putting it all together and start considering the other subtle nuances of deployment.

You see, most of your army will be little more than a sea of markers, making it near impossible to guess your list composition unless your opponent has an acute awareness of your limited model collection. All your models though will be on the table in some form (either as a model or a marker) because Ariadna lacks hidden deployment, but there is one exception we need to consider – Airborne Deployment (AD). The main point to consider here  then that because Ariadna lacks Hidden Deployment (no TO) the main thing is not to leave any obvious gaps in your order pools where an AD model would be a dead giveaway. Incomplete order pools once everything has been revealed are an obvious no-no, as is revealing all your markers before the AD model can arrive (against the more math savvy opponents).

Why is this a faction-specific problem for us though? Ignoring Van Zant for a moment (who is a separate discussion of his own) Ariadna is limited to the Parachutist level of AD (arrive at a table edge, determined at deployment), making it a very predictable skill if it’s something your opponent is expecting. This means that unless you have gifted prescience, you not only have to be able to guess the table edge right for them to have a meaningful impact, but you have to avoid arriving straight into an opposing killzone and eating a bunch of unopposed rolls (especially bad are TR REMs).

So, not looking good so far. This is why some people deploy their AD model as the reserve model, so that you know at least where MOST of your opponent’s army will be. Fair enough, except for one problem – if you don’t deploy anything as your reserve model, won’t your opponent know you have AD anyway? Making it difficult to get use out of it once the opponent repositions, unless you get first turn?

This is where the Ariadna trickery comes in of course, because using a Reserve Model is optional. Many times you can throw a spanner in the works and simply choose not to deploy anything, letting your opponent perhaps assume that you have an AD model inbound. So let’s now look at some of the other clever uses of…


The Reserve Model

Perhaps worthy of a tactics article all by itself, the reserve model is particularly potent in a camo-heavy list like this simply because you have so many options. Some of these are pretty obvious, such as deploying a big long range gun (HMG, Tankhunter Autocannon) with choice fire lanes after an opponent has deployed to get them in an ideal shooting place, or saving an expensive Impetuous model (Dog Warrior perhaps?) by relocating them to a safer spot so they don’t either take a bunch of ARO’s or waste regular orders to cancel the Impetuous move.

Other setups are a fair bit more subtle. The AD option we’ve already discussed, and of course Holoprojector usage only increases in utility when you can draw attention to the model in question by reserve deploying it, or onto something else by simply dropping down a simple cheerleader in reserve and making your opponent think it’s really something else. Uxia is another model who is particularly valuable to hold back in reserve (especially if you’re going first), as she can get into prime position for an early game rampage, or simply be held back if there are no easy approaches after the opposing deployment to save her for something more useful.

20160410_140016

– Uxia

Some models also tend to make problematic reserve models. Minelayers and Ambush Camo models aren’t bad per se, but by deploying 2 markers at once your opponent should know full well that one of them is a mine/fake, spoiling some of the shell game advantage that these models typically provide.  The main trick here though is to keep opponents on their toes. If Uxia plays your reserve model a lot for example, than your opponent will always assume that the last camo marker is her, so it’s sometimes worth deploying a different camo marker as the reserve model, or even leaving her back in regular infiltrate to hide among the others and make hunting her down that much harder. Likewise, as we mentioned with AD, it’s sometimes worth not deploying a reserve model at all, because opponents might assume you have AD (when you don’t) or overlook that the dangerous model they were waiting for has already been deployed.

To help get the most out of this ability then, we might want to discuss deployment order a little bit. Certain “groups” of models tend to go together – for example, Minelayers with their mines, Ambush Camo with their fakes and so on, so try not to deploy these guys at the same time for fear of giving away their position by proximity. As in many cases you will need to measure to check they are in ZoC, it’s worth sometimes doing “fake” measurements between other markers too in case opponents are trying to guess what’s what, leaving multiple possibilities for each and ideally shaking up their expectations.

Oh and speaking of Mines…

Deployable Weapons (Mines and E-Maulers)

Last article, we covered how both Minelayer and Ambush Camouflage contribute nicely to your shell game, in that you have additional camo markers to mask the presence of your troops, waste opposing orders and deny certain areas of the board. Now we’ll look at how your visible models might go about making life miserable for the opponent, taking advantage of their non-camo status (for those that had it) or otherwise to make the most out of being a model on the board.

Once the jig is up then, so to speak, laying mines is a valuable tool for revealed models. Covering objectives and choking up narrow points of advance in the midfield is pretty valuable, but if your opponent tries to land AD type models in the backfield then it’s sometimes worth laying a few down there as well. A good turn sequence might play out that models will go up, do some shooting/take objectives, and then lay down a few mines before returning to the camo state. Mix in coordinated orders and the whole process can be rather efficient!

The thing is with these deployables is that they are far more useful as an irritant than an actual source of killing. Yes it’s absolutely hilarious when a mine triggers and blows up a valuable link team member who rolled poorly on his dice, but more often than not, I’ll find that most mines are better utilized for the headaches that they cause – forcing discovers, risking dodges, wasting orders clearing them or simply getting opponents to go around them. You can probably see now how they fit into the overall shell game of the Ariadna list, because in conjunction with camouflage, mines really hamper an opponent’s order economy and limit their ability to bring their superior fighting ability to bear.

20160410_133102

– Minelayer Chasseurs

After all, Ariadna lists like this one are never about fighting fair, but limiting opponents orders are only part of the equation. Mines are also incredibly valuable for actually winning firefights, and we’re talking about more than just a few opposing models stepping killing themselves before lines even clash. A typical example might look like this:

Suppose we have only 2-3 middling rifle guys holding a corridor, which isn’t much by itself. Plenty of enemy models out there will happily face off vs. 2-3 single rifle shots if they’re sporting a bigger gun, defensive abilities and so on, and can easily wipe them all. Throw a mine or 2 in there though and suddenly the situation changes. If they choose to dodge, not only do they still have to pass (at -3, vs. the mine) but your 2-3 rifle shots have weight of numbers on their side, going against only a single dice instead of multiple from burst. Even if they live, it still takes them more orders now to actually touch your guys, which also leaves more points of failure, or you could even dodge to safety unopposed if you prefer. And of course if they choose to shoot (few people do, unless they’re HI’s or TAGs) then those mines could happily kill them in the process.

So suddenly, what looked like a very uneven fight becomes much dicier for the opponent, and that’s what this type of list is all about – minimizing superior fighting strength and pushing the odds into your favor. Mines are one of the best tools in our arsenal for this, but there is another that’s equally important…


Smoke

Ariadna and smoke go together like bread and butter. We may not have the MSV2/3 to see through it ourselves, but as standard issue on some very cheap (45’ers, Irmadinhos) and very useful models (Uxia, Antipode Controller, bikes…), it’s pretty trivial to get some in your list. Smoke in many ways is what allows our mostly rubbish stats to actually stand a chance of surviving in the deadly world of infinity, and even more so for the models that don’t have the precious defensive benefits of camouflage.

So, assuming the enemy isn’t packing too much MSV, Smoke is an insanely valuable tool:

20160410_124838

– Irmadinhos, a lovely source of smoke…

Blocking lanes – Primarily we of course need to use it to make it up-field through the open lanes of fire, because blocking off an alleyway allows our fragile models to cross narrow gaps. The main trick here is balancing this between your own active killing models, because of course too much smoke makes it hard for our main killers to do much either. I cannot count just how many times I laid down smoke for models to advance BEFORE crucially activating an important killer model that now can’t see a thing. Either do the shooting first, or consider angles/placement carefully before the clouds go down.

Diffusing ARO’s – Similar to the above, but rather than focusing on throwing smoke to cover a gap between models, this tactic focuses on landing smoke ON the opposing models, shutting off their ARO’s. Assuming you can get close enough and do it safely, this more offensive smoke strategy can worry less about blocking your own visibility and tackling ALL the angles of the offending model at the price of only neutralizing a limited number of ARO models. Providing you don’t plan to shoot the offending piece (or anyone behind him)  this is often a more precise strategy and tends to work best vs. lower model counts or armies with usually 1-2 dominant pieces (e.g. a TAG).

Camo – Coupled with camouflage, smoke can also limit the opponents opportunity to discover, helping you preserve the camo state for a more “open” area of the board ahead, or simply allowing you to maintain your Surprise Shot/Attack modifiers when you finally do engage. In the early game this is especially important, because the longer you can maintain models in a camo state, the more orders opponents will typically need to spend to deal with them, which gets increasingly difficult as the game wears on and the opposing pool begins to get depleted. Later on of course your smoke throwing models might be dead (or at least further away), and many markers have probably been revealed, so take advantage of it while you can and really squeeze every drop out of the shell game that you can.

Melee and Objectives – As your own melee models couldn’t give a damn about needing LOS, having them approach through smoke is infinitely safer than striding through the open, and they lose nothing really by doing so. Actually reaching melee is typically a dangerous proposition in infinity given the distances you need to cover, but smoke really evens the odds by allowing you to walk up safely without eating a bunch of ARO’s before you reach the target. I also make note of objectives here because the process is much the same – you don’t need LOS to push most of the buttons, and as you might need multiple attempts to do so (if you fail the WIP roll say), you really DON’T want to be triggering further ARO’s each time you try.

Other skills – Like melee/objectives above, a lot of other useful skills just don’t need LOS to do their thing. Speculative fire is a given, but there are more subtle uses, including laying mines, reactivating camo, going into suppressing fire and specialist skills like Doctor, Engineer and so on. In most cases then, unless you’re shooting you definitely don’t want to be taking any unopposed ARO’s, and smoke is often one of the safest places to be when declaring a lot of the skills that don’t require any interaction with the enemy.

We’ve gone through some of the main uses here, but I’m sure the thing you probably get the idea. In general, a good rule of thumb is to balance use of smoke with shooting (you really want to not block your own LOS, just the opponents) and focus primarily on using it to block LOS only when you need to. Obviously there’s no need to pop smoke when you’re safely tucked away for example.

Finally, we need to consider smoke in the reactive turn. Typically, this will involve the dodge+smoke ARO, but don’t be afraid of using smoke as a normal unopposed roll if losing the smoke thrower will protect something more important. Again the main balance to strike here is with LOS for your own potential shooting ARO’s. Obviously if none of your big guns can/will be shooting then you can probably smoke away, but just be careful that otherwise do the opponent’s job for him by accidentally neutralizing your own sniper or other valuable ARO piece by blocking their view.

20160410_141017

– Don’t block my firelanes! (Cateran T2 Sniper)


Prone on a Roof!

But what about the models who have no tricks. No smoke, no AD, no camo, no mines, nada. Well that’s when the “prone on a roof” (POAR) strategy comes in, because this, IMO, is perhaps the safest place to be on a whole damn board.

See in discussions with our gracious host (Midnight Carnival) and my regular opponents, I quickly realized this is one of the best places for inactive models to be. I say “inactive” because cheerleaders are the ones who tend to tick the most boxes in the above categories, and the fact that they largely just contribute orders means they rarely have anywhere more important to be. This is a crucial thing to note, because once you’re POAR, it generally takes models on the ground at least another order or two to get to you (Climbing, stairs or whatever), but by the same token, it will also consume more of your own orders if you ever need to move them. Coupled with the fact that generally movement wants you to stand up (for maximum movement distance) and that standing on a roof makes you very visible, POAR models  can really struggle to relocate.

So let’s break this down. Being prone means that any building with even modest walls (the lips on most of the standard cardboard buildings) keeps you completely out of LOS, and even if you don’t have protective walls, any attacker lower than you will at least have to contend with cover and struggle to get LOS if you’re far back enough. Even if models do want to close in on you, they usually have to spend more orders getting up there, and even AD models will struggle getting the right approach if your guy is crouched in a corner or they didn’t stick the landing. Lastly, if they’re climbing/using ladders to get to you, then at the very least your POAR model (and ideally others!) should be able to ARO them out of cover to even the odds.

Of course no strategy is foolproof. Watch for even taller buildings (that might be able to get LOS on you anyway), and of course Spec Fire (up and over!), although both of these things still tend to be a problem for models hiding behind stuff on the ground level. Try not to cluster too many POAR models together (ideally spread to multiple rooftops)and also avoid standing too close to “active” models (e.g. any snipers, big guns that are standing on the roof for LOS when fighting), as templates hitting them can still clip your cheerleaders quite handily. But in general, POAR is a great place to hide, and terrain depending, is probably a good “default” place to put your cheerleaders in order to make killing them that much harder.


Conclusion

Anyway, hopefully this article gives some more insight into the strengths of a typical Ariadna build. A lot of people see the sea of camo as the primary focus of the list, but in many ways it is just the first in a strong toolbox of denial, distraction and destruction based abilities. Of course, knowing how to put it all together is something of an article in itself, and with H3N3 just around the corner and some likely changes to everybody’s list, this is something that I’ll be working towards producing in the future.

20160410_131719
Until next time then 🙂

Spotlight – eZaal

Posted: November 17, 2015 by lazarus0909 in Skorne
Tags: , , , ,

Intro

With the release of Skorne’s new caster, eZaal, most people in Skorne clearly went through the 5 stages of grief in a very vocal and very chaotic manner after the initial spoilers of his rules. Since then though, I think most members of the community have calmed down a bit, and started to look at this newest caster in a more reasonable manner, with many of them coming to the conclusion that, while he might not be breaking the top tier of the game any time soon, he’s actually a pretty decent caster.

This might be a surprising fact to those looking at him purely on paper, but once you start playing it all out, eZaal is actually an amusingly legitimate caster choice. Despite looking particularly skornergistic and having no immediately obvious or overt synergy, I can honestly say that he has not only proved more fun than I ever would have suspected, but actually more powerful as well.

So, while it’s too early for a full write-up, I thought I would at least lay the groundwork for a preliminary article, and perhaps add to this as time goes on. I won’t be focusing on people’s comments or their personal issues or claims of skornergy about him as a caster, but what I will do is go over actually what I think makes him effective on the tabletop, and perhaps try to shed some light on what is a particularly controversial caster.


Overview

For those sitting at home and wondering what on earth is going on with this guy, there is a lot to explain, and more so if you’re sitting away from cards. Overall, eZaal has one of the most deceptive stat lines in the game, with some good (ARM 18, boxes, Fury 7), some middling (MAT 6, POW 14) and some downright awful (SPD 4, DEF 10). The reason I say “deceptive” is that once you start to incorporate his rules and some of the army abilities, it all goes completely out of the window:

– DEF 10 can quickly become DEF 14 (Concealment/Swarm animus and in the Krea bubble.)

– ARM 18 becomes 23 on feat turn, (again, 25 to range with the Krea bubble). You can also mess around with a Cannoneer here (Diminish) but I haven’t had the chance to test myself!

– SPD 4 becomes effective SPD 8 when you factor in Righteous Vengeance (making him the fastest caster this side of eXerxis, with a much smaller base to move around on). **

– Fury 7 quickly jumps up to Fury 10+ once you factor in Reclaim (even the low turns usually give you at least a couple of souls to play with and my personal record was 19 after only a handful of games).

– MAT 6 turns into free boosted hits (Feat turn) and MAT 8 (Krea bubble again), quickly upping your melee potential.

** Side note – Every time I see somebody forget to use this ability, I die a little inside. It’s huge what it does for his game plan, and should be triggering almost every turn with standard play…

His melee weapon (PS 14 with Reach and Silence) is also on the face of it nothing to write home about, but it does have some amusing applications. Not only does it hit better than you might think (given the feat/Krea for accuracy, and given the huge stack of fury he typically has to increase output) but it also gives him some interesting insurance in terms of failed assassinations. Even if your giant “beaty stick of death” fails to kill their caster after a charge with a big stack of fury, many of them are still left hanging out to dry when they can’t cast any spells. Against most casters it’s far from guaranteed to keep eZaal safe (after all, they can still attack in melee, though many of the spell slingers are screwed), but it’s nice to know that on occasion you can think about taking the bigger risk if you know your opponent is less capable of punishing you should you fail.

Aside from noticing how deceptive many of his abilities are, hopefully you’ll begin to notice that many of his stats and abilities start to point to a very specific, very focused playstyle. Once we take a look at his spell list though, you’ll begin to see how this starts to take form.


Spell List

eZaal has a rather peculiar spell list on first glance, giving you situational tools when you need them, but generally being nothing you need most of the time. Crucially though, I largely consider this an upside, as while many of them are useful, none of them are tempting enough to detract you from your full stack of fury and what it’s good for. In general then, there isn’t a huge amount of thinking involved for when to use them, because their usage is so damn obvious on the actual table. We’ll see how this all comes together in a minute, but let’s run through each of them so you see what I’m getting at here:


Annihilation

Every now and then you’ll see clustered infantry to kill and have 0 use for Transference/transfers, so blast away. Most people’s opponents understand proper spacing though, so it’s more a back pocket threat for “sleepy” (read – he’s in 0 danger) turns. However, every now and then it’s nice to take advantage of opposing mistakes, and using the spell essentially functions as a bank to turn the fury you don’t need this turn into extra fury for the next. Once you see the spell in that light, it’s function becomes clear (if admittedly, still corner case).


Vision

Stick it on something, move on. If you’re taking Wonder (I am, he doesn’t need anything else) then recasting it is the same as upkeeping it each turn anyway. Some argued early on that you should stick it on Tiberion, but I found that this was actually fairly useless pretty quickly, as every use of Shield Guard kept knocking it off and he wasn’t worried about the damage anyway. An important solo is generally the best target, such as the Agonizer. If your opponent is swimming in sprays and drifting AOE’s then the spell doesn’t come up much at all, but other games it saves you from the charge attack of an opposing heavy.


Mage Sight

The very definition of a situational ability, Mage Sight ranges from “incredible” to “useless” depending on your list and your opponent’s. Only battlegroup models benefit from the spell, and it tends to have more use on shooting models who are most concerned about the effects (ignoring clouds/forests for LOS and ignoring Stealth). One of the best uses of the spell though is for eZaal himself, letting him get an assassination off through the cloud/forest wall type casters, and sniping Stealth models with a handy spell.


Sunder Spirit

And speaking of a handy spell, this again is a spell that either dominates the matchup or lays idle by the wayside. Sunder Spirit is a big part of his assassination game, letting him get off a 21″ non-linear assassination threat (4″ Righteous Vengeance, 7″ charge, 10″ spell range), 23″ with the addition of the Shaman. Factor in Mage Sight above and Reclaim below, and any sliver of LOS spells a quick death for a big chunk of non-camping casters in the game. Otherwise, this spell has a nice little clutch of utility uses, letting you snipe out important solos with those same tools, and of course denying important animi in hordes which can quickly up his game. But again, when to use it is pretty obvious, so not much explanation should be required.


Transference

And now we come to the real moneymaker spell on his card, Transference. Of all the casters in the game that come with this spell, eZaal is fairly uniquely positioned to abuse the hell out of it, turning ridiculous numbers of fury into readily available boosts for the army. The trick with this spell is not to go overboard, as unless you’re facing particularly crazy DEF/ARM skews across the board, you should only need it to take out a few key pieces every turn. Save a decent amount for eZaal’s own durability (more later) and know the odds you face (don’t go fishing for stupid numbers unless you really have to) and it’s a really useful tool to have.


All in all then, his spell list all seems to point in one direction – Simple and Situational. I’m being very deliberate in my choice of words, because eZaal falls quite clearly into that category of casters who have really mundane spell lists (personally, people like eGrissel and Terminus spring to mind here). In many ways the gameplay for this spell list really writes itself… Upkeep/recast Vision, put up Transference, and save most of your fury for that, unless any of the other spells are needed.

Simple, right? Which is good, because the next section is where we start to get a real spanner in the works…


Abilities


Reclaim

The cornerstone of eZaal’s playlist, Reclaim is probably one of the most important abilities that he has in trying to understand his game plan. For those of you not used to facing High Reclaimer/Testament, this ability let’s eZaal pick up souls off any model which falls in his control area and convert it into extra fury. Given that eZaal has a bigger control area than either of these casters and can play rather close to the front (we’ll get to that), this generally means every casualty in your army is going to his fury stack.

There are typically 3 main things you want to be doing with this extra fury once it starts to trickle in:
1.) Transference. If most of your models are making contact with the enemy that turn,  then saving enough fury for them to boost away with is often a good idea.

2.) Spell blasting. Often saved for the assassination, 4-5 fully boosted Sunder Spirits isn’t unheard of from eZaal, and can definitely put any caster in the dirt providing they aren’t camping too heavily and you can get the LOS.

3.) Mass transfers. If the other 2 options aren’t required, generally you just want to sit on it for durability. Providing you still have healthy beasts, most casters on 7-10 transfers (before any other defensive tech) are in the “don’t  bother” range for a lot of assassinations. Just make sure you wipe your beasts with Paingivers first that turn.

Other uses of course exist, such as healing up beasts, reloading the Agonizer and chucking out a few animi. But I only mention these main ones for now as you want to keep in mind where any big stacks of fury might be going, as those turns can and do come up.


Direct Spirits

A familiar ability for old pZaal fans, Direct Spirits is back. Unlike pZaal however, eZaal might well be rather hungry for some of those spirits for himself, so the choices can get a little tricky. Obviously those lists that run minimal ancestral guardians won’t need to worry much about this ability, but for those of you who do take a full complement of statues, you want to think carefully about who gets what and why:

1.) If you give them to the regular Ancestral Guardians, they stick around past a single turn, but are also lost if the statue dies (well, you lose them if eZaal dies too, but then you lost the game so…). My rule of thumb is that, unless they want to be leaving his CTRL area (rare), then statues want souls whenever they’re looking to buy attacks, and you can simply direct the souls to eZaal for boosts seeing as they have access to transference anyway. Often it’s worth them having at least one though, even if just so you can use Spirit Driven at some point for an important turn.

2.) If you give them to Hakaar, it’s pretty much the same principle, but remember that any leftover souls instead contribute to his ARM, making it generally desirable to load him up as soon as possible. Fully loaded on feat turn, Hakaar reaches a near ridiculous ARM 26, which even colossals might not kill unless they’re fully stacked with focus (Hint – Agonizer). Hakaar thankfully doesn’t need Spirit Driven, but he does have Righteous Vengeance which still triggers even if he doesn’t get the soul.

3.) However, if your statues aren’t reaching anybody soon, die off, or eZaal just needs the fury himself for one of the main reasons above, send them to him. I tend to see this as the default option if I don’t think the statues will be doing anything useful the following turn, and of course his collection area is bigger so he often has access to some that they don’t anyway. Just make sure you don’t find yourself on a turn where he has a big stack for no reason and they’re all sitting dry.

Finally, I’ll note that if you have any Extollers in the list, they might be worth thinking about as well. Suddenly loading one up for a surprise “lazor beam” shot is an old favorite trick of pZaal players, and this is still true of eZaal as well.


Righteous Vengeance

As I alluded to earlier, this one of eZaal’s best and least talked about abilities, because people are fundamentally terrible at math and threat perception. Most of us in Skorne are probably well aware by now of how quickly a SPD 4 model can move, but this little extra move does absolute wonders for his game plan. Here are just a few of the uses I’ve found already:

– Repositioning a full 12″ a turn (4″ advance, 8″ run). Great for scenario presence, and if he plans on camping or just spending via transference, he can afford to run each turn anyway.

– Edging forward, doing his spell thing, and then using the normal movement to scoot back again. Kind of like a mini Fate Walker move, this yo-yo move can let him snipe things out and then return to the relative safety of your lines. Remembering that Sunder Spirit is 10″, just keep in mind that anything in your CTRL area at the start of your turn is susceptible to this maneuver.

– Full on threat range, non-linear. Now you’re basically SPD 8 for charging/spell threats, and the first move can reposition for optimal angles. When we consider that one of his great end-games is spell/staff to face, lateral repositioning like this is fantastic to get the right angle.

– Activation order issues. Getting eZaal out of the way or into a particular spot before he goes.

The other thing to remember is that Hakaar has this ability too. These two have been best buddies since Day 1 of my playtesting and I’d never leave home without him. In short, Hakaar is a decently durable screen (esp. with feat and/or Krea) and acts as the front screen for eZaal (blocking landing space, as well as some shooting) before scooting out the way again to let eZaal pass at the start of my turn. In this close proximity they will almost always trigger Vengeance together, and the twin free attacks can clear out a couple of jamming models from my army before anything else activates. Coupled with any defensive strikes from nearby AG’s, and suddenly, the list has quite some unjamming potential on its own.


Steady and Construct.

I put these two together, because they have important defensive consequences. Steady on DEF 10 isn’t saying much, but remember that shooting DEF mentioned earlier and it starts to become important. The other bonus here is how it helps retaliation (sensing a theme here anyone?) because eZaal can shrug off assassination attempts like the best of them and Steady keeps your options open for the following turn quite nicely.

Construct is generally really sweet. Aside from the fact that you can be repaired (lol?) and the numerous things that only affect “living” in this game (yay!) eZaal’s main love here is of course the interaction with the feat. And speaking of which…


Feat

While definitely more of a thematic (and some would argue skornergistic, given his love of living models) feat, thankfully his feat is about as obvious as his spell list in application, reinforcing this idea of him as a simple and situational warlock. Healing up constructs is nice for any incidental damage you take on the way in, and then they all get both boosted melee rolls (saving fury from needing Transference, which is important) and +5 ARM, bringing Immortals up to 22, AG’s and eZaal up to 23 and Hakaar as high as 26 with a full load of souls. All of this of course is pre-Krea, so bear that in mind shortly.

In terms of being situational, when to pop it is almost always a T2-3, looking for the turn where your constructs will be making it to melee and making them tricky to get rid of once they arrive. Just like most of his abilities, thankfully the “correct” choice is almost always incredibly obvious, reinforcing the simplicity side of this caster. Generally I find the healing always works out the same to offset early shooting, but the rest of it plays out in one of the following ways:

1.) When you are faster than they are, then you’re charging into melee en masse, jamming with high ARM, hopefully surviving to deal more damage the following turn. Think of it as the pSkarre feat turn and you won’t be far off.

2.) Counterattack.  If the enemy is quicker than you, then normally you get jammed up and the constructs can sweep through with boosted hits (most jammers being the high DEF kind), clear offending models (again, remember the Defensive Strike/Righteous Vengeance above) and use the high ARM to mitigate any out of positioning problems they now might have.

3.) Risky eZaal plays. This covers everything from the personal assassination (for melee he’ll want the boosted hits, and the ARM boost means he might survive counterattack), turns you dump a load of fury on necessary transference and the weird poor positioning problems for scenario plays. It’s your get out of jail free card that occasionally solves a few bits and pieces along the way.

Some of this admittedly depends a lot on how many constructs you have in your army. The more you have, the more the feat will be primarily for their benefit most of the time, making options 1+2 more likely. If however you are primarily focusing more on living infantry for Transference, and perhaps solely running something like eZaal + Hakaar, then 3 becomes more attractive.

Either way, the feat is actually very easy to use, because normally the best time to pop it is pretty obviously dictated by the matchup, how the game is going, and which bit of it you need the most.


Gameplay

This is where it all comes together nicely.  What’s amusing though about eZaal is how having all these options stands almost in direct contrast to the way I’ve found eZaal plays, because his biggest strength is that he does almost nothing on a given turn, and that’s what makes him powerful. This is primarily because, despite having a modestly deep toolbox, many of these tools can and should go unused on a given turn, and will only be something you resort to in a very specific situation when the moment’s right.

You see, a lot of what makes eZaal a strong caster is that he has several tools for the job, but rarely does he actually need to resort to using any of them. His default stance, of methodically camping the lot and edging slowly up the board until the crucial turn, is actually his biggest strength. A lot of this will soon become apparent once we review a few more of the basics, but you’ll see shortly that simplicity is the crowning achievement of eZaal, and it’s something that he manages beautifully. Allow me to explain…


Early game

– Fill Agonizer (if present).

– Cast both upkeeps, charge up the table.

– Or just run up the table, which is generally preferred if either of the first 2 will leave you in danger vs. long range armies (e.g. eLylyth) or you just want to be another inch further up.

Don’t forget you can always forgo the upkeeps early on if need be. You’re unlikely to be using Transference right away, and Vision only tends to pop T1 again vs. the very long ranged armies. The other part of the equation here is that with 3 upkeeps on the card, I often find Arcane Wonder a solid choice of objective (equating to one extra Transference/Transfer each turn…) so getting up field quickly and leaving an upkeep for T2 is usually just fine.


Mid game

This is even easier, and not many casters can boast that! The primary objective here is to build a bunker for eZaal, because some of those defensive stats are a little middling in these early turns (until the soul train and/or feat starts going) and any fury we don’t leave on eZaal is free to use on early Agonizer fills, upkeep spells, transference and so on.** Later on you can be a lot more risky, but we’ll get to that.

** As a small aside, I’ll just describe my own personal setup. Tiberion and the Krea are kept close by to guard eZaal from harm. I then have 1-2 Paralytic Aura’s going and surround him with Cataphracts (any variety will do) on the sides, as they require a bit more effort to remove than single wounders and make it trickier to reach him in melee given the placement of the bases. The cherry on the cake as it were is to have Hakaar immediately in front of the caster, as the tip of the spear. By his lonesome Hakaar is pretty durable, but the key part we’re interested in here is Righteous Vengeance, as Hakaar has TWO opportunities to get out of the way (and ideally clear some space) before eZaal activates, letting him perform the necessary screening role without blocking eZaal’s path. Considering how slow eZaal is, we really don’t want him to get boxed in if we can avoid it, but neither do we want him left out in the open where he can draw unnecessary fire, so this is an important bit of tech. Finally, I sometimes pull the Ancestral Guardians in as well (either side of Hakaar) if the enemy is running important jammers, or I need to simply concentrate my force. This lets you create a very strong central position on your feat turn, and the defensive strikes mean you tend to have some room still free to move around.

Now, assuming you have a solid mass of infantry (we are playing eZaal here) most of them go after their usual preferred models and use Transference where required to deal the maximum amount of damage. The only other consideration here is to make sure they are as annoyingly placed as possible and within eZaal’s control area whenever we can, as we want opponents to have to kill them and start loading eZaal up. Basically the key part here is to focus on the offense – providing eZaal is safe, focus on dealing the maximum damage you can to the enemy (especially the pieces that might threaten him and the battlegroup) and treat nearly every other model as disposable in the process .


Late Game

By now a good 40-60% of your models should probably already be dead, but if you’ve prioritized correctly, eZaal should be in almost 0 danger and have a boatload of souls to boot. In most games you’ve probably already spent the feat by now to deal a serious blow and survive retaliation, so now you need to focus on how you’re going to end the game. Most of the time this will be using the battlegroup/Transference selectively to clear the zones, but if you see an opening, a quick spell or melee assassination can put a number of casters in the dirt, so keep that consideration always on your mind.

Even if you never use it, the point is that this threat of assassination still keeps your opponent playing with it in mind, focusing on blocking LOS (especially with colossals) hanging back, camping more and so on. Just by making certain risky plays too dangerous to attempt, eZaal’s hefty stack of souls/focus not only serves to keep you alive and your models effective, but can serve as a dangerous deterrent to certain crucial caster plays.

The final thing to note here is to really try and keep your battlegroup both safe and open at all times. Having 10+ transfers is all well and good, but if you don’t wipe the beasts with handlers you’re just going to leave them open to frenzies every turn, as well as leave yourself with few viable transfer targets in the first place.    


Mistake checklist

– Don’t forget Righteous Vengeance (going from a SPD 8 caster to SPD 4 sucks)

– Don’t SPEND the whole stack on Transference if it leaves you open (duh)

– Don’t SAVE the whole stack for transferring if you’re not in danger and other models need it (also duh)

– Don’t overextend on the offense (there’s no point throwing away 30 models on a given turn and getting soaked in souls if you’ve got nothing to do with them in turn).

– Don’t get too cocky on the defense (don’t stand in stupid places, forget to leave your beasts open or expose them to huge numbers of transfers for no reason, don’t take more damage than you have to)

– Don’t waste time (the beauty of this game plan is simplicity, so you should be ahead on clock much of the time, giving you additional late game pressure)

– Don’t forget your spell/melee assassination (always look for openings, math it out vs. their caster defenses, remember the non-linear 21-23″ threat range for spells, 13″ or so for melee)


Overall Assessment

As you can see then, simple, effective playstyle. Sit around in the midfield on 10+ transfers, let the models that need to boost away, camp and clear the zones while you threaten/wait for an assassination. You’ll notice I barely needed to touch upon the spell list in this analysis, and that’s because although those tools are useful in a pinch, the fact that they come up so rarely means they shouldn’t factor much into the thought process on 90% of turns. If you pull this off effectively, your own models should be efficiently killing most things with ready access to boosts, and yet killing them in turn is only serving to make you stronger.


List construction

While not being a particularly complicated caster to play, eZaal nevertheless has some rather complex list considerations to balance out that makes actually creating a balanced list a little tricky. Really, most eZaal setups come down to balancing between 3 major things:

1.) Constructs

These are mostly for the feat turn, as his feat does exactly nothing for the rest of the army. While most would say it’s important to not build an entire list around a feat (well, I suppose unless you’re playing his tier where you have little choice) I would say it’s probably important not to ignore it either. At a minimum, eZaal himself will always benefit from the feat, and I would say that Hakaar is definitely on the right side of the cheap/awesome equation to make him a really strong candidate as well for some of the reasons I’ve discussed already.

Beyond that, looking at the current Skorne range, it comes down to whether or not you want Ancestral Guardians and/or Immortals (+UA). Either way, both take up a decent chunk of points so you will need to carefully balance their inclusion with how many points you need free in the rest of the list. Immortals really want at least one statue (Hakaar will obviously do) for the speed boost, and Ancestral Guardians (more so with Hakaar as well) desire a modest supply of souls, which will have to be balanced around eZaal’s own demands and how many you have in the list.

At the low end then, we’re looking at a mere 4pts for the awesomeness that is Hakaar. Beyond that, you could easily end up spending closer to 20 for everything above, and even as much as 30 in tier (which I won’t discuss much further, but mentioning it for completeness). I probably wouldn’t go all out though personally – either Immortals or AG’s for my lists, and then Hakaar, keeping the cost from 10-14pts and giving me enough mileage for the feat.

2.) Living Infantry

You need at least some of these for Reclaim (which is a pretty important ability, I would argue) and in conjunction with Direct Spirits, they also help load up any statues that you’ve taken. Like all warrior models in the list they benefit from Transference too, so generally living infantry will be the bulk of any eZaal list to do the bulk of the heavy lifting as well as feed the soul machine on eZaal himself.

Really the only tricky thing to balance here is cheapness vs. effectiveness, because obviously the more souls the better, but you still want to have an effective fighting force no matter what. The problem with the cheap troops is that most of them are cheap for a reason, and trying to cram excessive numbers of them into a list just to have a hefty supply of souls means that you often struggle with things like quality attacks, durability, utility and so on. Clearly you don’t want to pour all your points into dirt-cheap living infantry then, as while it’s nice to have Transference + a boatload of souls, you still would really rather be turning decent attacks into excellent with the spell, rather than bringing mediocre ones up to acceptable.

So, I would say a happy medium is key here, and shooting for a list that focuses on having at least 20-30 souls is probably a decent balance, remembering of course that even some f your key support pieces can still contribute to this number. Again though, remember that while you can hit this target on a budget by reaching for the real budget items like Karax, Slingers, Swordsmen without UA etc, some of medium priced models (Nihilators) and expensive ones (Cataphracts) are also fantastic choices for all the normal reasons Skorne players love them so, and giving them access to Transference only increases their effectiveness. I try to shoot for roughly half my list here, looking for at least 2-3 full units + support and around 20-30 points.

3.) Battlegroup

We’re still playing Hordes, so we need at least 2-3 beasts as a minimum, even only for fury generation and eating up the warbeast points. However, there are two big reasons and a handful of smaller ones that we need to take into consideration when finishing up an eZaal list.

First of all, as we’ve noted earlier, eZaal can easily have an absolutely astonishing number of transfers, but all that won’t do you any good if you don’t have a healthy (and empty) battlegroup to pass hits onto in the first place. People always seem to overlook this fact in trying to build eZaal lists the way that pZaal ones were built, because a battlegroup with only a couple of utility lights really limits the personal durability of your caster (something pZaal isn’t even going to compete with, given his fragile old-man stats, 7 fury limit, important spells, soul converter…etc.). eZaal’s personal durability is kind of important as you’ve probably gathered by now, but as you’re only as resilient as the health of your battlegroup, we need plenty of beef here to take those big important hits.

Second of all, being primarily an infantry oriented caster with no direct ways to bust through opposing ARM, the battlegroup is pretty much the only armor cracking that you’re going to get. Even the most infantry oriented factions out there frequently have battlegroups of their own to crack, and with the relative popularity of colossals/gargantuans you’ll probably want at least one hard-hitting heavy in your back pocket. On the flipside we don’t want to go overboard in taking heavies either, as the other stuff we’ve noted above tends to come first and eats up most of the remaining points.

Then there’s all the smaller reasons. Skorne has some great animi on utility beasts like the Krea, Raider (shooting lists) and Shaman (if a Cryx drop to strip debuffs). Many of these beasts also have other tools we want, such as the Shaman granting extra spell range (added assassination) and things like the Brute or Tiberion giving us valuable Shield Guard. Models like the Sentinel, Raider, Shaman and Drake are wonderful ranged killers as well (+ Mage Sight), which makes them valuable at picking off key models without having to necessarily commit to fighting in melee. Finally, many of these models are more resilient than infantry no matter which way you slice it, making them valuable for body blocking, jamming, holding zones and so on. Currently, I’m taking Tiberion, Krea and a Shaman (if room) to fill this role. 20 pts


The Build

So overall, this is where I’m at right now, but as eZaal hasn’t exactly been out that long it’s something that is still very much subject to change:

eZaal +6
– Tiberion 11
– Krea 4
– Shaman 5
Max Nihilators 8
Min Incindiarii 6
Min Incindiarii 6
Min Paingivers 2
Tyccom 3
Ancestral Guardian 3
Hakaar 4
Gobbers 1

Basically the idea is to incorporate many of these elements I’ve described above, bringing a strong complement of living infantry, constructs and battlegroup while sprinkling in some of the more necessary elements of support. While most of the list is fairly standard, one thing that some people have asked about is the use of Incindiarii, which is primarily a matchup consideration, generally excelling into the lists that eZaal wants to see. Aside from thinning ranks and tackling high DEF troops at range, Incindiarii are durable enough to trickle souls throughout the game, while also simultaneously being able to fight well in melee also thanks to Transference.

However, the other build I’m very interested in (but sadly don’t have all the models for just yet) is something closer to the following:

eZaal +6
– Tiberion 11
– Krea 4
Max Nihilators 8
Max Incindiarii 9
Max Immortals 8
Min Paingivers 2
Shamblers 6
Tyccom 3
Hakaar 4
Gobbers 1

Basically the statues swap for Immortals to decrease some of the thirst for souls, while still taking advantage of the feat. It’s got a bit less battlegroup support so you have to play it carefully, but the addition of Shamblers lets you double dip on the recursion while letting you have more bodies on the field than the previous list. It’s a little rough around the edges at the moment (no points free for the Immortal UA for instance, unless you swap the Tyccom and Gobbers for him and Saxon perhaps?) but you can see the basics are there.

Fortunately, eZaal is also on ADR! While this won’t be much help in the long run, it has let me experiment with different choices for the slots, and work out quickly what I want to take in various matchups. In either case, it allows me to take an Agonizer (something which is clearly missed in both of the lists!) and play around with either the unit choices or battlegroups:
–  In the first build, I quite like leaving Bloodrunners and Cetrati here as my other favorite infantry choices, but saving a few points at the end to swap a Drake for the Shaman is also stellar considering the kinds of lists he wants to be taking on.
– In the second build, things like the Task Master and Immortal UA are “duh” choices, and it’s probably worth putting the Shaman back in. That leaves 9 points (after the Agonizer remember) but I honestly haven’t played around with it enough to say what the list truly needs at that point, so I’d probably throw in another unit and call it a day.


Conclusion

So having given this guy some actual table time, I think I can definitely say that I’ve found him surprisingly interesting as a caster to run play. Once you correctly balance out his varied list construction considerations to come up with something functional, I think some players out there will find his very deliberate, methodical playstyle quite rewarding, and quietly satisfying to push around the table. eZaal is actually a much more interesting guy to play than he looks on paper, and I think that as people get over the lack of initial “flashiness” and start to temper their different expectations, they can get a start to play more effectively to his strengths.

So while it might still be early days, he’s definitely an interesting caster to me and somebody I can see myself playing a lot more of in the future. In fact, the pairing of eZaal and Makeda3 on ADR is proving somewhat irresistible to me right now, and this will definitely be a space to watch as I begin to test them further still.

But, until next time… 🙂

Intro

Ah the Iron Lich Overseer. Definitely the ugly duck of the Cryx family, the Iron Lich Overseer (ILO) brings a lot of unique abilities to the table, and yet, is chronically maligned pretty much across the board. In typical Lazarus fashion then, we’ll give this piece a bit of an extensive review, going what it does, how one is supposed to use it and what lists can we use it in.

As our only jack marshal option, the ILO a medium based model fundamentally designed to make managing the focus management of Cryx jacks easier while providing them with extra delivery and backup melee options. What we’ll soon find however is that the ILO is anything but simple; directed in his usage by the unique nature of Cryx jacks and balanced against his nearest competitors in the battlegroup or Aiakos led alternatives. As usual, Battlecollege will go over all the basics, http://battlecollege.wikispaces.com/Iron+Lich+Overseer, but we’ll soon find that this is a very complicated piece to understand.

Overview

Well, what can we say about the model and its stats? The ILO is actually fairly hardy for a solo, boasting 8 boxes (above average) DEF 14 (solid) and ARM 16 (again, solid for a solo). SPD is the usual Cryx standard at 6, and the MAT is a fairly average 6, although at least it’s boostable as we shall soon see. At 3 points a pop these guys aren’t cheap when you factor in the cost of a jack, but they’re at least moderately more survivable than the average solo, which is pretty essential given their battlefield role.

Weapon: Fell Staff

Like its name suggests, the Fell staff is a big pokey stick with reach. With a decent POW of 13, the fell staff can generally crush most infantry with ease, and it’s magical for those annoying incorporeal models that might get in the way. Aside from the usual uses of a weapon with reach for jamming and free striking purposes, what’s important about this weapon however is the way it interacts with the ILO’s soul taking abilities, which we’ll come to in a moment.

Magic Ability (7): Dark Fire (*Attack)

The ILO has 2 magic abilities, the first of which is a fairly standard fireball spell with RNG 10 and POW 12. As with the same rule on the Combine, Dark Fire allows the ILO to gather a soul from any destroyed living models (regardless of the proximity of other models, woot!), and then put those souls to use, as we’ll see a little later on.

Magic Ability (7): Cloak of Darkness (*Action)

For one round, the ILO and any warjacks it controls (while in base-to-base with it) gain Stealth. The ability sounds simple, but actually it really isn’t. First of all, because the ability is a *Action, if you’re using it you’ll largely be confined to walking speed, and any jacks you bring along will face a similar limitation if they want to benefit. Second, because of the “while within” clause, any enemy movement abilities that can separate your pair will want to be carefully considered as they can bypass this defense. Finally, note that this is (sadly) only models that the JM controls, so it will have no affect on any battlegroup or other jacks in the army… including, amusingly enough, jacks bolted to another ILO (!).

Ability: Soul Taker

Like many Cryx models, the ILO can gather souls when living enemies are popped within 2” of it, up to a maximum of 3. During the ILO’s activation, it can then use those souls to buy attacks (in melee, no additional dark fires) or to boost attack/damage rolls. Fairly standard stuff by itself, but there are a couple of interactions that are fairly neat. For instant, there is the old “pseudo-thresher” trick, where as long as the ILO can reliably hit and kill, it can clear it’s melee range by using the newly gathered soul from each victim to continue buying attacks. Generally though, you’ll want to use your magic abilities rather than the initial melee attack, but it’s nice to have. Finally, there is no requirement for the ILO to do the killing himself. So long as you don’t need his own abilities that turn, running him close enough to where your models are doing the killing is sometimes a great way to get him loaded up. Particularly when we consider…

Ability: Soul Matrix

The final component in his soul gathering abilities, this ability essentially allows warjacks under his control (and in his 9” CMD range) to spend souls sitting on him during their activation. Like having Soul Taker themselves, these jacks can use the souls to either buy attacks or boost. This ability is actually fairly neat, as not only does it provide a use for any leftover souls on the ILO that he doesn’t need, but allows him to directly fuel the jacks using his own combat capabilities. Providing your ILO can keep reliably killing things while staying safe each turn, warjacks can happily benefit from the souls along with the jack marshal bonus (below) and any Siren power-boosting (as none of these things count as “focus”) to operate in much the same way as a fully loaded heavy.

What’s also neat about this ability is that the souls don’t vanish if they aren’t used that turn. Any souls that aren’t needed can be put away in this “battery” and stored again for later, allowing jacks to potentially get a full load of souls on a turn they need it and output far more than even a fully loaded jack. My record so far is 5 focus worth out of a single jack (JM bonus, Siren Power boost, 3x Souls) but you could potentially get even more running something like a Harrower who can use souls of his own! When marshaling jacks with Soul Drive (Inflictor/Seether at the moment), getting the equivalent of 3 focus every turn actually isn’t all that difficult though.

Ability: Jack Marshal

A whole series of rules that you might want to revisit in the Jack Marshal (JM) section in the main rulebook. Basically what you need to remember is:

  • You can control up to 2 jacks, but they don’t count as being in a battlegroup.
  • No marshalling characters, and they have to be from the same faction. Boo…
  • If the JM dies, the warjack goes Autonomous, not inert (a very different story compared to losing Aiakos for instance).
  • Every jack under the JM’s control, during its activation, gets one of the following: a free run/charge, a free boost, or a free bought attack. In most circles this is known as “pseudo focus” because it is used in much the same way. However, unlike real focus, you can’t use it to Imprint, shake effects, use power attacks, and so on. Finally, if the JM is fleeing, knocked down or stationary you don’t get this benefit, so work those things out first before activating the jack in question.
  • Providing he isn’t running 2 jacks, he can reactivate inert (or autonomous) jacks and bring them under his control. This is quite useful if running Aiakos to pick up the battlegroup if he dies or reigning in the new jacks created by Dark Industries, but otherwise will rarely come up unless playing a multi-caster game.

Note that unlike some JM’s, the ILO doesn’t have a Drive, so ignore this section for now.

Ability: Terror

The ILO is like many Cryx models in sharing the ability to frighten opposing models. This is an easy-to-forget ability that can occasionally be game winning, especially considering that it will often end up in melee combat. Force an opponent to take enough terror checks and they are bound to fail a couple, so this can swing a game pretty quickly if the dice turn against the other player. Bear in mind Undead, Fearless and other similar abilities that ignore this altogether.

Ability: Undead

Like many Cryx models, the ILO is undead, helping to keep him safe from numerous terror inducing effects as well as the many abilities out there that only affect living models. As Cryx players, we all know how this works, so moving onto…

Ability: Commander

Like most Commanders in Cryx, I’ve honestly not had this ability come up with any kind of frequency. Obviously this only affects our non-fearless troops (i.e. most of the living) and they have to be both taking a CMD check in the first place and lower than CMD 9 to actually benefit. Still, when it does come up it’ll really save your skin, as failing that CMD check can have drastic consequences for the models in question in making them considerably less effective. Like Terror, just make a note of it and keep an eye, as while incredibly situational, it can also be a complete game-changer too.

Ability: Circular Vision

An even more situational fluffy ability, and one I haven’t had come into play. Theoretically there are a couple of uses, from jamming more models in your melee range (and clearing them out in a 360 circle using the “pseudo thresher” trick above) to charging at an odd angle despite somebody sneaking off behind you. It does make free striking a bit harder at times though, as models won’t be exiting your melee range through crossing your front arc, so keep that in mind if burying him in a pile of infantry or using him to block a charge.

Gameplan:

Alright, well we can kind of get a basic picture of how this model works, but we’ve got some way to go yet before we can understand how it fits (or doesn’t) into a regular Cryx list. Typically the gameplan of the ILO is fairly straightforward though. In the early turns, the ILO will walk slowly up the board and pop Cloak of Darkness (assuming Stealth is meaningful in that matchup) with any jacks running off into B2B with him to share in that protection. Once he gets close enough, the ILO then switches to Dark Fire/melee to pick up extra souls, and the jacks use the JM bonus plus any spare souls to fuel their own combat capabilities. The ILO is fairly hardy to most regular infantry attacks, but don’t get carried away, and steer clear of anything boosted, weapon masters, enemy heavies and so on. Obviously if Stealth isn’t particularly useful in a given setup (e.g. vs. Legion) then the gameplan is fairly similar, but if there aren’t any souls worth gathering (also frequent vs. Legion) then focus on running or charging for extra threat instead and go from there.

Ok fair enough, so that’s the basics. And in fact, if all you wanted to know is what the model does, then you might as well stop there. But for the more advanced readers, we’ll want to consider not just what the model does itself, but how it interacts with other models on the battlefield. For the rest of this article we’ll focus on the jacks that it can take and which how it interacts with each of our casters, but for we’ll go over strategy and uses with the rest of the list over in Part 2.

Warjacks

First of all though, we’ll have a look at each of the available options that the ILO can run, and assess each of their main uses. Before we start though, I’d suggest that for those looking for some more general Cryx jack thoughts that they read the following thread: http://privateerpressforums.com/showthread.php?193911-Cryx-Heavies-An-Experiment

This should give you considerable background into the nature of Cryx jacks, including both their fundamental strengths as well as the weaknesses that they face. Doing so will give you a much greater overview of what we’re dealing with here, because discussing the ILO and the role it plays will inevitably require some understanding of where Cryx jacks stand in the overall current meta.

So what options do we have for our JM to marshal? For ease of time, convenience (and because this is not an overview of each jack, but simply how they operate under the ILO) I’m going to break these up into different categories.

Bonejacks: Arc Nodes (Deathripper, Ripjaw, Defiler, Nightwretch)

Without the ability to actually directly arc anything, attaching bonejacks to the ILO isn’t usually a very popular choice given the fact that you are inevitably paying points for something you cannot use. For a lot of casters they are going to be far better off taking the jack in battlegroup so they can take advantage of the node, but on the off chance that you are playing a caster who doesn’t have much use for arcing and you particularly like the weapons they have to offer, you could always give it a go.

With the melee versions (as with any fast jack that wants to get in melee) you’ll probably struggle to make the use out of the stealth ability, so either focus on soul collecting or bear in mind the reduced speed so the chicken doesn’t leave the ILO in the dust. The shooting variants then will find it easier to take advantage of this ability, but they do still move at a base SPD higher than the ILO so that is still something you will have to consider. Realistically though, this option is just too expensive and doesn’t pull nearly enough weight, so is probably something you will forgo.

Bonejacks: Assassin jacks (Helldiver, Scavenger, Stalker)

These little jacks are much more to our taste, as we tend to get a significant jump in melee potential vs. the melee versions of the arc-node chickens for a comparable price. I label these jacks “assassin” jacks not only in terms of caster killing potential, but also because they make great hunters of UA’s, solos or squad leaders to cause CMD issues, sniping out key abilities and generally spot-removing other pieces you really don’t want to deal with.

Unlike running these jacks in battlegroup, you’ll probably operate under a very different focus. The limited control area of the ILO for these jacks (yes, even the Stalker, because the ILO doesn’t have a control area) keeps them from roaming too far and typically going after casters. Coupled with the fact that doing so often requires being fully loaded at the very least (which is a bit unreliable) means that going after casters tends to be more off the table.

2 of the jacks (Stalker and Helldiver) also don’t really need the protection of the ILO providing Stealth, so you have to decide if he is still worth paying the points for if they won’t see the benefit. The Scavenger on the other hand tends to benefit a bit more, often by being able to charge in, murder something and sprint back to the ILO providing him Stealth. Personally, I still really don’t like running bonejacks all that much and prefer running them in the battlegroup. This is something I’ll probably have to go into during Part 2, because this write-up is already getting pretty extensive!

Helljacks: Slayer Chassis (Slayer, Reaper, Corruptor)

Now we’re talking. All of these jacks tend to be a bit more on the brittle side and so really appreciate having Stealth on the approach. For the two that have a gun (Reaper and Corruptor) the ability to boost the hit and damage roll of the shot is all you really need when shooting much of the time, so the ILO can often happily provide that without a hitch. Along the same line of thought, the Slayer can be used in a similar such manner, dropping a double boosted combo strike on something can happily ruin even the most durable of targets. The Slayer is also a great piece in terms of bringing very versatile melee combat, using its 3 initials to kill multiple infantry or using 2 “focus” for a boosted power attack given it has access to the full suite. Otherwise, fully loading any of the jacks to take down heavies or casters in melee is certainly still a possibility, but again, this has to be carefully balanced against the desire to maintain stealth which depends greatly on the matchup.

For the price of a heavy all of these jacks are fairly cheap, and the nice thing about all of them is that it’s rare they will have nothing to do on a given turn, regardless of whether you only have 1 focus (JM bonus), 2 (+power boost OR soul) or more (+up to 3 souls). This lets them engage damn near any target on the table and rarely waste a given turn. Stealth also covers one of the biggest problems in these jacks in that they are so brittle and susceptible to being crippled, so while it isn’t always meaningful in a given matchup, it’s still nice to have access to in order to screen them on the approach.

Helljacks: Seether Chassis (Seether and Inflictor)

When we consider the Seether chassis, we’re basically getting a 1.1 version of their cheaper helljack cousins, paying a bigger price but getting a lot more in return. Both jacks generate their own single point of focus, which can be a fantastic choice if you don’t have/want Sirens around to provide it, or simply because you don’t like the unreliability of the soul mechanic. The Seether only increases this further with the Aggressive ability, meaning that marshalling one of these gives you happily 3 focus worth without any extra steps involved (I suppose more if you want to count the chain attack?), and souls can potentially give you up 6 focus worth of attacks. Even more so than the Slayer chassis, the Seether is highly susceptible to crippled systems, so that Stealth really does come into play as well. The main point of contention is of course the price, because for what you pay, the alternatives of a standard Slayer (if you don’t use all the rules) or Wrongeye and Snapjaw (if you just want ranged resilience and focus efficiency) should be considered for a lot less.

The Inflictor meanwhile is arguably one of the best marshalling options. For its price it’s one of the more durable options available to us, and further protects his ILO buddy using Shield Guard. Offensively it keeps much of the same focus efficiency, but trades raw output for valuable abilities like Reach and durability against free strikes or retaliation. Because of the JM bonus in combination with its own focus, the Inflictor can happily put double boosted hits on something, returning the possibility of crit poison with each successful attack that is made. Finally the jack sits in the middle of the road on price, and the utility of Shield Guard often gives it something valuable to be doing even when not directly contributing to the fight.

Helljacks: Crabjack Chassis (Harrower, Desecrator, Leviathan)

Now we get into the really pricey territory. All 3 crabjacks are supremely flexible, with shooting options to put shots downrange when hanging back under Stealth, and solid melee punch when eventually committing to the combat. While all three of these tend to be quite expensive we also get a bit of extra utility bolted in, with slightly extra ARM (at the price of DEF), a better grid, Pathfinder and Steady to help keep them up and moving without being crippled on the approach or bogged down in terrain.

Fundamentally each of the jacks plays a very different role. The Leviathan is by far the shootiest of the bunch, trading any additional capabilities for raw shooting power to put down range. As the most focus hungry option of the group, getting the jack 3 or more focus to play with every turn is usually highly desirable… which can sometimes be difficult to manage if our Siren/souls are unavailable and yet we don’t want to diminish any combat output. Sometimes this tradeoff is difficult to manage which is why many prefer the Aiakos provided alternative for this jack, but we’ll come to that later on.

The Desecrator is one of the most focus efficient of the three, gaining an extra focus from the proximity of Banes and also potential extra attacks in melee via Crit Shred. This means that the jack can happily double boost its own weapon without any outside assistance, and interestingly, the gun does have some nice utility with the ILO itself in using the Scather to keep him safe from troops or potentially reap up further souls for him to use. However, the short ranges on both the gun and melee (due to his low SPD and no reach) mean that the jack has to manage distances carefully to get the most out of its offense without getting caught up in the retaliation.

Finally, the Harrower is the most melee oriented of the three, bringing the all important reach and thresher for clearing out piles of troops while also gathering more souls of his own to potentially get a huge number of attacks against any harder targets. This keeps the jack focus efficient at all times, particularly because those souls can be stored for later use. In terms of shooting the Harrower isn’t exactly a slouch either, being able to happily double boost his gun as noted as well as bringing ghost shot to pluck key offending models out who thought they were safe deep in terrain or out of LOS.

While all the crabjacks are undoubtedly pretty solid under the ILO, they fundamental problem here is one of cost. This is something we can go into later when discussing advanced strategies, but it’s worth keeping a close eye on because they represent a very sizeable investment.

Casters:

So now let’s take a look at which casters will consider taking the ILO. If we’re honest, the ILO is generally a fairly poor choice in Cryx so many of them are going to give it a miss. Still, a lot of people really like the model or want to give our 3 headed lich a try, so those people are going to want to know how it fits in with the caster options out there and what benefits to look for to get the most out of it on the table. Clearly then, we need casters that:

– Aren’t draining our soul resources. The ILO isn’t too bad on soul consumption, but it does like to have access to them in order to keep the jacks fed. When you consider that more souls = more focus for your heavies (and more killing power out of him in a solo capacity) we want casters who take on matchups where souls are available, and who aren’t bringing lists that directly compete for those on the table.

– Aren’t battlegroup oriented. These casters are generally very poor choices for the ILO. Part of the main reason you bring one is to run jacks and because by doing so, they get more benefit under him than they would be under the caster. Battlegroup oriented casters skew this horribly in the direction, forcing you to not only pay for the ILO, but also lose out on many of the benefits they’d normally have.

– Can improve the odds of survival. The ILO is fairly hardy model (for a solo) but losing him does still leave the jacks a bit out in the cold and that’s something we’ll want to take into account. Generally I’ve found this isn’t too much of a problem given the effort required to remove him vs. the gains in doing so, but still we’d much rather keep him alive as long as possible when we can.

– Can improve the odds of hitting/damaging: With his desire to pseudo-thresher up anything in melee or pop off Dark Fire into some unlucky fool, buffs and debuffs are great to drive up the ability of the ILO to gather souls, in turn translating almost directly into focus for the jacks.

– Opportunity cost: The biggest problem the ILO tends to face is cost, both in terms of his own investment and that of his jacks, is the points cost. Any casters that find themselves quickly scrambling for any remaining points in a list are very unlikely to have room for this kind of sizable investment, and will quickly drop him in favor of other choices. What we need then are those that are either flexible enough to run nearly anything, or can at least go “all in” committing to this approach.

As a quick disclaimer, note then that only a handful of these casters will probably end up using the ILO given the reasons above, even if it is an workable choice with many of them. Also note that as a release in Wrath, the ILO is excluded from all the tier lists aside from those specifically discussed. With all that being said, let’s have a quick rundown on how it can be used:

pGaspy – A fairly average choice, as both Parasite (debuff) and Scything Touch (buff, tends to have better uses elsewhere though, but Crit: Corrosion can provide some souls) help the ILO do damage to harder targets and ease gathering any souls. On the feat turn pGaspy can randomly grant the ILO souls too on any nearby models as those free hits (POW 8 with Parasite) rack up any kills, and Breath of Corruption has a chance of doing the same if enemies move into the template. In return, pGaspy tends to be very selfish with his focus and generally hates feeding much of it to jacks in favor of his superior spell list, so the ILO generally doesn’t cost him much in turn.

eGaspy – Like pGaspy, Parasite benefits the ILO doing damage, but eGaspy does suffer in having competition with the ILO over souls, so intelligent use of Daemortus will be required. Despite this, both Excarnate (with Biles) and Death Knell can cause a large number of casualties among opposing infantry, so depending on the matchup, there might be more than enough to go around. Caustic Mist clouds also block the ILO or any jacks for LOS, both preventing retaliation from melee troops and also protecting at range for any non-stealth turns. On the flipside though, you might consider that because the clouds already deliver your jacks, the ILO isn’t as needed to be providing them stealth. Overall though, like pGaspy, the ILO also doesn’t lose out on any battlegroup benefits and eGaspy is very selfish with his focus, so you aren’t giving up much in the way of jack support by including an ILO in your list.

3Gaspy – Generally a poor choice for the ILO, as running jacks out of battlegroup deprives them of Mobility. The other main issue for him is that he competes with souls with Vociferon, with any good turns of soul gathering giving Gaspy3 the chance to feed any battlegroup jacks himself, and conversely, any turns of poor soul gathering frequently means the ILO is unlikely to do that much better than Vociferon or Gaspy3 would instead. Despite this, as he lacks the clouds of his predecessors, the ILO is occasionally useful for providing Stealth and still benefits from Carnage and Scything Touch (again, better targets) can help him deliver damage on the offensive front. Hex blast can help strip important upkeeps, and Bone Shaker can randomly get the odd soul here or there for a relatively low cost.  Ashen Veil isn’t the absolute worst thing in the world for the ILO, but again will probably have better targets. As a more recent release, his is one of the few tier lists that can actually include the ILO, and in fact gives it a handful of benefits with an extra starting soul, extra deployment and a free necrotech for every jack. Generally though, due to the problems in competing with Mobility and the general battle over souls, I’d probably give this caster a miss.

pDeneghra – pDenny vastly upgrades the ILO’s killing power with her various debuffs, and unlike Gaspy, is generally flexible enough to run almost anything well within her list. Her feat only continues this theme, giving the ILO not only better chances at killing opposing models, but also a degree in protection given how limited the enemies retaliation will be the following turn. Influence situationally can be amusing, giving you the odd soul if they are in your melee range and you don’t have any issues hitting. Ghost walk can help with using the ILO as well, preventing him from getting jammed or helping him keep up with any jacks by avoiding being bogged down in terrain while benefiting from its protection. Overall, her focus pool is quite tight so any jacks go unsupported in her army, making the ILO not the worst choice in the world if you want to play her this way and give any jacks you like to run a little help. Like all things pDenny then, really it’s an okay choice, but pretty much everything is in Cryx for her.

eDeneghra – Honestly, nearly every spell can find some use with the ILO. Like her predecessor, she brings a lot of debuffs to help the killing power and Ghost Walk to help with navigation, but she trades out raw debuff power for much greater board control capabilities. Curse of Shadows helps him move through enemy models, and Marked for Death gets rid of annoying things like Stealth or LOS (he ignores Incorporeal anyway) to ensure his combat abilities aren’t hampered when trying to gather souls. Her feat is also a big help, helping you to get him and any jacks in position or in sitting safe from the opponent’s army because of stealth and being safe from melee for a turn. Really the only serious loss is Pursuit, as any jacks run out of battlegroup can no longer benefit from this ability, so you’ll want to think hard about which ones you choose. Likewise, Hellmouth also presents a small bit of Skornergy, because it removes from play and thus denies any souls, but vs. harder targets it can certainly be nice to cluster up multi-wound infantry or harder targets when trying to set up a long range charge in melee. Along this line of thinking, both Seduction and Eclipse can contribute some interesting plays with charges and potential souls, while Venom racks up kills to fill up with souls (especially when corroded). All in all, a reasonably solid choice, and like her predecessor, she does run many things quite well. I will say though that she is one of the few casters I have run with the ILO in the past to a moderate degree of success.

pGoreshade – Generally pGoreshade doesn’t do a lot for the ILO. Soul Gate and Shadowmancer both want jacks to be in battlegroup to take advantage of it, meaning that any jacks out of battlegroup are paying more resources to get something they could have had for free, all for the possibility of an extra focus. Mage blight is nice to save you from any spell based attackers and Hex Blast can further this spell hatred by removing crucial upkeeps (and do some damage/kills for souls). Meanwhile, Deathwalker debuffs DEF or minimizes opposing retaliation, even if she is difficult to position in this setup accordingly. All in all, pGoreshade is a pretty poor choice to run with the ILO given his largely battlegroup focus, so I’d definitely give this a miss.

eGoreshade – Like his predecessor, eGoreshade provides a strong battlegroup buff in Phantom Hunter that we will directly be missing out on when taking the ILO. However, given Phantom Hunter is mostly useful on a ranged platform, it isn’t the worst thing to be missing out on if it will end up having better targets, particularly if continuing his theme of stealth (Banes + Occultation) and freeing up any extra focus. Like the casters mentioned above, Curse of Shadows helps him get around the table and do more damage, while Hex Blast helps you manage opposing spells and animi. Continuing this trend, eGoreshade has Arcane Consumption, which can deter further spell casting or potentially yield you a soul if you’re in the right place. Sudden Death is actually a fairly interesting choice, potentially spoiling you with out of activation movement to catch up to your jacks or potentially get a kill off for a soul the following turn.  Finally, the ILO can hilariously be returned under his feat, which while limiting him on the turn he arrives, is still a surprising move which could have some potential uses. All in all an ok choice, but it generally doesn’t make the cut in favor of more infantry and a battlegroup shooting heavy to take advantage of Phantom Hunter instead. Finally I should mention that it breaks his somewhat popular tier list, so fans of going that route with eGoreshade will want to look elsewhere.

3Goreshade – With the already discussed Scything Touch (to up damage, but corrosion kills can = souls) and Occultation (to keep it safer via Stealth), 3Goreshade does have a few things to offer the ILO, even if these abilities might have better targets. Sadly the jacks under the ILO cannot benefit from Infernal Machine and he can’t himself benefit from Mockery of Life, meaning you might want to focus more on those elements to take advantage of the spell list.  You can however use the feat both to increase your chances reaping souls, or could always sacrifice the ILO himself under it if it helps you pull off an assassination. Generally though, I think opportunity cost and the loss of Infernal Machine will have you focusing on other options.

Mortenebra –  With almost all of her abilities (Jump Start, Interface, Terminal Velocity, Overrun and Spectral Steel) oriented around her battlegroup and the ILO being prevented in her tier, the ILO is an incredibly poor choice for Mortenebra. In short, you have to really really want the stealth (even then, the tier provides it for turn 1) in a given matchup, because Terminal Velocity will usually exceed any kind of focus savings that being a jack marshal would provide, nevermind her other obvious battlegroup benefits. Obviously it can still benefit just as any model can from her feat and Void Gate shutting things down, but I would say that in general almost anything else will be a much better use of points.

pSkarre – Buffing both accuracy (Dark Guidance) and power (Feat), pSkarre can seriously help the ILO reap any souls, while using the latter portion of her feat to shield him in turn. Generally she also has 0 use for any jacks in battlegroup and can be quite demanding on her focus to keep her safe, so outsourcing any melee jacks (to take advantage of her spell list) can be worth it if you’d rather save the focus or give them stealth to survive on the approach. Any continuous corrosion from her Blood Rain will generate some souls, but given the rare use of this spell it’s not really worth mentioning. In general though pSkarre tends to be a bit more of an infantry caster, so while I think the ILO could have a place in some more jack oriented skews, doing so will generally require a radical departure from the normal list she runs.

eSkarre – Like Mortenebra, eSkarre does have a lot of battlegroup support, meaning that any jacks on the ILO will lose out on Admonition, Perdition and Seas of Fate. eSkarre can still benefit the ILO and any associated jacks with Black Spot to up their offensive potential and help to gather souls, while her feat can play the role of keeping them safe defensively to either save a turn of using stealth or defend from other kinds of threats. Black Spot can also in turn save focus by generating additional attacks, freeing up the souls that would normally be spent doing so, and finally Blood Rain could randomly grant a few souls through any casualties she causes. Like most higher ARM models it doesn’t mind having Death Ward to stay alive, although picking columns for damage won’t apply and something else will probably want this ability instead. In the end the ILO is still a very poor fit for eSkarre, generally not providing enough focus efficiency as an alternative to justify the loss of battlegroup support even if it does provide them Stealth.

Terminus – As another one of our infantry casters, Terminus isn’t really all that fond of bringing jacks as is, let alone wanting to invest in further support in them. His primary benefit to jacks (Ravager) only affects those in his battlegroup, and the ILO potentially steals souls that he might prefer having for himself via the feat or Annihilation. While he does benefit from Shadow of Death and Malediction, those things tend to be somewhat situation for this model. Finally, Sac Pawn can be used to pass hits onto the ILO, but those hits are usually somewhat dangerous and better passed onto a regular grunt. In the end, I think Terminus is better off with more infantry or support given the difficulty of finding the points to fit a jack or ILO in his list.

Venethrax – Venethrax in many ways has similar problems to Terminus above, in that there is little direct synergy and they can compete over souls and the interaction with Soul Harvester. The feat can play well with protecting both the ILO and any jacks though (particularly on a non-stealth turn) but beyond that his spell list is largely situation, perhaps yielding the ILO the odd soul (Blood Rain/Hellfire) or protecting against certain kinds of models (the threat of Dragon Slayer melee into a beast and Lamentation for some casters). In the end then combination is fairly middling, as like Terminus above Venethrax generally has little business dabbling much in jacks and generally has a long list of things to take first that leave the ILO behind.

Witch Coven – In many ways the best (and most would argue only) way to run the ILO, particularly in their No Quarter tier list, Machine Minds (note: this will be discussed in part 2). Both Black Mantle, Occultation and the feat help keep the ILO and any associated jacks alive, while Curse of Shadows, Ghost Walk and Veil of Mists all help with delivery. While the Coven have Occultation, generally the ILO can let them freely use this spell on something else and instead help alleviate the demand for Stealth by providing it themselves. The only real downside of running jacks on the ILO is that they lose access to the Coven’s high focus pool as well as Infernal Machine, so generally you will want to think about the tradeoffs in switching out of battlegroup as with 3Goreshade above. Really though if we’re honest, any time you even think about using ILO’s with the Coven, you will almost certainly want to do so in the context of their theme, so we should probably leave most of that discussion for another time.

Scaverous – Like eSkarre, Death Ward keeps the ILO going longer (though again, better targets), while Feast of Worms and Icy Grip can help the ILO with debuffs to enhance its offensive prowess and keep certain opposing attacks at bay. Again, Ghost Walk is nice to have in avoiding free strikes and Excarnate (plus the associated Bile purge) can occasionally glean a soul if lucky. Really the primary benefit both for the ILO and any jacks he runs is telekinesis, enhancing threat ranges, lowering DEF and protecting them from charging heavies all for one neat price. Finally, as a spell slinging model the ILO does benefit from the feat to help land that crucial dark fire, which can either help you feed a jack or give added oomph to an assassination. Interestingly enough, his tier list is also one of the few which permit the ILO (again giving him potential free souls and Necrotechs like 3Gaspy above), but overall I find this a difficult theme to work with in going in this direction due to the many limitation of the build. In the end Scaverous is certainly one of the more flexible casters to possibly run an ILO with, but the list of things he’d rather have first is long indeed and usually keeps him on the shelf.

eSturgis – Sturgis is again slightly battlegroup oriented with the benefits of Convection and the second portion of the feat, but in general being focus strapped means that there might be room anyway to run one if you were determined to take more of a focus on the jacks. Parasite and Occultation are both good for all the reasons previously discussed, and his feat also tends to cluster opposing models, which is great for the ILO in attempting any pseudo threshers or bringing models into soul gathering range. I’d say though that still none of this particularly makes the ILO anything but a fairly average choice.

Other Synergies: There are a LOT of numerous ways the ILO can be help/be helped by your list, most of which we’ll try to focus on in Part 2 when we start to consider list composition and his overall strategy though. However, we’ll give the basics a quick review for now, and then can get onto detailed explanation later.

Jacks: We’ve pretty much exhausted our review of this section above, but I will make a quick note for any additional jacks you run out of the ILO’s control. Generally this will include any arc nodes on the caster (useful in tandem so the caster can lend their support), as well as anything that can slam/push things to knock down targets as the ILO jacks don’t always have a reliable source of power attacks. Otherwise synergies include Ripjaws (Vice Lock -2 DEF, prevent movement), Stalkers (Grievous wounds to prevent tough/healing), Reapers/Malice (Drag) that are all worth considering. On the flipside, try to carefully position around any jacks that might compete for souls, or at least keep that in mind when planning out your turn.

Units: Aside from the great infantry slaughterers like Biles, (who work wonderfully in providing souls or simply dealing with the overwhelming numbers that heavies and ILO’s alike tend to avoid) we have Bane Thralls (Dark Shroud) Black Ogrun (More Drag,) Bloodwitches (positioning for Entropic Force and Dispel on a key model, clouds for further denial, Incorporeal to prevent getting in the way + Unhallowed), Blackbanes (Incorporeal again, and fire when applicable, but watch the RFP), Mechanithralls/Necrosurgeon (reaping corpse tokens), and the Withershadow Combine (Puppet Strings, Unbinding for removing upkeeps).

Solos: Machine Wraith (possession of key targets before/after heavies beating), Pistol Wraiths (board control vs. harder targets), Raider Captain (Critical Knockdown), Skarlock (any spells he has access to), Warwitch Siren (Power booster mainly, but also Venom to clear troops, Shadow Bind to debuff or prevent movement or Seduction to further force opponents models), Darragh (Death Ride to keep models out of the way and get another inch of movement, Beyond Death for survival), Gorman (Further debuffs and of course Smoke!), Madelyn (extra positioning for him or other models to get out the way), and Orin (spell protection and chain lightning to remove key intervening models).

Plus there are many more!

Conclusion:

The ILO isn’t exactly the best model in the Cryx arsenal, but this should at least give the more curious among you a nice overview of his general capabilities. In terms of covering the basics I think this should shed a lot of light on something that rarely climbs off the dusty shelf, but the more curious among you might want to stay tuned for Part 2, where we go a lot more into the advanced uses of this model. Until next time 🙂

Intro 

Now it might come as a surprise to some people (generally because I’m somewhat quiet on the matter), but I also play Retribution. In fact, I have done for quite some time, and although I’m not very active on the Retribution community, I am fairly experienced in playing the faction. So when I was helping out somebody the other day with building Rahn’s tier list, the thought occurred to me that not only is this one of the builds I’m most experienced with, but it is very poorly discussed in any kind of extensive detail.

So in typical Lazarus fashion, it’s time to change all that! Let’s take an in depth look at Rahn’s tier list, Fires from on High (FFOH), from No Quarter #44.

Please note – As always, this is my take on the list, not necessarily a be-all-end-all mandatory way of running it. While I will be doing a very broad and general overview, please understand that I will also be arguing for the list to be run a certain way. I will explain my choices, but if you disagree…well…YMMV.

Overview

First of all, what is it? Well like most No Quarter tiers, you’re generally going to want War Room, or to trawl through the internet to dig up the basic details. But in the interests of time and sanity:

Warjacks – Non character jacks with Shields, Discordia

UnitsHouse Shyeel units (aka, Battle Mages), Houseguard Units, Stormfall Archers

SolosHouse Shyeel solos (aka, Magister + Artificer), Arcanists, eEiryss, Sylyss

Tier 1 – Only the above = +1 FA for Shyeel Units/Solos

Tier 2 – One or more Hyperions = Heavy jacks and colossal get +2 SPD Turn 1.

Tier 3 – One or more Stormfall Archers = Stormfall get Advanced Deployment (AD)

Tier 4 – 2+ solos with Magic Ability = Warjacks with Arc Node (Phoenix/Chimera) get -1 pt cost

Fairly straightforward stuff. But we’ll break it down in turn:

Tier 1 – Generally, pretty meaningless. While it’s nice to spam Shyeel stuff (and they get a lot of mileage out of his feat), I generally feel that if you want to go in this direction, you’ll probably want to stick to the tier in the Forces of Retribution book. We’ll quickly see running through this list that there just isn’t enough spare points to actually start spamming these kinds of models. So, moving on…

Tier 2 – Now we’re getting to the good stuff. Also amusingly however, I think part of the reason why Fires is actually kind of underplayed is that this tier is quite a steep requirement. Hype is a solid colossal (not ball busting, like Stormwall, but still good). If you’re a new player though, you probably won’t own one, as it’s quite the investment. A lot of people also don’t see Hype particularly synergizing with Rahn. Well I’m here to make it abundantly clear – those people are very very wrong.

The main benefit of Tier 2 is that your battlegroup easily hits the midfield turn 1. When we’re considering talking about a SPD8 heavy jack with reach (Phoenix) that’s pretty good… When we’re talking about a SPD 7 colossal, that’s downright scary. A lot of this comes down to playstyle which we’ll cover in the specific unit breakdown, but just note that this is huge for early game threat, scenario pressure and massive repositioning. This isn’t just about getting up the board though. A lot of people forget that with this kind of SPD you can totally refuse flank with a colossal for example (I did recently vs. Butcher) and that kind of move totally changes the way we play the game.

Tier 3 – AD Stormfall. Again, this is huge. Getting AD opens up a lot of plays for these guys, with everything to moving + Snipe shots to carpet bomb the enemy AD line with drifted AOE’s to simply getting your Brutal/Star Strike hits in one turn earlier. Consider that with AD + Move, your Stormfall are already further up than they would be in a normal T1 run, so this is excellent for getting into that great position early on and unleashing hell.

AD is also nice because you can deploy after everything else, ensuring your Stormfall always get to line up vs. their ideal targets, avoid certain dangerous elements and so on. In short – threat range and target optimization. The important thing to remember is not to get carried away – sometimes you can end up being TOO close and either jammed or killed. Be mindful of threat ranges and you should be fine.

Tier 4 – Decreased cost on Arc Nodes. Depending on your setup, this will usually pan out in two different loadouts, with Chimera(s) (5-10 pts) or a Phoenix (9 pts) being your main choices. The tier requirement is pretty low, as while Shyeel solos are far from godlike, they’re still pretty solid and actually one of the few cheap non-character options to fill in points anyway (after your other requisite choices). Considering that 1-2 points you trim off the list by them just being there, it’s not hard to see them as being valuable. In cases where we aren’t bringing a unit of Battle Mages (Mittens), they’re also one of the few models using the feat, so that’s nice if you still want to leverage it to fullest potential.

The list

Ok so let’s put it all together. At a minimum, we’re locked into at least 27 points (Hype, 1x Stormfall, 2x Magister) to reach Tier 4, and we’re still without some clear essentials (at least a Node and 1-2 Arcanists). What I’ll do though is put down my own list, discuss the main strengths and features, and then we can later get into a choices breakdown to explain why each of the selections has been made.

Adeptis Rahn Shyeel (*6pts)
* Hyperion (18pts)
* Phoenix (9pts)
Houseguard Halberdiers (Leader and 9 Grunts) (7pts)
* Houseguard Halberdiers Officer & Standard (2pts)
Stormfall Archers (Leader and 3 Grunts) (5pts)
Arcanist (1pts)
Arcanist (1pts)
Eiryss, Angel of Retribution (3pts)
House Shyeel Artificer (3pts)
House Shyeel Magister (2pts)

*Objective = Effigy of Valor*

Total = 50 (Tier 4)

Strengths and Features

Some of the stuff in here is obvious. Some of it might seem questionable. But before we look at what made the cut and why, we need to understand what this list is doing and what it’s good at.

Early game threat – As you might have noticed by now, this list is surprisingly quick out of the gate. Both jacks hit the midfield T1. Houseguard can either Shield Wall 9” right away (Reform), or run 12” after them. Stormfall and Eiryss both have AD. Should anything else need to get up there it really can, with Rahn TK’ing any key models early on (after all, beyond Polarity Shield, he has little else he NEEDS to do with that focus, especially if your Arcanists would rather power boost the jacks vs. running). But we’ll get to that a bit later on…

Not magic reliant – This I think is one of the key strengths of running Fires vs. say, a normal non-tier Rahn (or worse, his book tier) list; it really doesn’t mind magic hate all that much. Should you find yourself in a strong magic hate setup (particularly those that prohibit offensive spell slinging…), this list can simply shrug and carry on. After all, Rahn can spend much of his focus upkeeping, allocating to jacks and simply Force Blasting/TK’ing friendlies on an as needed basis. The Artificer can usually play somewhere in your backfield escorting squishies up the table (and so almost always out of range of magic hate) and the Magister carries on as a slam-bot (Combo Smite woot!) and generally makes himself a nuisance. So while it’s annoying to not be able to TK/Force Hammer opposing models, you have so many other options compared to many of his normal builds that give you plenty to be doing every turn.

Scenario pressure – Conversely, even MORE so than his usual builds, Fires is all about the scenario pressure. Your strong threat ranges get you stuck in quickly early on, and from there both battlegroup models and incredible at keeping those zones clear (Sparkle Cannon/Combustion for infantry, POW 19+ hits and Open Fists for harder targets). As usual, Rahn’s spell list is fantastic for clearing zones (Chain Blast for troops, Force Hammer/TK for harder models and Force Blast just for shoving people out the way), but special mention has to be made when running Hype, because a Force Blast coming off of that can catch a huge array of models and be very difficult to shift in turn. When you consider now that Hype will also have Polarity Shield (unless it’s better served on Halbs) that makes him incredibly difficult to break in turn, even more so when you consider the Arcanists waiting in the wings… Then we get to the other nasties – both the Artificer and Magister are great at moving other models, Eiryss is great to shut down jacks trying to run/charge in or remove key buffs before hand, and Halbs are both fast and deadly to do much of your mainline combat or jam people from getting in further still. This isn’t necessarily about winning on scenario by the way – even if we can’t score, we want enough pressure to force an opponent to commit and let us start getting ahead on attrition.

Resilience – This might seem surprising for a Retribution list, but Fires isn’t actually all that flimsy. We aren’t running any of the usual Mage Hunter squishiness, and with a durable battlegroup and shield wall mainline troops we can certainly afford to take a few hits coming in. Even the Stormfall who are generally fairly flimsy really appreciate the fact that everything else is roving far ahead of them to keep them from being jammed up, and can unleash carpet bombing on the center field to clear them out in turn. With the huge base screening, Artificer, Polarity Shield and Force Field to protect any squishies from stray hits, Fires has a few tricks up its sleeve to keep the key things safe, at least until they do their job.

Assassination – While not perhaps as prominent as his usual builds, Fires still packs in a mean assassination threat. After all, there is nothing stopping eEiryss or Rahn doing their usual thing to set up other models to get the killing blow, and we have the requisite threat ranges and firepower to put many casters in the dirt if they aren’t too careful. Generally, you won’t be looking for assassination opportunities out the gate – rather, you will be focused on putting in the scenario pressure, using attrition to wear them down and finally taking the shot if the opponent overextends or gets desperate later on.

Anti infantry – We’ve got 8 AOEs from Stormfall, up to 2x Chain Blast on Rahn, Hype’s big sparkle cannon and 2D3 shots, the Phoenix popping combustion and Halbs can mangle anything that makes it through. Infantry (especially the less brick-ey kind) really suffer against this kind of list, because they struggle to make their presence felt adequately in the midfield while surviving the torrent on approach. When just about every single model can tear them apart almost trivially and you’ve got excellent ability to snipe out key synergistic pieces, it gets really ugly…

Anti heavies – …but not as ugly as this list is for cracking heavies. I absolutely adore Fires at taking on beast heavy matchups (my record into Legion now is really quite something) because not only do you have great tools to break them apart, but you can keep them busy for a very long time. Again we have Stormfalls dropping brutal shots, Hypes massive POW in melee or RNG, the Phoenix as a second heavy and Halbs coming in with MAT 8 boosted POW 14 on the charge (mini-feat). eEiryss is also around to lend a hand with disruption into WM, pulling defensive animi off Hordes and stripping buffs which like to find themselves on center pieces and colossals. When you start to factor in Rahn’s spell list though it begins to get a little silly, with Force Hammer/TK making heavies trivial to hit and that much further away. TK/Polarity shield also makes it very difficult for those kinds of models to get off the charge, meaning you can deny them opportunities to make themselves useful so long as you keep mindful of their threats. Both our magic solos have movement tricks of their own, and the Arcanists give you both the added POW to hurt them in melee and repairs to patch up the retaliation afterwards.

Choices breakdown

Ok so it all sounds good thus far, but we want to assess why each thing made the cut and then we can look at a few variations. We’ll start with the obvious stuff, and begin working our way down…

Hyperion = 18pts  

Well we need him for the tier, so duh. But Hype is actually a fundamental component of the list. He generally parks himself in the midfield, blasting things away with guns  or even wrecking harder target in melee while being difficult to kill in turn thanks to his 60 boxes, the strong board control elements of the list, Polarity Shield and the Arcanists around to stitch him back together. Aside from raw offensive and defensive might, Hype plays a strong part in the list’s scenario game, where we use him as a valuable massive source of Force Blast to clear objectives, sweeping and hurling key pieces away with his mighty open fists or simply getting in the way for contesting models using his giant base. Fires turns this colossal into an absolute monster on scenario, and he’s a big part of why the whole thing works. Try not to lose him unless you have a way to win shortly after!

2x Stormfall = 10pts

Again we need one set anyway for scenario, but I find it pretty much mandatory to double down. Apart from being one of the bigger tier bonuses, Stormfall play a valuable role in this list, both for giving us a strong shooting component to waste infantry and harder targets alike and clearing out the middle ground with ease. Landing TK (or better yet, Force Hammer) on something before dropping brutal is a great way to remove harder pieces from a distance, get fire on enemy clustered troops or even pull off the odd assassination. And when it comes to killing troops, in conjunction with your battlegroup, not much survives this much abuse in the midfield when you’re laying down the AOE’s turn after turn.

Phoenix = 9pts

As I alluded to earlier, Rahn really wants an Arc node. While he isn’t dependent on offensive spell slinging, it’s a great option for him to have in either direct damage (Force Hammer/Chain Blast) or moving key enemy pieces at will (Force Hammer/TK). The ability to also recast Polarity Shield or TK a friendly is not to be overlooked either. Now personally, I rate the Phoenix over the option of 1-2 Chimeras (discussed later), and ultimately that comes down to valuing combat potential in this list over extra angles on those spells. In this list, the Phoenix gives us very valuable combat capability, with the ability to break harder targets with his sword, shoot up something at range when hanging back (especially after TK/Force Hammer gets involved) or combusting the little guys in melee when trying to empty out the zones. Combine all of that with fire and long threat ranges as a SPD 6 jack with reach, and there’s just about nothing he can’t kill or threaten seriously at the very least. Outside of direct combat capability he’s also quite the mean scenario piece, being moderately durable as a heavy with Phoenix Field to patch him up, and packing both reach and an open fist to stop enemies getting in the zone or ejecting them once there. All of these are enormously useful to our list, and should the worst happen and Hype bites it before the game is over, you’ll really appreciate that extra heavy waiting on the side.

Halberdiers +UA = 9pts

These guys are our mainline combat unit, tackling everything from infantry to even harder targets once we use the minifeat and charge. Halbs however are also fantastic scenario presence in this build, with Reform + Reach being a wonderful combination to lock down opposing shooting, keep enemies from reaching the zones or even blocking angles for harder targets to get in on the other elements in the list. With Set Defense and Shield Wall (+ the option for Polarity Shield if we need it), Halbs can actually be quite troublesome to remove, and they rarely get wiped out before at least taking out something more important in turn or allowing some other element in our list to do its job. Remember that these guys also have Ranked Attack, so they aren’t getting in the way of Stormfall once locked in and yet they can screen them very well in turn. These guys are the second part of the anchor in tandem with Hype in the list, making the center ground very difficult to hold onto and punishing anybody who wants to try. Finally, in any setup where it’s more valuable to hang back, letting the Artificer follow after them (with TK help) and moving up in Shield Wall presents a 15/18 statline that is generally more trouble than it’s worth to deal with, and yet rarely something they can ignore.

2x Arcanist = 2pts

These guys are such an auto-include when running Ret jacks it isn’t even funny, and as one of our sources of filler, they fit in nicely to the list. When we’re taking a mandatory Hyperion though these guys get even more important, giving us both the necessary +2 POW needed to break those super durable targets or giving us double repair options (aka, both redundancy and extra healed boxes) while cowering behind his base. In any cases where we can’t/won’t be getting any focus from Rahn, even a single power boost is useful to give either jack a boosted hit/damage (particularly when shooting the main gun) for breaking something crucial. Generally I have one duck behind Hype, while the other sits somewhere between it and the Phoenix so he can lend either one support. (ideally near that Artificer or objective, see below) Keep them safe because they are really nice to have around.

Magic solos (Artificer + Magister) = 5pts

Our last tier requirement, and generally a good one for what we hope to do. These guys are really your problem solving little toolbox, often activating later in the turn and cleaning up whatever our mainline combat models didn’t crush. Both are bringing ranged movement tricks (Magno Blast and Force Bolt/Whip Snap/Combo Smite) to open up our options on the field as well as 2 initials with beat back for when we need to clear that last offending model out the zone. In the case of the Artificer, he generally hangs back (not optional with his lower SPD!) and keeps our squishies safe until he’s needed, which is nice when we’d rather avoid Force Field if we can to squeeze out every drop of focus. The Magister meanwhile usually goes for the far side of the scenario, keeping him out of any trouble. This lets him intercept both annoying incorporeal models (typically Feralgeists/Machine Wraiths) hoping to contest the center and also smash any wayward solos or stray troops models hanging on the flanks. Typically I also have him operate with the Phoenix in near tandem, allowing him to whip snap it forward/back, potentially slam an enemy heavy or  simply clear out any survivors that the big guy fluffed a roll on.

eEiryss = 3pts

Finally we come to eEiryss, quite possibly the best solo in the game. Really people can sing her praises to death in WMH, so there rarely comes a time where we need to justify her inclusion, but we do want to discuss her role in the context of this list. eEiryss is really the final piece of the puzzle here, solving so many little difficulties it isn’t even funny. Making life absolutely miserable for opposing jacks is pretty much her keepsake, but when you factor in our Force Hammer and other knockdown/threat reducing strategies, it really is a tricky combination for the opponent trying to keep heavies useful in the game. This only gets more important when we consider enemy colossals, because while we can’t keep them disabled with the gun, running at them from way downfield to shut them down next turn is fantastic to keep them from pulling their weight in taking the midfield. Upkeep removal is also essential in this kind of list, both removing annoying buffs for units trying to muscle into the center (Iron Flesh/Defenders Ward being key offenders) and wiping debuffs on your battlegroup/halbs respectively that keep them doing anything useful on a given turn. Remember, Hype is immune to disruption, so having her strip off that offending item is a life saver under the right circumstances. Then there’s just wiping those key utility spells and animi that get in the way of your gameplan – Banishing Ward, Admonition, Respawn etc etc. She’s a brilliant fit for the list, but she is the only character, so we’ll need to think about that in variations (below).

Effigy of Valor

This is generally quite an optimal objective for Retribution, with a lack of Fearless and quite a unit heavy composition. In this list it just generally makes a lot of sense, with fearless countering the very real presence of terror/abomination troops trying to get stuck in the center and Cover for any squishies being the preferred choice of defensive benefit (blast/knockdown immunity not being in quite such demand with this kind of build).

Variations and ADR

So this list is made up of many interlocking parts, but we do have a few variations to discuss. I’ll also make a quick nod to ADR here (which I feel is another article all by itself) to say that some of the below do make my list of specialists, so a lot of them do bring some value to the list even if they don’t make the cut for the core build when specialists aren’t available. In many cases then, it isn’t really anything to do with how good these models are, but just that other models might play a more valuable role for what the list hopes to do and we simply don’t have the points left over for more specialized alternatives. So for those of you running ADR, I’ll make a note of what made the final cut and why.

Chimeras  (5-10pts)   

Getting a discount from the tier 4 benefit, Chimeras do look quite appealing as an arc node choice. This is generally a very solid route to go if you’re looking to shave points off the cost of the Phoenix (when running 1) or to simply get more angles/threat on your spells (when bringing 2). As I briefly mentioned earlier though, I think the combat capability of the heavy jack is more valuable in the end. Remember, with Hype to feed 3 focus every turn, Polarity Shield to upkeep and generally wanting more of our focus on nearer midfield targets, it just isn’t as necessary to have quite such an emphasis on offensive spell capability… so we tend to want models that can actively contribute more in combat there instead. In terms of running with Chimera(s) AND the Phoenix, I think that while it’s nice to have the extra arcing options, it isn’t as essential to what the list fundamentally wants to do and that overall there are better choices for your points.

Note – I do bring 1 in specialists with ADR all the same. It’s sometimes nice to have the cheaper option when trying to fit in any of the below, and in some matchups, a heavy ends up being more of a liability.

Battle Mages (5-10 pts)

This one comes up a lot. A lot of people have asked whether I mind not having Mittens for Rahn’s feat or the scenario play, and funnily enough this is what I used to run before. While Mittens are great for both leveraging his feat and clearing off the zones, I find them ultimately unnecessary in what the list is trying to accomplish. Apart from being a bit too fragile to duke it out in the center zones given the weapons of today’s meta, in the end I opted for Halbs to give me the versatility of both Reach and Reform to get people truly locked out beyond the zones. Halbs also do pack a bit more muscle, and while both are dependent on a single big turn (Feat/Mini-feat respectively) I found Halbs more useful after suffering dwindling numbers and packing a bit more ARM to keep them getting to that state. The other part of this equation is one of meta – high DEF and low ARM is definitely not what it used to be, and easy to find elsewhere in Retribution. Mittens generally mean doubling down on Rahn’s magic capabilities, being fantastic in setups where his magic can excel and somewhat mediocre should they encounter spell denial on the table. Considering the strength of this build as a generalist setup, that’s something I personally prefer to avoid.

Note- I bring 2 of these units in specialists, because if anything summarizes the above, it’s “matchup dependent”. This makes them fantastic to have available on the side, but not something you want to get locked into every time. If I need eEiryss in the other list, I also drop her, 2nd Arcanist and downgrade the Artificer -> Magister to get a unit of these in. It’s not really an “ideal” setup, but it’s perfectly serviceable and sometimes it’s more important to have the little elf free!

2x Magister/2x Artificer (4-6 pts) and/or Soulless Escort (1pt)

Generally you’ll use these setups for 3 main reasons: 1.) You have a preference for one kind of model over the other 2.) To adjust the fiddly point setups or 3.) To replace eEiryss if she’s needed elsewhere (above). Obviously the strength here is doubling down on any of these kinds of model for redundancy and coverage at the expense  of added versatility in your toolbox. Theoretically, I have nothing against either of these setups  for any of the reasons above, I just personally have one of each to give me the maximum number of tools available for any number of situations that might occur. With the Soulless Escort, he’s great either as filler for a leftover point or to replace an Arcanist, sticking him on Halbs as spell defense to give you added insurance into certain kinds of matchups.

Note – I bring these guys in Specialists to round out the last few points of sideboard. This gives me the option to shift things around in the list as needed, filling in spare points or covering more of my bases. Often for example I’ll use a Souless and Magister to swap out the Artificer, who’s defensive capabilities aren’t always needed or when he’s too slow to be useful in a given setup. This trades shooting resilience for spell defense, as well as giving you a Magister for each flank.  

Sylyss (2pts)

Sylyss is brilliant, no doubt about it. Extra dice when slinging offensive spells for a spell caster and free upkeep for that battlegroup, what’s not to like? Well actually the main problem is that he’s a character, and while he is a great choice for Rahn, he’s often an even better choice elsewhere. With a lot of your pairings Sylyss is going to be more important in the other list, as while Rahn appreciates these bonuses, other casters kind of want them more… The other tricky bit is actually making him fit, which generally means yanking Eiryss or downgrading the Artificer + dropping second Arcanist to squeeze him in. Doing either of those things isn’t exactly comfortable, as while his benefits are nice, I’d argue you often gain more from the alternatives in any case. Probably the biggest YMMV option in the variations, but generally nothing to really even think about unless running something like eVyros tier, as he’s rarely free in either case.

Rahn

So where does he fit into all of this? Actually using Rahn is kind of simple funnily enough, with the main considerations being where to find a place to safely stand (especially as he’s often dry on focus), how much to allocate, and what he wants to do in terms of spells. Realistically you have 7 focus to be working with (Polarity Shield being kind of important). Force Field is nice and all, but you’ll probably find yourself not needing it in the majority of games or simply having better uses for the focus.

More often than not, one of your jacks (usually Hype) will be gobbling up 3 each turn for raw combat capability. The other 4 then tends to go into some combination of Telekinesis/Force Hammer/Force Blast. Which of these spells to use depends totally on the battlefield situation, but you primarily want to be looking for either ways to gain some attrition advantage or clear out the center field. Each of these spells have completely different merits, so it’s just about which one offers you the most in terms of center board control or allows you to gain the upper hand in a straight attrition fight.

Allocation isn’t too hard. Hype will rarely not want the full 3 with a solid output in either ranged or melee, and the Phoenix is either going to want 3 (if pounding on a heavy), 2 (if double boosting the gun) or 0-1 (power boost, if just running, jamming, single boost into a solo, combustion or whatever). It’s very intuitive to see how much to give these guys, so you get the idea.

Generally, feat turn comes about T2-T3, and you’ll typically use it on a Force Hammer/TK turn vs. a key opposing target. His feat is very minimal in this kind of setup (unless running Mittens) so it doesn’t really matter so much when you use it as what it enabled you to do. Use it when you can’t/won’t boost, and bonus points if your magic solos get some output too.
Otherwise, keep him safe. He’ll have Hype roughly somewhere in front of him and the Cover is often there on Valor if need be. Really he has very little reason to get stuck in there himself, so just be mindful of any long range threats and work on usual caster protection. Should it all go wrong he’s still a very viable late game threat, but knockdown/TK on a stick and high Focus will do that…

Weaknesses and Matchups

So we’ve gone over a lot of the strengths, but let’s spend a little bit of time going over the things you need to watch out for. Fires is a pretty generalist setup, able to take on a bit of everything, but it does have limits…

Assassination ­– Rahn himself will generally be running pretty dry on focus, and while he’s generally not the worst in terms of statlines (with Force Barrier, plus clutch Force Field as well), he’s still at risk if you don’t keep your head on straight. In general you’ll mostly be relying on a distance and Hype’s base to deter the worst of opposing threats, followed by prioritizing particularly dangerous opposing pieces. This isn’t so much a weakness for the list, but certain strong assassination opponents will make you want to play a very different game and perhaps leave more camp on Rahn accordingly. This in turn brings us to…

Tight on resources – As part of this, a key problem is that while you have a solid focus stat, there’s also a lot of demand for where that focus wants to go. Both Hype and the Phoenix get pretty hungry as heavies when going for harder targets (or shooting), and that spell list is pretty fantastic too. Some turns will be just great, where it’s obvious which abilities to use. Other turns you’ll want to do it all at once. Prioritizing correctly will be very necessary here, as well as overlapping redundancy in your roles in case a key piece can’t get the job done.

Really strong skews – Fires is a fantastic generalist build, with a tool for pretty much every occasion and able to deal with most things out there in moderate number. The problem comes with the super extreme builds on each end of the spectrum, because they make life a struggle when you can’t deal with a certain “type” of model spammed to excess, or your opponent can prioritize out certain tools you have too quickly and reduce your number of viable answers in short order. The trick here is to focus your attention and do the same. If for instance the opponent has way more ARM than you could possibly crack (e.g. Fist of Halaak), you need to focus on killing only what you need to until you can pull out a scenario or assassination victory.

Pairing

Well funnily enough, almost anything works here. After all, his list is a little melee, a little shooting and a little magic, with a very strong scenario play backed up with both respectable attrition and assassination capabilities. You have a lot of tools that can take on a bit of everything. Generally I’d probably look at which skews you are the most comfortable with, or if a particular meta is full of something and go from there. Finding high DEF more of a problem? Bring Ravyn. Find yourself in a severe high ARM spam meta? Bring Ossyan/eVyros. Really hate facing Cryx? Bring Issyria/Kaelyssa/Ravyn. What you really want is Fires to cover the bad matchups of the first list, letting him be your “go-to” drop and bring a pair that focuses on asking tough questions or dealing with specific problems you have in your particular meta. Bonus points of course if your pair doesn’t need eEiryss, as she’s the only character in the list. As you can see then, you do have lots of options.

Finally, I’d say a lot of people aren’t comfortable running Hype in both lists (as you’re guaranteed to get the colossal cracking opposing list), so you might want to go in another direction with your pair. As few Ret builds really NEED Hype to function, again your options are pretty open. Personally, I’m pairing him with Kaelyssa at the moment (ADR) as the two complement each other pretty nicely and don’t have a lot of overlap, but I’ve tried him in a number of setups and most of them work fine.

Conclusion

Well that’s pretty much my overview on what I consider to be a really strong tier list! I really love this build, because it’s one of the few available in Ret that can simultaneously ask tough questions (Can you protect your caster and still effectively contest scenario) while simultaneously packing in a lot of answers. I might in fact be tempted to say that as a generalist setup, Fires is one of the few that can feel quite comfortable in almost any matchup, and the recent ADR format only emphasizes this still further.

Hey guys!  We’re into a new year, and let’s start this off with a new battle report from Lazarus0909! 

———-

Intro

So, it’s battle report time! With an upcoming event requiring at least a single Tier3 list at 50, I was initially a bit lost for ideas. After all, Fist of Halaak only really takes me to Tier 2, and I was lacking the requisite minions to run Rasheth at higher points effectively. Fortunately, a buddy of mine bought me a Mammoth for my recent birthday, and I was dying to give it a go (you’ll have to excuse the partially assembled state for ease of painting). The end result – my take on Makeda3’s tier list, Armageddon.

While not exactly one of the most popular tiers in Skorne (mostly due to the models it prevents, including, for some bizarre reason, Molik Karn), there are some nice things worth mentioning. +1 to go first and Advance Move on the caster gives you a good early aggressive ploy, and the soul on Marketh isn’t a bad thing either (mostly to boost Eliminator or upkeep Vortex). Obviously the cheaper Mammoth here is the real sell, offsetting the slightly lackluster beast points while shoring up the ARM cracking and ranged firepower. The rest of the points I filled with a combination of support for the Mammoth (Krea, Raider), staple choices (Gladiator, Paingivers) and a nice brick of Cetrati, to help take the initial hit so the slower pace of the rest of the list can counter-attack.

My opponent was decked out with a full complement of Legion beasts led by eAbsylonia. In this instance, my opponent wanted to try a few more lessers with a Raek to replace the infantry utilized in a normal list, while keeping to her strong warbeast-oriented battlegroup. The lists then:

Points: 50/50
Tiers: 4
Makeda and the Exalted Court (*2pts)
* Basilisk Krea (4pts)
* Cyclops Raider (5pts)
* Mammoth (19pts)
* Titan Gladiator (8pts)
* Aptimus Marketh (3pts)
Cataphract Cetrati (Leader and 5 Grunts) (11pts)
Paingiver Beast Handlers (Leader and 5 Grunts) (3pts)

Vs.

Points: 50/50
Absylonia, Terror of Everblight (*5pts)
* Raek (4pts)
* Shredder (2pts)
* Shredder (2pts)
* Shredder (2pts)
* Angelius (9pts)
* Carnivean (11pts)
* Scythean (9pts)
* Typhon (12pts)
The Forsaken (2pts)
The Forsaken (2pts)

Deployment

We played with the scenario Outflank, with the center of each zone loosely marked by the 2 pennies for simplicity. I lose the roll off (2 vs. 5) but my opponent elects to take second turn, in order to grab better board positioning later on.

Early Game Shot

The picture above was taken just after my first turn (after my opponent had activated and moved up eAbsylonia), as we forgot to snap a picture of deployment. As you can see here though, I positioned the Mammoth and Gladiator off by the bubbling swamp to be less hindered with Pathfinder, leaving the Cetrati over on the other side in order to give me presence to contest the left zone. Marketh, the Krea, Makeda3 and the Raider all took the middle, while the beast handlers followed up behind.

Skorne Turn 1

Skorne T1

A fairly uneventful turn, with Makeda3 casting Vortex and Paralytic Aura on herself before charging up the center. Most of the rest of the list ran up to get into position, with the Gladiator passing Rush onto the Mammoth to offset his slow SPD 4 for an early game positioning. Finally, the Krea put up Paralytic Aura on that flank, charged across the table, and Marketh kept close behind.

Legion Turn 1

eAbsylonia cast Fortify on Typhon, Spiny Growth on the Scythean and moved up slightly behind the rocky outcropping. The Shredders put up Tenacity on her and the Angelius, before the Angelius ran into the left zone. Seeing an opening, my opponent put up Spiny Growth on the Carnivean and went for a failed charge + assault shot, dousing Makeda3 and her bodyguards in flame (he was in range by the smallest of fractions). The left bodyguard was reduced to a single box while Makeda3 was unharmed. The remaining shredder and Raek moved up, and the Forsaken wiped fury off the Carnivean (this would become important later).

Legion T1

Skorne Turn 2

At the start of the turn, I was wishing I had an Archidon or Molik Karn to try some aggressive retaliation, before retreating Makeda3 off to safety. But as it so happens, it probably turned out for the best… After upkeeping Vortex, the Raider put snipe on the Krea and missed the boosted shot at the shredder. The Krea then went up and shot at Typhon, paralyzing him (DEF 7 and can’t run/charge) before putting up the Paralytic Aura with the remaining fury. Makeda3 pulled back a fair amount, putting Snipe on the Mammoth and a second instance of Paralytic Aura on herself. Cetrati then enveloped around her and the bodyguards in the Aura for protection, also shielding her from harm (she only had 1 transfer, but the Aura plus her hardy stats was plenty).

Now it was time for the Mammoth! Unloading the siege battery into Typhon, he didn’t roll so hot, but 11 damage wasn’t too shabby so I was more than happy to take it. After that, the rest of my force repositioned, hoping to deny a good Conferred Rage opportunity and survive the feat turn. Marketh went over to the far left behind the Cetrati, the Gladiator moved up further into the swamp and the Paingivers wiped away most of the fury.

Skorne T2

Legion Turn 2

Sensing the best chance for a feat turn, my opponent took the gamble and hoped for the best. eAbsylonia opened up with a quick charge over the rock, barely making it to melee range with the Raider, the only possible target for Conferred Rage. This was probably a slight mistake on my part to have him this far forward, but as I was unlikely to need the beast much after this, it didn’t matter much in the end. After some generally poor rolling, eAbsylonia was a bit annoyed to see the Raider left standing still with a small handful of boxes. This quickly proved to be a big problem, as even though she had enough fury to teleport away again, the lack of a MAT/SPD buff via Conferred Rage seriously hurt the other beasts.

Typhon then flew over the rock, easily wrecking the Raider but not having the distance to make it to the Krea without the +2 SPD. Instead, he opted to spray for some token damage on the Krea and Makeda3’s second bodyguard. The Scythean lucked out and was just in charge range of the Gladiator while staying in her control, handily dicing him with a flurry of stabbing blows. The Carnivean then had his share of the onslaught, again spraying for little effect but killing 2 Cetrati in melee. Again, the lack of +2 SPD was hindering the attempt to get at anything else…

With the Angelius and Raek killing another 2 Cetrati, (rolling somewhat poorly I might add, with Snake Eyes on the Angel’s charge…) the main beasts were done, leaving a lot of fury on the table (we actually ran out of tokens!). That Forsaken who was loaded turn 1 certainly wasn’t helping matters either… After that, the remaining Shredders put Tenacity up on the Angelius, Scythean and Typhon in a hope of surviving the counter attack, while one charged the Krea for a little extra damage. I thought the 2 right Shredders had a potential shot of jamming the Mammoth out of melee, but between Bulldoze and the Krea’s activation, the odds weren’t great, so this was probably the right call.

Legion T2

Skorne Turn 3

Well, I was a little sad about the loss of the Gladiator, thinking it would be too difficult to get at effectively while also staying in eAbsylonia’s control and keeping her out of the threat ranges, but what can you do. It was time for revenge!

Firstly, the Cetrati opened up with a CMA on the Angelius, maiming it fairly handily. Makeda3 popped her feat, and the bodyguards started tearing into both beasts, damaging both the Angelius and the Carnivean pretty badly. With 4 MAT 8, POW 14 (Battle Driven) boosted damage (Vortex of Destruction) attacks between them, both beasts were badly injured, allowing Makeda3 to finish them both off without breaking a sweat. With 4 fury still left on Makeda3 after the dead beasts filled her up again from the feat, I then activated Marketh, who hurled an opportunistic Eliminator off at the 2 Forsaken and missed.

The Krea then activated, used Paralytic Aura on Typhon to cripple his DEF, and took an opportunistic bite for a few points of damage. The Mammoth then activated, bulldozed the Shredder out of the way and charged Typhon. In the heat of the moment I forgot the Assault Shot, so while he handily took Typhon out of the picture, it would have been nice to have maybe done it with 1 less fury after he was left with but a single box. After that, the Mammoth rained blows down on the Scythean, who miraculously survived the ordeal in a badly maimed (but entirely functional) state.

Skorne T3

Score: Legion 1 vs. Skorne 0 (Note: Somewhere in these photos something must have gotten moved at some point, because I was contesting the left zone until now. Probably advanced something out by mistake…)

Legion Turn 3

After the loss of 3 heavies and nearly a 4th in a single round, my opponent was understandably grappling for ideas. The Shredder in front of the Mammoth frenzied on it for 2 damage, and Fortify was obviously gone after Typhon died. eAbsylonia regrouped her strength, flying over the rock again to butcher the injured Krea, before putting Fortify on the Scythean and fleeing off to the right zone in the hopes of piling on the scenario pressure.

Both Forsaken then went up and proceeded to Blight Shroud my front line. Aside from a single Paingiver, Makeda3 was the only one to take some pretty fierce damage given her stack of transfers, handing off the damage to the Mammoth accordingly. After the first bomb hit and I transferred, the combination of Battle Driven and 1 less dice due to the fury being used to transfer meant she only took a single point of damage from the second Shroud, making a potential assassination somewhat unlikely. It was then that we noted that eAbsylonia having to retreat so far away on the other flank had left the remaining Shredder and Raek on that left flank very much out of her control, taking any hope of assassinating (or killing the Mammoth via transfer after the Scythean attack) incredibly unlikely.

After giving it some thought, my opponent then tried to perform some damage control, pushing heavily on the scenario instead. The Scythean then proceeded to tear chunks out of the Mammoth, damaging it pretty badly but leaving it very much alive with 7 boxes still to go after a few poor rolls. Then, in what can only be described as both a heroic and somewhat comical effort, the Shredder on that flank bravely decided to take on the mighty beast. Rabid….free charge (Conferred Rage)…but dice -10! First swing…hit…12! 5 damage still to go. With baited breath we watched the fated dice…second swing…hit. 15… Yes, the Shredder proceeded to eat the Mammoth. (Sadly no snacking, as he was uninjured, but the image is there…)

Legion T3

Score: Legion 3 vs. Skorne 0 😦

Skorne Turn 4

Yikes! With the Mammoth unfortunately biting through the combination of a transfer, Scythean and one very hungry shredder, I was in serious trouble. Not only was that my last remaining beast now gone, but I had 0 presence in the right hand zone, and nothing really durable to put there either. My opponent was already up to 4 points, so I had to think fast in order to keep both zones away from scoring, especially as warcasters can’t contest, and there was still a very functional Scythean to contend with. It was time to get creative!

Marketh moved up to point blank range with both Forsaken, hitting them with a double boosted damage (via souls) Eliminator. Although the to hit roll missed, minimum deviation ensured I could still clip them both with the template, and one died from the subsequent damage roll. Makeda3 now moved 2”, bringing her into charge range of the Scythean, and promptly charged the shredder next to it so I could get an angle on all 3 beasts. With nothing left to transfer to, she used up all her fury buying attacks, wrecking the Shredder on the charge, the Scythean with bought attacks, and the second shredder with a Blood Boon Ground Zero (boosted damage from the Vortex). Yay!

Her bodyguards meanwhile, on the very edge of her CMD range, proceeded to carve up the second Forsaken and damage that far left Shredder pretty badly. The Cetrati advanced around the Raek slightly, Shield Walling within the zone to contest and CMA’ing into the Raek with some pretty solid damage. Hopefully the fact that both beasts were damaged and out of eAbsylonia’s control would keep them from getting too clever. So far so good.

But none of that solved my problem of what to do about the right hand zone. eAbsylonia was very much in charge range of Makeda3 from where she stood, so even I could contest the zone, I still had to stave off a full charge from a very angry, fully fury warcaster with nothing left to transfer to… With a glimpse of hope, I then ran the Paingivers into the zone, arranging 4 around Makeda3 in a little box while another headed to the side to keep the objective contested. Without any models left to kill them all and lacking reach to do it herself, eAbsylonia was in trouble. Worse still, my box stopped her from getting Makeda3 either, given the lack of reach and the placing of the bases…

Skorne T4 Score: Legion 3 vs. Skorne 2 (because my opponent’s caster couldn’t contest either)

Legion Turn 4

Suddenly the odds weren’t looking quite so good. Both of eAbsylonia’s remaining beasts were out of control, and after thinking it over for a minute, an assassination looked pretty much off the table. Both beasts were crippled a bit, and neither the shredder nor the Raek could force for their respective Charge/Rabid/Bounding Leap, making them unable to take out a single Paingiver for eAbsylonia to get in range and seal the deal. So instead it was time to try something else…

eAbsylonia charged a Paingiver on the left, neatly bringing both beasts back into control and simultaneously triggering Conferred Rage. Sticking Fortify on herself for good measure (might as well at this point, with no healthy transfer targets), she used Psycho Surgery on the Raek and the Shredder to uncripple the odd aspect. It was time to make a play for the left hand zone!

Seeing as only the 2 last Cetrati were in contesting range, the Raek activated and did his best, but at ARM 20, even with boosted damage, the right one only took 3 damage. Buying a second tail attack, the Raek did luck out and killed the bodyguard with 1 box left, freeing the last remaining shredder.

It was all down to the little guy! Somewhat wary after the ridiculous “mammoth buffet” earlier on hot dice, I knew it could all go either way at this point, and the Shredder needed both attacks to kill the injured Cetrati AND the last one (who would be out of Shield Wall for the second attack)… So here we go again! Hit… 0 damage. Hit…2 damage. And with that, we were done.

Legion T4

Score: Legion 3 vs. Skorne 4 (again, my opponent’s caster couldn’t contest.)

Skorne Turn 5

Makeda3 now stared at the flapping she-daemon before her, sharpening the Talon of Murzoul for a finale that was long past due. Having lost the majority of her army and clinging on tenaciously through one of the trickiest battles of her career, it was time to end this.

While I could have sat there and just taken the scenario victory anyway, that’s just not the way we do things around here :). A flurry of MAT 8, POW 17 (Battle Driven) attacks later…against a caster that couldn’t transfer… and the Skorne were victorious!

Skorne T5

Skorne Victory: Assassination

Score: Legion 3 vs. Skorne 4 (6 technically)

Conclusion

A very intense game that went back and forth each turn, with both of us rolling some pretty hilarious dice and playing to the best of our abilities. Honestly, neither of us made any particular mistakes, as even though the Raider and Gladiator were just a hair in charge range, it allowed me to effectively piece trade as a result. Taking the charge on an eAbsylonia feat turn from a number of heavies is not exactly easy for most lists to get through, but I was pleased that I could bait them out sufficiently on my turn and then prepare a brutal counter-attack to wipe them out in turn. I wasn’t expecting the Mammoth to go down like that either, so while his death did result in significantly greater scenario pressure that forced me to scramble as a result, I think I recovered ok in the end.

As for the list itself, I was actually shocked by how much I enjoy it. Normally I’m very much an advocate for her non-tier setup (with Molik Karn, Agonizer and Willbreaker being the most keenly felt losses here), but if you play to the tier lists strengths, it can work out very well. Between the Mammoth, Gladiator, Cetrati and Makeda3’s inherent durability, you can present a very strong front line, even more so once the Krea is factored in to give you durability at range. As a result, the list can take a great deal of punishment, and it’s nice to have opponents come at you for once rather than hoping to have Makeda3 make a desperate bid surfing with Eliminator around the table.

I did mention earlier in the battle report how I wished I had an Archidon, but I’m not sure yet if it’s the right way to go. While having the ability to Sprint is excellent (especially on Makeda3), it would have to replace either the Gladiator or Cetrati, definitely reducing my own durability and muscle in return. In the case of the Gladiator, Rush (mainly for the Mammoth) is a hard thing to give up, and the Cetrati give you a great bunker while blunting an opposing charge and giving you a unit presence on the field. So we will see how this list evolves, but I’m surprisingly content with it for now, and I heartily recommend you give it a shot.

Until next time!

Lazarus 🙂

Spotlight: Wraith Engine

Posted: September 18, 2014 by midnightcarnivalwmh in Cryx
Tags: , , , , , ,

Alright guys!  We’re back with another article from Lazarus0909!  This one talks about a piece that I feel is one of the best looking huge bases in the game!  Enjoy!

———-

wraith-engine

Overview:

So finally I got around to that long overdue article on the Wraith Engine. A hybrid combat/support piece, the Wraith Engine certainly has its fair share of problems, being both moderately expensive and incredibly squishy. DEF 10/ARM 18 might not look so bad by itself, but factor in the incredibly low number of boxes (comparable to an arc node) plus the complications involved with defending a huge base and it means that once the Wraith Engine starts taking hits, it isn’t due long for this world. As usual, the Battlecollege article: (http://battlecollege.wikispaces.com/Wraith+Engine) can go over many of the basics, and any of the more interesting abilities will be covered in detail shortly.

I’ll also mention here that as a battle engine, the Wraith Engine follows all the usual rules there, giving him pathfinder, knockdown immunity and so on. I highly recommend brushing up on the battle engine rules while you’re at it, as people STILL continually ask me if you can place the Wraith Engine (answer – yes) or give him stealth (also yes) on a regular basis.

Weapon: 2x Scything Blade

With his giant claws, the Wraith Engine certainly looks like he has the ability to dish it out in melee. Compared to a melee heavy, POW 15 is a bit pillow-fisted but he does have Dark Shroud so realistically we’re looking at POW 17 hits (and he helps others hit harder too) which isn’t quite so bad. Most of the time his POW is more than enough to chew through infantry without too much of a struggle, but you might want to think twice before you commit him to taking on other heavies (especially if it means giving up Incorporeal, the amount of souls you have to play with/lose etc.). The crucial point to compare with vs. a heavy though is that the Wraith Engine is a battle engine, so he relies on souls instead of focus to buy or boost. This has various upsides and downsides, which we’ll cover in the Soul Collector ability later, but for now keep this in mind when considering any potential melee output.

The only really complicated bit of tech here is how his weapons interact with his battle engine status. Reach lets him cover a big area, so as long as you bear those fields of fire in mind, he can actually jam a fair few models in melee if need be. Combined with his soul collecting ability he can generally get to a wide number of targets, so there should be no shortage of things to kill and tie up whatever remains still standing. Note that you don’t always have to be attacking to do this (while Incorporeal you generally don’t want to either!), as the Wraith Engine has plenty to do with his other abilities while you abuse his jamming/incorporeal status. So in the end – these weapons end up being knowing more about when NOT to use them rather than what to do with them.

Ability: Apparition

Apparition is a nifty ability that lets the Wraith Engine move 2” in your control phase. This has a bunch of uses, from the highly predictable things like getting out of the way before activation and extending threat ranges to the more obscure, with things like the interaction with the Coven’s Black Mantle/Perfect Conjunction, Dark Shroud application and pseudo bushwhack. Being a place effect, apparition is also a favorite tool to escape melee or opposing abilities that trigger on your movement, so it’s easy to catch people out if they forget you have it. On the other hand, considering it happens in your control phase it’s also an easy ability for YOU to forget as well, so keep that in mind!

Apparition could really be an article all by itself (and I’d suggest if you want some clever uses of a 2” place, check my little section on Telekinesis in the Scaverous article) but consider the general uses of Mirage, Darragh, Madelyn and so on and you can’t go far wrong.

Ability: Wraith Walker

Like eDenny, the Wraith Engine can turn Incorporeal every other turn (and also like eDenny, this is just as easy to forget!). Just remember that it takes place in the Control Phase after Apparition and you should be good to go. In general though, timing is everything with this ability. In an ideal game you’ll be Incorporeal on all the turns you need to use your abilities or most worry about survival, and corporeal on any turns that you’re attacking. In practice though this can be tricky to balance out, because anything can happen – from a model failing to die when it really should have that now needs attacking… to needing Incorporeal to reach the target you want to whack in melee anyway…

There are really 2 main approaches to this ability. The first is a simple rule of thumb; if in doubt, aim to be Incorporeal on your NON-feat turns (the turn before/after the feat). This is mostly due to the small stable of casters I’d actually use the Wraith Engine with (Coven, eDenny, pSkarre) where the feat helps a great deal with their survivability. But you can see that in many cases, the feat turn is often where you are hoping to do the most damage, so intelligent planning with your forces will allow you to kill any threats to the Wraith Engine. In the case of buff/debuff feats (either Denny, pSkarre, 3Shade/Scaverous indirectly) your Wraith Engine will also want to be in attacking to take advantage of the increased power and amp the destruction. Finally, the other advantage to this approach is that the WE is incorporeal on the turn before the feat (allowing him to position/setup) and mitigate retaliation later on (after you’ve had time to eliminate magic weapons or other key pieces).

The second approach to using this ability is to instead time his incorporeal around your opponent’s damage capabilities. For example, if he has poor shooting than you can easily afford to be corporeal T1. If you know your opponent is likely to deliver 80% of his forces into melee on T2 (fast melee) or T3 (slower melee) then make sure you have Incorporeal access then to keep him safe. A lot of armies out there have quite predictable threat ranges once you get the hang of facing those key models, so once you have a good grasp on your opponent’s capabilities, timing of this ability gets a lot easier.

Finally a quick nod to the recent incorporeal ruling: http://privateerpressforums.com/showthread.php?203662-Incorporeal-Charge-Spirit-Chaser&p=2715448&viewfull=1#post2715448. In short – enemies moving through your incorporeal models is generally a bad idea.

Oh, and I think it goes without saying – watch for magical weapons, A&H, spellcasters and so on…

Ability: Dark Shroud

Same as Bane Thralls, you know it, you love it… Enemies in the Wraith Engine’s melee range suffer -2 ARM. What’s important here of course is that not only does the Wraith Engine have a 2” melee range, but he has a much larger base to cover a wider area. Looking at the particular setup on the table, this can sometimes make it much easier or harder to get that ARM debuff in place, depending on whether the added expanse of his bubble and potentially being Incorporeal outweighs the difficulty of maneuvering around a huge base. As mentioned earlier, it also gives him POW 17 hits to play with, giving him respectable damage output vs. harder targets especially when other debuffs and souls come into play.

Ability: Unhallowed

A trap ability if there ever was one (trap in the sense of list construction), Unhallowed is best thought of as a neat bonus much of the time and little else that grants +2 ARM and blast immunity to incorporeal models within his command range. However, most incorporeal models are pretty squishy on the whole so the extra ARM doesn’t tend to make that much difference, and flankers like Pistol Wraiths/Machine Wraiths are often too far away to benefit without dragging the Wraith Engine too far forward or exposing him to harm. The blast immunity has been situationally nice every once in a while, but again this just doesn’t come up all that often and certainly isn’t something you should go looking for.

The reason I say that this is a trap is because a lot of people think that taking the Wraith Engine means one should take a bunch of Incorporeal models (or they have lots of Incorporeal models and think they need a Wraith Engine) which is just untrue. In fact in many cases some of the Incorporeal models we do have are outright skornergy, from the various RFP effects on Blackbanes/Bloodwitches to the competition for souls on things like Pistol Wraiths.

One thing I will note here is a bit of an exception though – eDenny. Being your caster, extra ARM is no bad thing (either instead of or in addition to a healthy camp) and blast immunity can save your skin given the appeal of boosted blast damage in many assassination runs. I’ll go into some more specific eDenny synergies later though. Also if you do have 2 Wraith Engines they do benefit from the other’s ability (when incorporeal) which is something I suppose… but not really a list choice I’d be inclined to make myself!

Ability: Soul Collector

So now we get into the real “meat” (spirit???) of the Wraith Engine – his ability to gather enemy souls. With a pickup range of 10” from the base, he can get souls from a chunk of the board and use them to buy/boost attacks or spit out clouds (covered below). Like many soul gatherers in Cryx this ability is very hit or miss, with some infantry heavy matchups giving you a real abundance and other lists giving you very few at all. And of course like most soul gatherers, the Wraith Engine doesn’t have to get the kills himself to gather souls, so intelligent usage of the rest of your army (especially Bile Thralls) before he activates is a great way to get him loaded up and free to spend them when he goes.

One of the key things to keep in mind with this ability is that placing the Wraith Engine is everything; you want to be far up enough to get a steady stream of souls but without exposing yourself to danger and ultimately death. Trying to find this reasonably central location and avoiding getting in the way of your own forces can be a bit of a challenge, but I find that in general sticking the Wraith Engine slightly behind your front lines in line with other valuable support pieces works out best. This also nicely fits into his role as a second line/counterattack heavy, so keep that in mind as well.

Finally one neat bit of tech that comes up occasionally is that if you can gather souls reliably vs. infantry in melee (without boosting vs. higher stats, no tough, self sac etc), the Wraith Engine can pseudo “thresher” through them. As each kill provides a soul which can then be used to buy attacks, the Wraith Engine can clear his melee range with a little luck on your side. I’d say the most models I’ve gotten with this is 6, but obviously higher potential ceilings do exist.

Ability: Ectoplasm

A weird, fluffy and very useful ability, the Wraith Engine can spend any number souls during his activation to place an equal number of 3” cloud effects within his 10” CMD. This is my favorite ability on the Wraith Engine and where I feel he earns most of his keep as a support piece on the turns he isn’t ready to get into combat. Aside from the turns you get involved in melee and want the souls for fighting, Ectoplasm really comes into its own on any Wraith Walker turns, because it gives your “not-so-friendly ghost” something to do with all those juicy souls without removing his incorporeal status. As always keep in mind the enemies that can ignore cloud effects (Legion in particular), where you might be better off spending those souls in melee or saving them for later turns instead. Also being a battle engine, the Wraith Engine can’t benefit from his own clouds. But in general, clouds are really useful in Cryx to keep away enemy shooting, prevent opponents getting the charge and basically mitigate those victim stats.

Advantages: Terror, Undead

These two advantages can provide another added level of defense. Any terror checks you can force on an opponent might one day save your life, and with the Wraith Engine having a huge base and reach on his weapon, you could tag a fair few models with this ability. Undead also keeps you safe from a number of key bonuses or abilities that affect living models, but watch out for Alexia/Witch Doctor as he is affected by Dominate Undead as well (ouch!). Still, it does also mean amusingly that you benefit from Darragh’s Death Ride and a few other bits and pieces, so it isn’t all bad.

Uses:

Whew, well that covers the basics… But the Wraith Engine is a surprisingly complex piece and takes a fair amount of effort to get any kind of mileage out of. Ultimately I think that the Wraith Engine is best used as a second line heavy/support piece, doing its best to avoid dangerous opposing models while contributing valuable support to the fight. While on paper it looks like a focus efficient heavy (similar SPD, POW, MAT, reach, heavy DEF/ARM) I think it only performs this role adequately later in the game once key threats have been removed. The crucial thing to keep in mind is just how fragile the Wraith Engine is, and that even the most modest of aggressive plays will frequently get it killed. Ultimately it takes good knowledge of your opponent’s capabilities, as you can avoid the things capable of scrapping you and only get destroyed after getting enough usage out of him in turn.

  • Midfield/backline support: The Wraith Engine is very useful as a support piece, occupying a similar place as the Combine/Darragh on the table – i.e. close enough to contribute to the action, but far away enough to stay out of too much trouble. Incorporeal also synergizes nicely here, because you can more through your own lines in a pinch and ensure you get to where he’s needed. More importantly, while the Wraith Engine is Incorporeal and avoiding attacking he can still be very useful… ejecting clouds, debuffing with Dark Shroud, spreading Terror and the like. Avoiding the joy of potential combat (especially on the Wraith Walker turns) in threshing infantry or damaging heavies can be a very worthwhile endeavor, because a well placed cloud effect can be infinitely more useful and he is quite a bit more likely to survive another turn.
  • Threat range/jamming: SPD 6, Apparition & Reach means the Wraith Engine can easily tag things in melee from a good 13” away, and being affected by Darragh, place effects like Telekinesis and so on gives you further potential range as well. With that large base + reach you can often use this to tie up key opposing models in melee, which is not necessarily economical or feasible in the wrong matchup (melee armies who will wreck him) but can be an utter lifesaver in others (shooting gunlines with poor ARM cracking). This threat range is also important for his positioning, because the combination of Incorporeal and keeping him in line with your support means he can catch up to the fight when needed and out threat many melee opponents that could wreck him.
  • Playing defense: Even though he’s made of cardboard, the Wraith Engine can be a useful defensive piece. Proper application of his huge base can take up board space and allow him to block charge lanes or melee space in front of your key models (read: casters) while also blocking LOS from shooting on those corporeal turns. Being a battle engine he is immune to many effects like knockdown, slamming and the like, so it can be nice to have those abilities in play when people are gunning for the assassination. Combined with his support contributions, and I find the Wraith Engine can keep the caster a little safer without compromising his usage on the battlefield.
  • Late game heavy: Once the board has thinned out a bit and key threats can be removed, I find the Wraith Engine does much better as a late game piece. This gives you the chance to remove any Witch Doctors/Alexia/Aiyanna, clear space for his large base and generally remove anything that might kill him. In return, the early turns can be spent getting him loaded up on souls and using his support abilities so that when he does commit to the target (often a heavy/caster), he has the odds in his favor. As an aside then, I will say that once I started playing the Wraith Engine this way he got a lot more effective, reducing the “random death” scenario that is usually so prevalent with anything this squishy and ensuring he got to contribute something useful first towards every game.
  • Suicide: This seems counter-intuitive for such an expensive piece, and should only ever be a last resort, but sometimes the Wraith Engine is simply a wonderful distraction. If the game is going badly then it can be a good idea to throw him into the fray and hopefully buy some time, because he will take a little effort to remove (especially when Incorporeal) and can hopefully keep you in the game another turn. I would say that even despite playing my games a lot safer with him than most, the number of games where he makes it to the end are very few in number. What I would say however is that this includes the many games I’ve won, because sacrificing him at the right time has absolutely enabled a number of key scenario plays or assassinations that wouldn’t have been possible if I was too cautious or reckless early on. In the end, we’re Cryx – sometimes things have to die so that others may… not live. Or something.

Now is as probably as good a time as any as to stress – it really wants to get some souls. You need to think about this carefully, because he can easily tread on a few toes here with a lot of Cryx models given the wide range of his collection and the general competition for them whenever they are available. Some cases rarely come up at all (Skarlock) while others are just plain irritating (Vociferon or Terminus). I’ll cover some of the synergy/skornergy later, but for now the thing you need to think about is how you’re going to go about getting those souls in the first place.

For this role, I immediately grab Biles. This helps a lot if the lists I’m running already want them, but Biles deserve a special mention all of their own before we get to the unit section simply because of how they solve this problem. Purges barely scratch the Wraith Engine at all from friendly fire (Or not at all when Incorporeal, which also shrugs off the corrosion), utterly vape enemy infantry and can even move/purge through it to get to the target. In exchange, the Wraith Engine can present a large chunk of ground to obscure Biles from LOS, blocks them from getting jammed in melee and can even provide Dark Shroud if he’s close enough for extra bang. Given that the corrosion gives you random souls as well, they really are a match made in heaven.

Now obviously you don’t have to run Biles to get use out of the Wraith Engine, but it really is a very cheap and economical way of doing so, as well as being a damn good unit. But you will need a plan to get those souls one way or the other, and ideally without depriving other elements in your army that want them more. Again as mentioned earlier, watch for some of the RFP and other soul depriving elements that can be quite common in Cryx (see Lamoron’s recent pSkarre list as an example) that make the Wraith Engine a poor fit for your army.

Casters: 

So now let’s take a look at which casters will consider taking the Wraith Engine. If truth be told, the Wraith Engine has a few problems and is a particularly niche piece, so a lot of casters are going to give it a miss. Still, if you are going to take one, the trick is to look for those casters that make it shine, or at least to consider what it needs to be functional on the tabletop. Clearly then, we need casters that:

  • Aren’t planning on using any potential souls: While the Wraith Engine can work in lists where the competition for souls is there, it certainly does present certain skornergy problems in getting the most usage out of it and the caster/list in question.
  • Aren’t largely battlegroup oriented: Again these casters can work, but when a lot of your benefits affect models in the casters battlegroup, you might want to think again over whether you would be better served bringing a heavy instead or something else entirely.
  • Can improve the odds of survival: As mentioned repeatedly, the Wraith Engine is much more fragile than it might first appear on paper. Any caster that can help it stay alive a little bit longer will have more turns to benefit from its support or combat abilities, and thus see a greater return on the investment.
  • Can improve the odds of hitting/damaging: Any caster that can save the Wraith Engine spending souls in combat to boost through debuffs means that it has more to go around for extra attacks or clouds. Like any heavy, the application of debuffs greatly increases the odds of it 1-rounding an opposing heavy, so try to get those up first before committing it to any combat, particularly if your enemy has other abilities to lower your odds.
  • Opportunity cost: The main defining reason the Wraith Engine doesn’t get included is that most casters need the points elsewhere. When push comes to shove, Cryx has a lot of decent choices that will probably be picked first. Some casters have a long list of “must haves” or simply great choices that either take priority over this model or simply leave no room for it.

As a quick disclaimer, note then that only a handful of these casters will probably end up using the Wraith Engine given the reasons above, even if it is an workable choice with most of them. Also note that as a release in Wrath, the Wraith Engine is excluded from all the tier lists aside from those specifically discussed. With all that being said, let’s have a quick rundown on how it can be used:

  • pGaspy – A fairly average choice, as both Parasite (debuff) and Scything Touch (buff, tends to have better uses elsewhere though, but Crit: Corrosion can provide some souls) help the Wraith Engine do damage to harder targets and potentially save souls for other things. On the feat turn pGaspy can randomly grant the Wraith Engine souls as those free hits (POW 8 with Parasite) rack up any kills, and Breath of Corruption has a chance of doing the same if enemies move into the template. In return the Wraith Engine can stack up clouds alongside any use of Breath to create a wall while screening pGaspy’s medium base from further harm, which can often be a problem in his army.
  • eGaspy – Like pGaspy, Parasite benefits the Wraith Engine doing damage, but eGaspy does suffer in having competition with the Wraith Engine over souls, so intelligent use of Daemortus will be required. Despite this, both Excarnate (with Biles) and Death Knell can cause a large number of casualties among opposing infantry, so depending on the matchup, there might be more than enough to go around. Caustic Mist clouds might not block the Wraith Engine for LOS, but they do protect the Wraith Engine in melee from opposing infantry providing they are placed correctly. In addition, Caustic Mist also synergizes well with any clouds via Ectoplasm to block off further areas of the board or save eGaspy focus by the Wraith Engine putting down clouds instead. With easy access to clouds and Hellbound, eGaspy might not need the huge base in front of him, and you do have to watch out that you don’t stand too close and present an alternative charge target for models to reach him by charging the huge base. All in all it isn’t a terrible choice providing you can find the points and don’t mind competing for souls vs. Daemortus.
  • 3Gaspy – Mobility sadly does nothing for the Wraith Engine, but Carnage can still help him hit and Scything Touch ups the damage (providing you don’t have better targets for the spell, although corrosion can provide some souls). Hex blast can help strip important upkeeps, and Bone Shaker can randomly get the odd soul here or there for a relatively low cost. Ashen Veil is fairly useless as Battle Engines cannot have concealment, although you could use it to spread the MAT reduction around with huge base if you don’t have a better target (unlikely, given how useful it is on 3Gaspy himself). The main problem I find here though is that the Wraith Engine competes with Vociferon for opposing souls, meaning you really have to keep them apart to avoid one or the other missing out and interfering with your plans. His tier list is one of the few where the Wraith Engine is permitted, gaining the extra deployment, souls and potentially contributing Unhallowed to those mandatory pistol Wraiths. Ultimately though, I think the Wraith Engine is simply too skornergistic with 3Gaspy’s playstyle, competing with his various souls and abilities that mean you would rather have another heavy or something else.
  • pDeneghra – Given the running joke that pDenny makes ANYTHING work with a wide variety of debuffs and a crippling feat, it’s not surprising the Wraith Engine does okay with her in combat. Crippling grasp, Shadow Bind (her weapon), Scourge (knockdown for the easy hit) and Parasite all help him with his personal fighting capabilities, and in the case of Crippling Grasp, can help mitigate retaliation. Her feat only continues this theme, making it an ideal time to be Corporeal and attack while her debuffs are in play while simultaneously benefiting from crippled opponents to avoid an easy retaliation. Influence can randomly be amusing, granting you free souls from the opponent murdering each other and even benefiting from Dark Shroud if you’re lucky. Ghost walk can help with using the Wraith Engine offensively too, as making him ignore free strikes is always a plus if going for targets further away and not Incorporeal that turn (or vs. magic weapons). As a screening model you do have to be a little careful standing near the Wraith Engine though, as blasts and sprays could mitigate Denny’s Stealth and high DEF by tagging the huge base model instead. Overall an ok choice, but most things are with Denny.
  • eDeneghra – Honestly, nearly every spell can find some use with the Wraith Engine. Curse of Shadows helps him do damage, and helps a lot when corporeal to move around with that huge base and either get through your own models or get at the enemy with those long distance threats. Similarly Ghost Walk is occasionally nice for avoiding free strikes, but doesn’t come into play that often given his native pathfinder and potential Incorporeal even if it’s nice to have. Meanwhile, Marked for Death provides a defense debuff, and allows for some interesting charges on otherwise untouchable incorporeal models or those ducking out of LOS. Pursuit does nothing for the Wraith Engine directly sadly, but you could use the Wraith Engine as a shield for something else and move around him (or through when Incorporeal) to avoid an attacker. Hellmouth sadly removes from play any models that it kills, but vs. harder targets it can certainly be nice to cluster up multi-wound infantry or harder targets when trying to set up a long range charge in melee. Along this line of thinking, both Seduction and Eclipse can contribute some interesting plays with charges and potential souls, while Venom racks up kills to fill up with souls (especially when corroded). Like pDenny, the Wraith Engine loves the debuffs of her feat, benefitting especially from the control aspect that limits opposing movement to ideally avoid retaliation when corporeal. Unlike pDenny however, eDenny lacks Stealth, so she greatly appreciates the clouds to keep her safe at range and can even benefit greatly from Unhallowed when Incorporeal to get more mileage out of her own Wraith Walker ability. All in all, a reasonably solid choice, and one of the few casters I might consider taking the Wraith Engine with.
  • pGoreshade – Generally pGoreshade doesn’t do a lot for the Wraith Engine. Soul Gate and Shadowmancer do nothing for it, and the abundance of easy access to Dark Shroud can blunt the usefulness of the Wraith Engine bringing it to the table. Mage blight is nice to save you from any spell based attackers and in turn the Wraith Engine can help a little in shielding pGoreshade when he is typically vulnerable in using this ability. Hex Blast can remove crucial upkeeps (and do some damage/kills for souls) while Deathwalker debuffs DEF or minimizes opposing retaliation, even if she is difficult to position in this setup accordingly. All in all, pGoreshade is a bit of a difficult choice to work with the Wraith Engine, and I would probably give it a miss.
  • eGoreshade – With so many banes running on the table, again we can see that Dark Shroud isn’t the best debuff for the Wraith Engine to be bringing to the table. Unlike pGoreshade however, eGoreshade does have a few things going for him, including the means to keep it safe with Occultation (Stealth) and the previously mentioned Curse of Shadows to help it get around the table or do more damage. Like his prime incarnation, eGoreshade also has Hex Blast to strip key opposing buffs and even has Arcane Consumption to add to the magic hate and keep spell users away, but again there are some abilities that do nothing directly for the giant ghost including the feat, Phantom Hunter and Sudden Death. All in all an ok choice, but it generally doesn’t make the cut in favor of more infantry and a battlegroup shooting heavy to take advantage of Phantom Hunter instead. Finally I should mention that it breaks his somewhat popular tier list, so fans of going that route with eGoreshade will want to look elsewhere.
  • 3Goreshade – With the already discussed Scything Touch (to up damage, but corrosion kills can = souls) and Occultation (to keep it safer via Stealth), 3Goreshade does have a few things to offer the Wraith Engine, even if these abilities might have better targets. Sadly the Wraith Engine cannot benefit from Infernal Machine or Mockery of Life, but it certainly can use the feat to help it hit or even be sacrificed if it helps you pull off an assassination. Goreshade does appreciate the huge base to keep him from harm on his large base and potentially free up Occultation for other targets, but in general I think you won’t see much use with the Wraith Engine simply due to having better options for the points available.
  • Mortenebra – With almost all of her abilities (Jump Start, Interface, Terminal Velocity, Overrun and Spectral Steel) oriented around her battlegroup and the Wraith Engine being prevented in her tier, the Wraith Engine is generally a really poor choice for Mortenebra. Obviously it can still benefit just as any model can from her feat, Void Gate shutting things down and can be repaired if need be while screening her from harm, but I would say that in general almost anything else will be a much better use of points. If you’re really keen on the idea of a huge base to protect Mortenebra from harm given her general fragility, you’d be better off grabbing the Kraken.
  • pSkarre – One of the few casters worth considering with the Wraith Engine, pSkarre has a couple of things to look at. Dark Guidance and any hits from her Great Rack helps the Wraith Engine quite a bit in combat in helping it connect in melee, while her feat massively increases damage and protects it from retaliation for a turn. Any continuous corrosion from her Blood Rain will generate some souls, but given the rare use of this spell it’s not really worth mentioning. She does appreciate having the Wraith Engine around defensively to help keep her in one piece while playing close to the front (especially on turns where Ritual Sacrifice generates a low camp), so in general the Wraith Engine performs acceptably with her on the whole.
  • eSkarre – Like Mortenebra, eSkarre does have a lot of battlegroup support, meaning that the Wraith Engine misses out on Admonition, Perdition and Seas of Fate. Since the errata that prevent her using the feat on huge based models, she cannot protect the Wraith Engine directly, but using the feat to tag key opposing threats can help keep the ghost alive while vulnerable on a corporeal turn. Black Spot helps the Wraith Engine offensively, granting it free attacks and lowing opposing DEF to help it cut through opposing troops while Blood Rain can randomly grant a few souls through corrosion. Like most higher ARM models it doesn’t mind having Death Ward to stay alive, although picking columns for damage won’t apply and something else will probably want this ability instead. In the end the Wraith Engine is a fairly middling choice, as eSkarre will likely prefer a heavy in its place to benefit from her extensive battlegroup support.
  • Terminus – While Terminus can usually be relied upon to bring an army that can kill a lot of infantry and produce some souls, the fact that the Wraith Engine and him compete for them on feat turn or with Annihilation is a bit of a letdown. Sacrificial Pawn can be used to pass hits onto the Wraith engine (only when Corporeal), but any hits that he doesn’t want to take might be dangerous and better passed onto a regular grunt. Quite apart from anything else, Terminus generally isn’t in need of screening, although there are cases where it works out, such as when using the focus elsewhere and you can’t afford to camp. Ravager does nothing either, and while he can benefit from Shadow of Death (Tough) and Malediction, these things are a bit situational or difficult to apply. In the end, I think Terminus is better off with more infantry or support given the difficulty of finding the points to fit the Wraith Engine in the list.
  • Venethrax – Venethrax in many ways has similar problems to Terminus above, in that there is little direct synergy and they can compete over souls and the interaction with Soul Harvester. The feat can play well with the Wraith Engine though, using the ghost to patch in gaps in your cloud coverage, but you will want to plan your activation order carefully so you know where those clouds should go. Because models entering/ending activation in the clouds can die, the combination of that, Blood Rain and Caustic Presence: Corrosion can give you a few extra souls for your trouble and help keep the ghost nice and full. Lamentation occasionally might save the Wraith Engine from harm, but in general Venethrax might struggle to keep it alive given how clouds do little in preventing enemies going after battle engines. In the end the combination is fairly middling, as while the Wraith Engine plays nicely with the feat, the lack of direct synergy, conflict over souls and long list of more important things to fit in the list usually keeps it sitting on the shelf.
  • Witch Coven – In my opinion, this is the best caster to run the Wraith Engine with, and there is a lot of synergy to consider. Curse of Shadows, Ghost Walk and Veil of Mists all help with delivery, which is important given the size of his huge base on non-Incorporeal turns. While the Coven have Occultation, a far better source of Stealth can be found in Black Mantle, where the Wraith Engine is close enough to keep the Coven safe and can Apparition out again to avoid blocking Perfect Conjunction. Given that Stealth works wonderfully on Biles (that should be in their list), the Wraith Engine gets a reliable supply of souls from purges while simultaneously keeping them from harm. While the Wraith Engine does miss out on Infernal Machine, Curse of Shadows does help the hitting power, and a critical hit from Stygian Abyss can be an unreliable way around the lack of DEF debuff. Defensively the Wraith Engine is just perfect for the Coven, blocking dangerous models from reaching them in melee with the huge base, blocking LOS for things that ignore stealth and tying up or destroying heavies later on. If you time Wraith Walker around their feat, the ghost can get pretty survivable, and this combination with Stealth makes him much harder to take out than he would be under most other casters. In summary then, I think the Wraith Engine makes a decent choice for the Coven, and I suggest reading my linked articles below if you want any further explanation on the viability of this choice.
  • Scaverous – Like eSkarre, Death Ward keeps the Wraith Engine going longer, while Feast of Worms and Icy Grip can help the Wraith Engine with its melee prowess and keep certain opposing attacks at bay. Again, Ghost Walk is nice to have in avoiding free strikes (usually when Corporeal) but is often largely situational given his innate pathfinder status. Telekinesis really is the big one though, in giving the Wraith Engine extra threat (especially combined with Apparition and Reach) to go on the offense and even help to land those blows by turning around the target model. Generally the Wraith Engine should have easy access to a steady supply of souls via Excarnate and Bile Thralls, but you do want to be careful in exposing Scaverous to undue harm given the general lack of defensive tech in his lists or any other soul competition through his preferred choices in the list. Scaverous does appreciate the screening ability (given his medium base and spending all his focus) so the Wraith Engine can do ok in this role as well. In the end though, I find that his lack of defensive options to keep the Wraith Engine going (bar Death Ward, which has better targets) and the opportunity cost keep the Wraith Engine from my lists with him. The one exception I should mention is his tier list though, where the Wraith Engine is actually mandatory at Tier 3, and grants extra deployment to help get your models further up the field.
  • eSturgis – Sturgis does have a few battlegroup only effects via Convection and the second portion of the feat, but there are some interesting elements worth considering when looking at the giant ghost. Parasite and Occultation are both good for all the reasons previously discussed, helping the Wraith Engine lay down some damage and hopefully keeping it safe early on in turn. His feat also tends to cluster opposing models, which is great for the Wraith Engine in attempting any pseudo threshers or bringing models into soul gathering range. The key part here though is that Sturgis is frequently an upfield caster, so the Wraith Engine can play a useful defensive role in screening/blocking him from dangerous opposing models or running interference, a particularly useful tool to have given his expenditure of focus. I’d say the Wraith Engine is a fairly average choice, but you will want to think carefully about how this affects the rest of his list composition.

Other Synergies:

There are a LOT of numerous ways the Wraith Engine can be help/be helped by your list, so long as you mind any competition for souls, removed-from-play effects and how you spend you points. Anyway, here are some key examples:

  • Jacks: Anything that can slam/push things to knock down targets only makes it easier for the Wraith Engine to take them on, and is of course essential for those targets with really high defense. Ripjaws (Vice Lock -2 DEF, prevent movement), Stalkers (Grievous wounds to prevent tough/healing), Reapers/Malice (Drag) are all worth considering. Usually the Wraith Engine Slayer ends up doing more for the other jacks though, either through providing Clouds/Dark Shroud or simply because it presents another high ARM target to draw any fire. On the flipside, avoid any jacks that might compete for souls, or at least keep that in mind when planning out your turn.
  • Units: Aside from the repeatedly mentioned Biles, who work wonderfully together, we have Black Ogrun (More Drag,) Bloodwitches (positioning for Entropic Force and Dispel on a key model, clouds for further denial, Incorporeal to prevent getting in the way + Unhallowed), Blackbanes (Incorporeal again, and fire when applicable, but watch the RFP), Mechanithralls/Necrosurgeon (reaping corpse tokens), and the Withershadow Combine (Puppet Strings, Unbinding for removing upkeeps).
  • Solos: Machine Wraith (possession of key targets before/after beating, Unhallowed), Pistol Wraiths (preventing enemy movement/actions, keeps the ghost safer from retaliation + Unhallowed again), Raider Captain (Critical Knockdown), Skarlock (any spells he has access to), Warwitch Siren (Shadow Bind to debuff or prevent movement or Seduction to further force opponents models), Darragh (Death Ride to keep models out of the way and get another inch of movement, Beyond Death for survival), Gorman (Further debuffs…), Madelyn (extra positioning for other models to get out the way), and Orin (spell protection and chain lightning to remove key intervening models).

Plus there are many more!

Conclusion: 

Anyway I hope this helps somebody to get a bit of usage out of what is a particularly specialized and fragile model. With its numerous support capabilities and a role as a secondary/backup late game heavy, the Wraith Engine can be useful in a few specific setups, but it does take some thinking to use properly and careful safeguarding to prevent it being easily disposed of. While most casters will shun the Wraith Engine due to the opportunity cost our outright skornergy, there are a couple who can at least make it workable, so get it down from the dusty shelf and give it some game time 🙂

Alright, so we’re going to try something a little different today (not my bad puns and jokes though, those keep on going, and going, and going….).  Here’s a little piece that Lazarus0909 put together from our conversations about Goreshade3!  Enjoy!

———-

Overview


So, I know there has been a lot of hype around Cryx’s newest caster, Goreshade3 (3Shade) and even a few questions about why forum discussion on him from some of our regulars has been comparatively light vs. say, some of the other Vengeance release casters in their respective faction communities. Well fear not forumites, for a surprising amount of work and discussion has definitely gone on behind the scenes.

Today then, I thought I’d share some of the discussions MidnightCarnival and I have had regarding our newest caster. This won’t quite be a “spotlight” or “tactica” (as I know MidnightCarnival has already done something along those lines and I’m not quite ready to devote the time to putting one together), but rather something interesting I figured was worth sharing with our community. A lot of this is somewhat rough and informal as I’ve condensed our lengthy conversations into something a bit more readable, but I think this will definitely get some of the wheels churning and I can only hope this input has helped somebody along the way.


I’ve tried to divide this then into smaller sections, covering everything from character restrictions and list construction to general playstyle and gameplay on the table. I’ll also reserve some space to add to this as the discussion progresses, so expect to see more here as our thoughts develop further.


So without further delay (and because I have over 5000+ words of content here to share!), lets begin shall we.


Then vs. Now


Lazarus – I was a little…reserved, at first, maybe. Apprehensive? But now, nope, not even a little. It’s been an interesting ride for sure, but I’m glad some of my initial suspicions about his playstyle seem to have been proven correct (http://privateerpressforums.com/showthread.php?187517-3Goreshade-actual-assassination-potential/page2), with a lot of the same staples forming the basis of many of his lists. While the list in that thread was definitely more skewy, I think it demonstrates both some of the massive potential he has as well as the sheer variety you can use in dropping him.


MC – I feel like from initial reveal to now, my opinion on him has changed insofar as his assassination game is certainly more appealing. I thought of him as more of an attrition caster at first, but now, I see him as an assassin first and foremost.


Characters?


Lazarus – Character restrictions present an interesting dilemma, because while he is very flexible, certain characters unlock a lot of his potential. If I had to narrow down a list, I would say:

Combine = Maybe, they are very solid but that’s nothing new. Depends on the lists?

Darragh = Definitely, very important for the cav setups (esp Soulhunters), camping and overall army durability.

Madelyn = Really solid for assassination play, lists with Biles etc.

Blackbanes = Near mandatory IMO for the feat.

Saxon = If running non-cavalry (melee infantry) builds.

Tartarus = If running foot banes, about as good as most lists. (likewise Gerlak/Rengrave/Pirate solos with their units)

Gorman = Always solid but you can probably do without if need be.

Aiakos = Likewise, he has solid BG support through IM and points are usually too tight.

Character jacks = Sure, you’ll build around them, but you’re unlikely to want them in more than one list anyway.


MC – No combine for shade. Darragh, Madelyn and blackbanes essential. Yeah, I’m debating on tartarus of course, he’s always the elephant


Lazarus – In terms of pairing, he works with most IF you built 3Shade with none of the chars then yeah. That might be really difficult though. He’s certainly more flexible than my other “Big 4” options in the list 1 slot, but not as much as say, Denny or Skarre in terms of char hunger. So he usually fits into my “list 1” slot where Terminus, Venethrax, Scaverous, 3Gaspy etc. reside.
MC – And 13″ of threat isn’t quite enough. I think darragh is going to be mandatory with him. His DEF stat is so bad that you have to rely on ARM and the extra 2 is going to be extremely important. With 3Lich, I can, at the very least rely on DEF17 against heavies. So even if i’m at ARM24 or 22 with him, he still has better than 50% of living through most assassination runs. But for shade, he needs to be able to have the option for 26


Lazarus –Agreed. 26 is a big difference.

General Gameplay and survivability?

MC – Through some of my games, I learned a few things about Mockery and his list build, and also about his own positioning! As I suspected, he is very much a frontline caster, he wants to be up for spell vortex as much as possible


Lazarus – Yeah that makes a lot of sense. Do you think then he can afford to go without Occultation on himself to be able to put it on Biles, or do you really end up not having that choice?


MC – It 100% depends on whether the opponent has any high value shooting, for example, against Menoth, I would leave occultation on him and force them to purify so that you don’t get destroyed by reckoners. Same case against Cygnar where occultation on Biles doesn’t matter because gunmages eat them alive.


Lazarus – Yeah that was my worry with him. That while Occultation on Biles is super useful (or on Bane Riders) he might play so far upfield that it’s suicide going without. Bit like 3Gaspy and Ashen Veil heh..


MC – Yeah, in a way, I feel like their defensive tech must go on them. I actually have serious concerns about Goreshade’s survivability.


Lazarus –Likewise. Large base, little camp if he plans on using Mockery. So you either camp or revive but not both. At least he can camp mind. Like 3Gaspy, I think the trick is going to be trying to then maintain the camp as high as possible while getting use out of your spell list. So let’s say you get free upkeep (Combine) recast another (Skarlock) and recast another (Vortex). You can technically keep all your upkeeps and full camp. So therein lies the issue really – are you safe enough to use Mockery if you aren’t camping? And if you aren’t camping, you probably don’t want to be in Vortex range because that’s very far forward. Hmm…


MC – I actually find Mockery spam, while annoying, not a reliable game plan. It’s really good at tilting opponents though, and extremely good on the Riders.


Lazarus – Yeah agreed. I think I’d mostly confine using it to my Riders/Cavalry or situationally if I get a free one or for the feat. But otherwise just focus on upkeeps/camping. Aside from Vortex, do you find you have to play him far forward? Is it the assassination pressure too? And being able to Mockery better? (Just checking. I assume so myself, but wanted confirmation?)


MC – You absolutely have to play him forward. It’s not even optional I find. The assassination pressure is far too important to lose out on. Because his real threat is being able to charge an opposing caster. I played a 3 way game at 25pts that basically illustrated this painfully clearly to me. Now granted, it really wasn’t a 3 way game, more like 2v1 which is pretty normal for me, but I basically sat in the back and only ever cast mockery and the danger to the opponent just wasn’t there.


Lazarus – Thats what I thought. He’s so good at assassination you don’t want to go without.


MC – Also, spell vortex….wow.


Lazarus – Yeah I can imagine! Its one of the reasons I like Riders with him, because you get to Revive one free every turn. Otherwise being able to hotswap an upkeep for free is just gold in the right situation.


MC – Oh man, with him, you can vanguard with a single rider. It’s actually really vicious.


Lazarus – Yeah I love the idea of Mockery here. I think its a really solid play and the best way to really use it.


MC – Yeah, I don’t mind losing any riders now, so long as the entire unit doesn’t explode


Lazarus – Which is amazingly hard to do for most lists in a single turn, assuming proper play, spreading out, protection etc..


MC – Yeah And when I can throw one rider forward to let the rider eat it…


Cavalry?


Lazarus – Do you think Cavalry are def the way to go? See I think they’re not only valuable units that sync well with possible Stealth and ST for damage, but Mockery on them is simply great, and they position really well. With the general shift to armor and massive infantry cracking potential, I’m trying to actually only build 1-2 lists with foot banes in them these days (the meta is making them tricky to work with) so he usually ends up there.


MC – I like double cav a lot with him. Soulhunters help clear infantry jams out of the way for the riders to power through


Lazarus – Plus the feat! I mean I’m not as crazy about them for feat targets as a lot of people seem to be (I think many people are overestimating how easy it is to get large bases in B2B with opposing casters!) but if the opportunity arises and you have them anyway…


MC – Exactly


Lazarus – But I think a lot of people stop there and think “For the feat, duh, done” and need to be thinking about how they fit with the rest of the list, spells, gameplay etc. They can do a lot of work clearing infantry, blocking lanes, even taking down harder targets with the right support.


MC – Yeah they’re so strong with scything touch. I really love double cav with him, I think that’s a really legit build. Especially since it’s capable of hitting anything really, which his list can struggle with otherwise.


Lazarus – And Cav inherently have a lot of movement or ability to get through models, which he desperately wants. No inherent pathfinder dispensing makes it quite desireable for a list tight on points.


Shooting?


Lazarus – One thing I’m also very interested in is a shooting setup. Now obviously Cryx has few faction options here. But with Occultation being friendly, the feat not caring either way and the potential to put a lot of hurt downrange, it could really work. Particularly if you can engineer proper LOS. I’m less mad say, on the Ghost Cannons/Bloats that people have bandied around as ideas, but things like Nyss I feel could work?


MC – Nyss are good, I’m leaning towards more guns right now. Double harrower, double pistol wraiths


Lazarus – Yeah it’s actually hard to get that balance. You already want a solid melee piece for IM (Harrower obviously is awesome here, though I had some other ideas there), plenty of melee for ST and ideally Cavalry for Mockery. But shooting is just ideal to clear a path. If you can scalpel out the right models, it makes for a really powerful combo, especially when playing him for assassination.


Battlegroup


MC – I’m going to see if I can get to the store and speed build another harrower.


Lazarus – Yay! I can’t wait to see the results of that test. I truly believe 1 Harrower with him is pretty much mandatory, and 2 is definitely a solid choice


MC – Yeah, I’m always sad that people don’t play more harrowers


Lazarus – Yeah. I think it’s the cost. In fact in general I find people aren’t really playing Cryx non-character jacks (hence my quest this year) but the Harrower does have so much going for it…


MC – Yeah, and I feel like people tend to fall into the trap of “well, this doesn’t do anything different from infantry” when they really do. The double crab bunker is also amazing


Lazarus – They really really do. I think people are too focused offensively on what infantry can do. But there are a lot of difficulties delivering them, and most people should be prepared to tackle infantry spa vs. Cryx. I’m finding the jacks (especially in conjunction with Riders) is creating a wonderful skew that invalidates a lot of the mass POW 10/12 attacks people bring vs. my Cryx, generally fitting in more with the trends around a stronger ARM/brick meta. Anyway – you settled on your battlegroup for 3shade then at least? Harrower and Ripjaw?


MC –Harrower and ripjaw. Or if I’m going extreme jam, ripjaw and helldiver, I really feel like those are the strongest ones.


Lazarus – Yeah I love so many of the models. There’s a few infantry that I think could use a resculpt, but even then most grew on me over time.


MC – The only other battlegroup I would run is Deathripper/Kraken.


Lazarus – Yeah that sounds about right. He really puts the 3Gaspy Kraken to shame by comparison. And let’s him drop Occultation on himself which is nice, because the Kraken can shield him more on the approach and leave the spell free for something else like Biles.


MC – Oh, by far, infernal machine is straight up gross. And since I think I’m going to be pairing him with either shade2 or deneghra2, if shade2, then I won’t take the kraken with shade3, if deneghra2, then the kraken becomes more in the equation.


Lazarus – Agreed on all counts. It plays very well to a more attrition oriented gameplan I think as well.

I would love to see that in a more brick style Cryx list, which judging by signals I’m getting through various channels, is quickly becoming more the norm to fit in with the new higher ARM meta. But that’s a discussion for another time!


Assassination


Lazarus – So he’s a weird scenario hybrid. Like 3Goreshade I guess?


MC – Yeah, seems like a reasonable position to put him.


Lazarus – The assassination threat is so extreme, so while you’re waiting around trying to pull it off and your opponent is busy avoiding it, you win on scenario.


MC – Kinda like how Aurora plays, you threaten her assassination while using her in a scenario oriented game.


Lazarus Yeah. That’s my plan for Goreshade3, as I think it’s the best way to keep them safe and contributing.


MC – His assassination game is RIDICULOUS. Like, I’m having such a hard time not killing opponents with him, haha.


Lazarus – I thought as much. Was quite amazed actually that people weren’t down with it. Like every assassination there are casters that are immune to it, but it’s still something to fear.


Vs. Terminus


MC – See, Terminus vs. Goreshade3, now there’s a very real discussion to be had there.


Lazarus – Agreed. And 3Gaspy too


MC– Someone just said that they can’t be compared because Terminus isn’t as easy to stop


Lazarus – What???


MC – I know, I lol’d. Like, actually lol’d. Auto-stationary and not needing to roll to hit is a huge deal. Forcing a caster like caine2 to keep heightened reflexes on himself at all times to avoid just dying is also a very real thing. Which means that he won’t be shooting goreshade since he won’t have true sight up


Lazarus – Right. Both can melee assassinate, the point is, Terminus can rarely do a proper spell assassination unless he’s swimming in focus. Obviously they don’t compare completely and I think he has more in common playstyle-wise with 3Gaspy.


MC – Exactly. Goreshade has a MUCH more varied game and is capable of a reliable spell assassination in addition to an extremely potent melee assassination


Lazarus – So yeah, Terminus has Flight and more ARM. Goreshade has an army that does much more and a feat to help him do it. In the end he might not have as much brute force, but he has way more flexibility


MC – Exactly. And at the end of the day, goreshade is equally deliverable to the opposing caster as Terminus is. It isn’t as brain dead as just flying over everything, but if you understand cavalry rules and how they work, it’s not really that hard either. Tall in the saddle is a very huge difference


Lazarus – More importantly, Shade3 has many more ways of winning that have nothing to do with slaying their caster.


MC – I just had an epiphany……..Goreshade3 is a more support heavy Terminus


Lazarus – Yeah I think 3Shade really is. He’s a weird hybrid between several of our casters haha. Def got a bit of 3Gaspy in him, a bit of Scavs, hell even a bit of Venny.


List Construction & Staples


MC

Goreshade, Lord of Ruin (*5pts)

* Harrower (10pts)

* Harrower (10pts)

* Ripjaw (5pts)

* Skarlock Thrall (2pts)

Bane Riders (Leader and 4 Grunts) (11pts)

Bile Thralls (Leader and 5 Grunts) (5pts)

Blackbane’s Ghost Raiders (Blackbane and 9 Grunts) (9pts)

Machine Wraith (1pts)

Warwitch Siren (2pts)


This is my no-pistol-wraith variation. I realized that I crutch REALLY hard on pistol wraiths, so i’ve been consciously not including them in lists


Lazarus – Yeah I definitely crutch hard on them too. With the jack experiments I’ve been running there simply hasn’t been room lately mind, so that’s worked out nicely haha. Why the Ripjaw choice? And MW is for the feat yes? Think I’d rather have a 2pt solo?


MC – Melee assassination threat. I think having a Helldiver is going to be very good with him as well for casters like Sorscha or Vayl who are immune to cold, but not immune to knockdown. Infernal machine on a helldiver is a really really fast death bot too


Lazarus – Helldivers seem really sweet with 3Shade. You can deliver them really well and they’re perfect for accessing feat models.


MC – After a little more thought and analyzing the data from last week, I feel like I have a better grasp of Goreshade3 now and his overall gameplan. He is very much an assassination caster who uses attrition as a means to that end. I think he’s a caster who wants to do the deed himself with Voass. To that end, he needs every movement trick in the book, and I think Corbeau and Wrathe are going to be mandatory with him for the 17″ melee assassination threat.


Lazarus – Yeah I like him as an assassination setup, but he definitely brings a lot of attrition/support while waiting around to do his job. I see him sitting in the midfield, throwing/keeping upkeeps around and leveraging opportunistic revives until the opportunity presented itself. Then pop feat, boom. If it never pans out, you probably won on scenario, because the threat range is really high and doesn’t have to be that linear either. More interesting then will be if he subs nicely for Terminus. And if he’ll be looking to bring in Biles. I might bring them with Occultation, grab Inflictors on him and almost play him (positioning + personal durability wise anyway!) like… evyros. Shield Guard and minor camp might let him have Stealth elsewhere. But no testing of that just yet myself…


MC I think he can definitely replace Terminus. Ghostly means that a lot of those free strikes that rely on knockdown will never make be able to stop him.


Lazarus – He hits hard enough too, with ST on him before hand. Easy enough to cycle if you get the vortex off. The only issue is no moving through models. You can impact one row (with near auto hit potential if utilized around the feat) but it has a lot of room to go wrong. The other main reason I want Biles basically…


MC – Yeah, I think the Biles are going to be almost an auto-include with him because of that lane clearing, although, a Harrower could do it really well too!


Lazarus – It also gives a lot of control options. You don’t end up wasting the feat on higher DEF infantry, so you can save it for particularly opportunistic moments, like heavies that Biles can’t touch, duh casters and anything that needs extra focus to remove.


MC – Exactly. I think list building with him is probably going to be extremely tight points-wise as a result.

Pistol wraiths I’m thinking are more of an opportunistic thing with him rather than a sure thing


Lazarus – Especially if you’re building double Harrower and a node into the initial setup. It eats a lot of points. I’m starting basic testing with just the one. I do like the double setup, and it gives greater redundancy and coverage. But the issue is obviously cost.


MC – The other issue with double harrower is that you really do need bane Thralls with that setup for armour cracking, as harrowers really aren’t the greatest armour crackers, even with scything touch


Lazarus – I went without PWs the other day under Venny, ugh it was miserable vs. Saeryn. Skew and anecdotal I know, but dangerous heavies you can’t rely on killing are so very irritating. Now granted, Venny will be trying to toe-to-toe with them more, and indeed I played poorly in the actual game. But I do appreciate the control. And emergency feat models are definitely a “hey, why not” thing too. So it made me think that I might really want them with him too… But 3Shade is definitely one of our character heavy casters then, ala Terminus, 3Gaspy etc. After you get Blackbanes, Riders, Combine, Darragh, Skarlock, Node…that’s already a massive 35 points already.


MC – Which then tightens up the points even more! Corbeau is now part of my auto-includes with him.
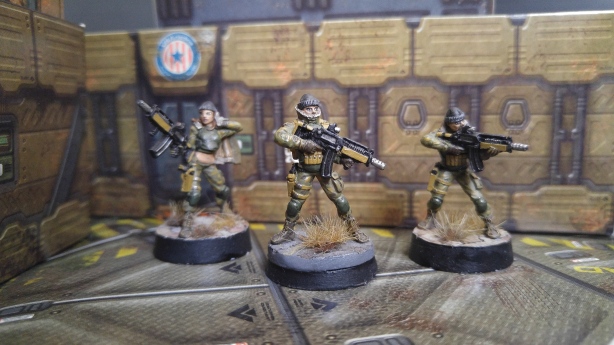
 

Lazarus – Ugh, hes a tough cookie for sure.


MC – I think pistol wraiths are for the single harrower setup. What I’m finding difficult for shade3 is fitting in all the models that I really want in his list! He’s very much like deneghra2 in the sense that they’re both so incredibly versatile to the point where I can feasibly see 7 or 8 different viable list builds to be used as either a first or second list in a tournament
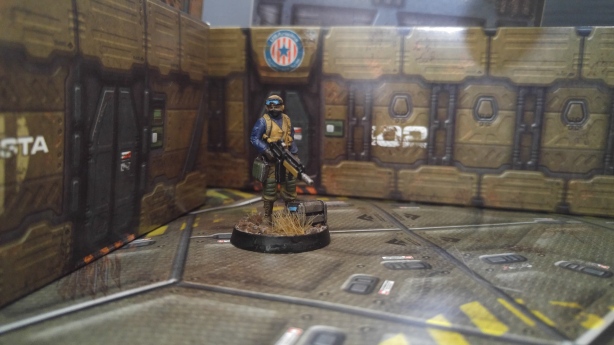
 

Lazarus – Tis why Mastershake had a great post on Issyria in the Ret forums when she dropped, basically saying “Yes everything is good, however let’s at least cut down to staples and go from there”. So I’ve tried to do the same with 3Shade?. And I think those are Node, IM Target* (this can be the node also, but doesn’t have to be), Blackbanes, Darragh, Madelyn, Skarlock. I also REALLY like Riders on him, and Soulhunters you can make a super good case for, plus you’re taking Darragh anyway, so I’d find it hard not to have one of them.


MC– And lately I’ve started fitting helldivers into the list… this variant I think is absolutely nasty:

Goreshade, Lord of Ruin (*5pts)

* Ripjaw (5pts)

* Helldiver (3pts)

* Skarlock Thrall (2pts)

Bane Riders (Leader and 4 Grunts) (11pts)

Blackbane’s Ghost Raiders (Blackbane and 9 Grunts) (9pts)

Satyxis Blood Witches(Leader and 9 Grunts) (6pts)

* Satyxis Blood Hag (2pts)

Soulhunters (Leader and 9 Grunts) (9pts)

Darragh Wrathe (4pts)

Madelyn Corbeau, Ordic Courtesan (2pts)

Warwitch Siren (2pts)


Deployment will deploy exactly like how my Deneghra2 list deploys right now, with the 2 block units in the middle beside Goreshade, Riders and Soulhunters up the flanks, with support and jacks near Goreshade. Occultation is pretty much always on Goreshade. The skarlock’s primary role is to be an infernal machine bot moving it between the helldiver and the arc node. Scything Touch cycling will happen after the helldiver is a little over halfway up the board and no longer really needs infernal machine. Witches and ghost raiders allow for the really really brutal double incorporeal midline.


Lazarus – If I had to pin down a list, hmm…

3Shade +5

– Harrower 10

– Node 4

Max Riders 11

Darragh 4

Max Blackbanes 9

Skarlock 2

Total = 35.

Jump to 50 I’m still undecided between:

– Second combat unit (likely Banes, Satyxis or Soulhunters) + solos

– 2nd heavy, like 2nd Harrower/Nightmare + solos

– More support, so Biles and Combine + solos. This is my fav pick at the moment.

(solos being Madelyn and Siren in all cases)


MC – I also have a super fast shade list is….well, it’s so tight on points….


Lazarus How super fast? Soulhunters, Riders, Raiders and Blackbanes? Hehe


MC – Soulhunters, riders, raiders, blackbane’s, yep. Only jack is a ripjaw. Darragh, madelyn, skarlock are the support models. Oh, and a machine wraith


Lazarus – Yeah its very similar to my first thoughts on him. I’m glad that actually turned out to be fairly spot on!


MC – I think I also prefer Goreshade3 without Bane Thralls oddly, which…I feel weird about, but his list really doesn’t have problems with contesting zones because of Blackbane’s. Scything Touched Raiders, Soulhunters and Bane Riders do enough heavy hitting to make the Thralls not necessary I feel for him. I feel like the banes get left behind with him whereas running a purely speed oriented list seems so much stronger with him, especially since you can dig so deep with a list of Raiders, Soulhunters, Riders and blackbanes.


Lazarus – I think that makes a lot of sense. If his list is very fast and aggressive then I can see Banes being problematic.


MC – Yeah, and scything touch makes the list hit SO hard. Believe it or not, I actually feel that madelyn is even MORE important than Darragh for him. Right now, I’ve been having so many problems with him in terms of how quickly he fills up points in his list. E.g.:

Goreshade, Lord of Ruin (*5pts)

* Harrower (10pts)

* Ripjaw (5pts)

* Skarlock Thrall (2pts)

Bane Riders (Leader and 4 Grunts) (11pts)

Bile Thralls (Leader and 5 Grunts) (5pts)

Blackbane’s Ghost Raiders (Blackbane and 9 Grunts) (9pts)

Madelyn Corbeau (2pts)

Warwitch Siren (2pts)


This leaves 9pts free. Soulhunters are always really good and at that point, I really would need to find the points for Darragh. And I want Darragh for the non-linear threat range that he brings with death ride.


Lazarus – Yeah I can totally see how he eats way too many points. Nevermind trying the double Harrower build. Which I worry is too costly to actually fit and still get the elements you want. I mean in the list above already you want WSC + Darragh.


MC – Yeah and that takes up 9 points. Though I’m trying to see if he can function without the wsc effectively.


Lazarus – Agreed. I think Soulhunters are probs really solid, but you do want Darragh then as you said.


MC – I don’t mind darragh in there, but then, it’s like…..what do I cut for him? At that point, the only sensible cut are the biles, but I feel that I really want the biles, which then leaves the cuts to madelyn and the siren, and while I think I could lose the siren, I don’t think the loss of madelyn is acceptable. And while I could always downgrade the ripjaw to a deathripper, that still only leaves 3 points, which is still 1 short.


Lazarus – Agreed on all counts. Madelyn I feel is too essential for what he does, so you’re deliberately gimping yourself in not taking her. Then (in that list) I wouldn’t do Soulhunters actually. Without Darragh they’ll be a bit eh for what he wants to do. Instead you could go for Bloodwitches which is somewhat excessive on the anti-infantry front. What I think he might really want is anti ARM. PWs maybe? Lets you lockdown heavies and further pressure the scenario, backup feat models if you want and so on. If you go Combine by cutting the Siren that’s 11. Otherwise use the last 3 points on MWs. Or do you think its worth spending the 9 just on Darragh plus whatever. Is Darragh also important for the durability of 3Shade and Riders?


MC – Yeah… I managed to get in another game with him yesterday to some good results, but once again, it was ANOTHER small points game so I didn’t get to really field a list I was happy with….

I actually don’t feel like Goreshade3 is playable in a small points game.


Lazarus – I’d agree. Few of our camping/character heavy chars are.


MC – I played against a caine2 tier3 list with goreshade, a ripjaw, skarlock, darragh, corbeau, max riders and 20 mechanithralls with 2 surgeons.


Lazarus – How are the McThralls working with him?


MC – Meh, he does jack all for them. They just kinda get in the way and occasionally kill something. I mean, rolling hard 9’s to kill rangers sucks something fierce, and I did kill 3 of the 6 rangers, but it did take like 7 mechanithralls to do it, each making 2 attacks.


Lazarus – Yeah that’s what I figured. McThralls really don’t appeal to me largely for that reason unless running the casters with solid hit buffs (pSkarre + Denny).


Tier


MC – I’ve actually been pondering his theme force. My biggest problem with his theme force is no blackbane’s and no machine wraiths. And I would only go up to tier 2 for the +1 to go first. But I think that may be a big enough knock against it that stops me from playing it in tier. But I still have the 2 units of riders just in case I ever do want to.


Lazarus – The theme force I think is iffy because no Incorporeal for the spell assassination. Really it’s all about the riders then.


MC – The only reason to play shade3 tier is to get the second unit of riders. Because of the +1 to go first is really nasty with that. But…losing darragh wrathe and madelyn is a no go for me


Lazarus – Agreed. I like riders with him, so im not sure what people are quite hating on there? Occultation and ST are both great on them, Mockery is obviously pretty fantastic and they screen the other elements you want anyway.


MC – After more thinking, in fact, straight up…losing Madelyn is a no go. I can live without Darragh. Plus, with the riders, you aren’t forced to take Tartarus. And anytime I can free up Tartarus…I do it


Lazarus – Yeah. In fact losing mercs kills a lot of our tiers, losing banes ruins some of the others, and losing access to biles straight up murders a few as well (esp as they aren’t in most of the Occultation casters tier lists!).


MC – Agreed. Its quite possibly the best thing about Riders (well and being a second super solid way to deal with high DEF)


Conclusion


So yes, we’ve had a few discussions about 3Shade as you can see here! I know it’s a very casual format, but hopefully this will bring some useful insight to somebody… and no doubt we’ll do more of this sort of thing if people appreciate the overview.

Comments welcome.


You guys asked for it, so here it is, part 2 of Lazarus0909′s Witch Coven of Gharlghast article!

———-

Overview:

I know after my successful last article a while back I promised to do some additional coverage on the Coven to go a little further into the complexities of this caster, so hopefully this will be useful to a lot of people out there looking to get more mileage out of the ladies.

If you haven’t already, I strong recommend reading Part 1 of this Spotlight on the Coven first, where I give them a general overview, look at some of the basics and go over running them as a moderately jack heavy caster. In this second part though, I plan to go a bit more in depth; going beyond some of the simple basics (that everybody at least has some handle on by now) and looking at some of their game play, strengths, weaknesses and of course finally, some list construction (where I explain some of the choices that have led me to the current incarnation of my list).

In short: Part 1 goes over what the Coven do, Part 2 looks at how to do it…

Before I begin though, I would note that as with any caster, the more in depth you go and start talking about application (rather than just facts), the more you will inevitably slant into the world of opinion. I will endeavor to do my best here to provide arguments and solid reasoning for each section, but do feel free to ask any questions for further clarity, and be prepared to accept that you might not agree with everything presented.

So, into the rabbit warren we go.

Taking a new direction:

At this point you ought to have a decent grasp of at least what the Coven does (and again, Part 1…) but the question you might be asking is “Yes, but how do I translate that onto the tabletop?”, or “How do I actually take that knowledge, use it to win?” or even more simply, “How do I stop getting the witches killed?!”

First of all, you have to alter your perspective, which means first and foremost, you need to understand that a lot of the lessons you learn playing Cryx casters actually don’t apply when playing the Coven:

  • Whilst you can (and should) run infantry, they want combat jacks in the list, and ideally, plenty of them. Don’t go overboard (my Part 1 covers how to strike the right balance) but don’t skip them either, or you’ll just wish you took eDenny (if I’m brutally honest).
  • You can live with spell hate. Considering 4/6 spells are upkeeps and a lot of your focus can (and again, often should) get allocated to jacks, opponents that prevent you from casting (or even channeling) spells don’t have to be so devastating.
  • You can live with upkeep hate though as well?! This seems odd, but it’s true. 2 of your upkeeps only cost 1 focus to recast. Veil will often be recast anyway for positioning, and Curse (being a debuff), is often applied to enemy models and taken advantage of on your turn. Factor in the Skarlock for a freebie and that you have plenty of focus to spare and I’ve often just shrugged through Purification and other similar nonsense.
  • The role of infantry is often to support. Banes in their list are often dying so that something else might do its job, not the other way around (such as in most lists) where delivering Banes into something is the crux of your muscle. Banes are often around to threaten, jam and simply eat 1-2 key targets each turn. In terms of actual killing they are obviously stellar, but you are using them to problem solve and sacrifice, not as the primary impact of the list. Note- this point shouldn’t be seen as an absolute, obviously each game is different. But perspective is useful.
  • A lot of opposing anti-infantry is wasted. If you look at most people’s anti-Cryx lists, they tend to feature a LOT of anti-infantry to counter lists like eGaspy, pSkarre, Terminus etc. I would argue the Coven only really need a single combat unit (which ends up being more for jamming and problem solving frankly) + Biles, and even then you have delivery options like nobody else to actually ensure they do their job. By the end of each game, usually all the infantry are dead just the same, but not before doing what they were meant to. Another way of looking at it is this – you have fantastic options for delivery & denial, but they can usually only affect a few models at a time, so you’re better off with less troops that you can protect better (and don’t have to worry about them sustaining casualties early on) then more which just opens up your opponent’s targeting options.
  • Character restrictions are a breeze. Currently I have Nightmare as the only character in the list, although you can make a decent case for Gorman (and the Combine if you shift things around). The point here isn’t that characters aren’t good with them (they are), but that running the Coven as a second list in Steamroller or other formats gives your other list(s) quite a bit of breathing room.
  • Your feat is nearly entirely defensive. When you look at most other Cryx casters, while some of their feats have a definite defensive application, they are primarily used to either inflict massive outright destruction (directly or by debuff), bring new models back, make your current ones better or gain you a large attrition/scenario advantage. The Coven mostly uses their feat to reduce incoming damage (ideally on an early turn) and deliver pieces as a result.
  • Your caster is squishy (duh) and generally lacks offensive ability (or it’s often a trap).  You need your army to win with the Coven, and that is sometimes a hard pill to swallow. Some Cryx casters actively encourage losing models (eGaspy and eGoreshade for example); others simply don’t care because they can largely do it alone (Terminus and Venethrax for example). The Coven are very different in this respect…lose most of your army and you will have very few options for victory. While you can go for the backup option of 3x Stygian Abyss to their casters face, see this as a last resort, because it’s unreliable and easily shut down. Otherwise you’ve got your knives and trying to camp (which does nothing for the Egregore anyway) and are probably not close enough to objectives to push aggressively on scenario. This is why denial is such an important element for the Coven, because you need those models to live.

These were just a few of the interesting lessons I learned along my journey with the triad. Some of these are obvious; others take an absolute age to truly get the hang of.  Anyway, the reason I mention all of this is because a lot of advice out there for the ladies is just terrible, and it’s so very easy to build off Cryx staples and instantly want to drop this caster because it’s just too damn hard to get them working… so you’ll end up wishing you’d taken eDenny instead. For example, here is one of my early lists.

System: Warmachine
Faction: Cryx
Casters: 1/1
Points: 50/50
Witch Coven of Gharlghast (*5pts)
* Deathripper/Nightwretch (4pts)
* Harrower (10pts)
* Nightmare (10pts)
* Skarlock Thrall (2pts)
Bane Knights (Leader and 9 Grunts) (10pts)
Bane Thralls (Leader and 9 Grunts) (8pts)
* Bane Thrall Officer & Standard (3pts)
Bane Lord Tartarus (4pts)

(and eventually I branched out into variations, where the Harrower or a unit became the Combine, Siren, Gorman and a Machine Wraith IIRC)

And I had a miserable time with it till I could narrow down what worked. Although you’ll have to wait till later in the list construction section to see why… 🙂

Strengths:

Ok, so I’ve already highlighted how a fresh approach is needed when looking at this caster (that doesn’t mean throw everything out of the window, but it does mean changing one’s perspective!) and I think a quick overview on some of their strengths is going to do a long way towards cementing this caster’s play style.

If I had to sum up the Coven in a nutshell I would say they focus around 3 key things – Mobility, Denial, and Jack Bullet. Whilst they have a lot of neat tricks to play around with, these are the main things I try to keep in mind when dropping them on the table. So let’s look at these further.

Mobility Aside from some of the mass teleport nonsense other factions can pull, the Coven arguably have some of the best options in the entire game for moving things around the table. It’s nice to know that no matter what battlefield you are on, pretty much no obstacle is insurmountable, and that very few things can keep you from going where you want to go. The crucial thing to keep in mind though is that this mobility doesn’t just help you navigate the battlefield but also your opponent’s army, as there is nothing quite like the freedom of moving through opposing models or ignoring free-strikes.

In one game for example, I put Veil down on an opposing heavy (in rough terrain), had the Skarlock cast Ghost Walk, put Curse on an intervening unit, then had Nightmare charge 13” through the whole lot (fully loaded + IM) to tear up their caster without a single free strike. All because they left just a sliver of space for him to land after I cleared a little room and gained some LOS.

While that silly combo is unlikely to come up very often (although rarely will it have to either, which is nice), you’ll quickly find that actually very little except immovable/indestructible bases around your target prevents you from getting there, so look out for those openings and do your best to create them otherwise.

Denial Of course you actually have to survive to do take advantage of any of those crucial situations, so playing the Coven’s denial game is a big part of their success. Timing the feat on the turn you will take the most damage is a big part of that (covered in Part 1) but you still have a lot of work to do to ensure the rest of the list gets to do their job.

Your other tools include use of

  • Black Mantle (not just for the ladies, but as a wonderful way of protecting a key jack (for free!) or solo that’s out of other options).
  • Occultation. Generally this spell is in high demand, so I try to slap it on something fast and aggressive T1-2 and then cycle it back to Biles after the feat. Obviously you will adapt this heavily based on the situation.
  • Terrain. (Pathfinder, Ghostly/Ghost Walk, Veil, plus all those juicy DEF bonuses and limitations to opposing mobility)
  • Blocked LOS (Jacks/huge bases to block lanes, Feat (duh!), hiding behind terrain, jamming up opposing models, and of course clouds (Veil, Gorman, WE, Blood Witches etc.)
  • Being in melee (vs. Shooting opponents, stops guns firing/aiming bonus, target in melee penalty (especially for high DEF models), increased friendly fire vs. sprays/AOEs, trouble getting their key models to threat during feat turn.
  • NOT being in melee. (Vs. more melee opponents you ideally don’t want to be stabbed to death, so feat to prevent charges/threat range, Stealth only works vs. range, terrain/target in melee modifiers (from other models) much more effective vs ranged, care little about being jammed, threat further than most anyway)

These are all just some thoughts of things to look out for. Remember, you need your key pieces to stay alive as long as possible to do their job, and reducing how much you take in terms of oncoming damage is crucial to that.

Jack BulletThis (to me at least) is one of the best and strongest win-conditions of the Coven, ultimately delivering a jack to a key target (ideally a caster, but if you can alpha key pieces to win…do it!) and ideally winning the game as a result. You have amazing jack support, with high focus stats, all the delivery options covered above and of course the wonderful buffing spell, Infernal Machine (IM). This to me then is the primary win condition for the Coven, and I try to advocate a general scalpel approach to games due to their many options in delivering key assassination pieces.

In general, I don’t think it is much of a stretch to say that you can generally support jacks better than infantry. I won’t rehash most of what I said in Part 1 about running jack heavy or why I think that perfect balance of jacks works well, but I will say that this is generally how most games I find are won with the ladies (with the odd handful of games ending to a random Bane or a lucky Stygian Abyss). As covered above, the Coven really can deliver jacks like almost nobody else in the game, and actually having the focus to power them and IM to buff their speed/accuracy up to crazy levels…well, it’s a scary proposition for most casters to deal with.

The main thing to focus on here with the ladies though is that most of the strength in your jacks results in superior mobility, so covering a lot of different threat angles not only increases redundancy (Cryx jacks are fragile after all and do get killed despite your best denial efforts) but also makes it harder for your opponents to hide or more likely for you to get there.

Weaknesses:

Well it can’t all be good news right? While the ladies might be amazing at delivering key assassination pieces, there are a lot of things you need to account for if you plan on surviving the experience on the tabletop. While I’ll discuss some specific bad matchups later, for now I’ll go over some of the general cracks to expect in the list so you can hopefully address these flaws and guard against opponents looking to exploit them.

Caster Survival– Like it or not, your survival depends on the continued existence of what are essentially 3x 8-box ARM 12 solos. It’s easy to get caught up on the fact that they have DEF 16, Stealth and more boxes than any caster bar Karchev…but ultimately they are squishy and that needs to be accounted for. So, one key thing to look at is what’s really a threat here, and what isn’t. This is a short list and obviously I can’t account for everything, but here are some good examples that come up a lot.

Threats:

  • Auto-Hit effects (trumps Stealth).
  • Fire (especially if it lands on multiple Coven members, because you take more damage and have less chance of it going out…).
  • AOE blast damage (especially boosted, and especially if clumped around the Egregore where multiple hits can be scored).
  • Sprays (again, multiple hits, gets around Stealth/some LOS issues).
  • Boosted hits/damage (usually heavies & casters, gets around stats for maximum effect).
  • Shooting that ignores Stealth (Black Mantle) and/or LOS (Feat).
  • Slams/Impact attacks (multiple damage rolls + sometimes knockdown is not good!).
  • Movement effects (drawing the Witches/Ball out to make them vulnerable).
  • Being a diverse target (opponents can target witches OR Egregore depending on their weapon of choice, and camping doesn’t work because of the Egregore).

Non-Threats:

  • Most standard infantry (average MAT 6 struggles to land hits on the ladies, and average POW isn’t going to damage the Egregore much at ARM 17…without Reach they will also struggle to bring many attacks to bear, generally struggle with threat range and few get past the Biles anyway).
  • Slow Heavies (because you can generally escape them and they take too long to get to you).
  • Corrosion (takes forever to eat through your number of boxes most of the time).
  • Most direct shooting (Stealth, Feat, Veil, other LOS blockers make this tricky to bring to bear).
  • Other short ranged effects (because you should really be miles away).
  • Anything that reduces focus (doesn’t work), does extra damage for upkeeps on you (doesn’t happen) or brings a lot of magic hate, because very little affects your personal survivability.

So as you can see, there are more TYPES of threats to watch out for, but there are probably fewer MODELS overall in your opponents list that bring those kinds of threat to the table. In general, you will be keeping an eye on 1-2 key pieces and hoping to eliminate or tie up those threats while relying on Denial & Distance to stay alive. As always, knowledge is power here, because a single “gotcha” moment really spells a messy death for the ladies if you forget about it!

So how do I deal with some of these problems?

  • Distance. I’ll say it again because few things are going to get you killed faster than being too close to the opponent. If you are too far away to shoot (due to Stealth) or charge (due to being out of threat range), you are usually just fine 95% of the time. In fact with the nature of the Coven largely using upkeep spells & arc nodes, the only time you want to be moving up at all is to keep jacks in control (still a massive 18” though), to stay out of killbox and of course moving the ball up for maximum coverage on the feat turn (remember, you gain nothing bringing the ladies with you, and he can always activate first next turn and rush back to restore perfect conjunction anyway). So stay the hell away from the fight.
  • A shield.  I’ve tried playing the Coven without any effective screening, and honestly, you just feel a lot more vulnerable. For this task, I assigned the Wraith Engine (covered below in greater detail) but a lot of people use a Kraken to similar effect. In essence, the idea is to have a large chunk of the board in front of you immediately impassable due to there being a giant base in the way, touching the Egregore for Black Mantle (WE only, Kraken needn’t bother as it can’t have Stealth). I’ll go into more of the specifics later when I cover the WE in my list, but for now I’ll just mention that this provides an effective defense vs. Charges, Walking Threat, Shooting and general blocked LOS all in one neat (big!) package.

Failed DeliverySometimes you either have a matchup or a particular battlefield situation where you simply can’t deliver your key assassination piece. Perhaps you are chewing through a particular ball busting feat? Perhaps you are dealing with a particularly hardy caster (e.g. Karchev) a particularly hardy list (e.g. Xerxis brick) or some other defensive element you are struggling with (Admonition, Stumbling Drunk, Bounce/Repulsion etc.)? Perhaps your mobility is either being reduced (SPD reduction, pathfinder removal, LOS messing up charges, spell immunity preventing you getting there) or stymied completely (mass knockdown/Stationary, Gaze of Menoth, Locker, Shadowbind etc).

So obviously there are a lot of things that can go wrong. The trick then is obviously going to be trying to see as many of them coming as soon as models hit the table and planning ways around them. This includes things like:

  • Can I ride it out till next turn?  This is particularly applicable to feats or other temporary effects, but also depends on your/your opponent’s models.
  • Can I push things into my favor?  Often this is just killing the models that are causing the grief, but slamming/throwing them out of the way is also very legitimate (knockdown shuts several defensive abilities off). Another consideration is bringing other models to my assassination run in case one doesn’t seal the deal…
  • Can I force the opponent to make some difficult choices?  Sometimes the situation might look hopeless, but forcing tough choices is something this list does really well. You might not yet see the opening on your turn, but if you have varied threats across the board, not all of your list can be dealt with at once. Opponents have to make conscious choices of what to kill and what can wait, whether they can afford to retreat (killbox) or stay put (assassination risk). Do they camp for survival, or use that focus to sling spells/load jacks to clear the threats (or for Hordes, do they camp transfers and risk the beasts being less effective/dying from transferred damage)? You get the idea. This isn’t so much about expecting mistakes, but forcing an opponent into difficult target priority/tactical choices.
  • Can I do something else?  An opponent might be so entrenched that a jack bullet looks near impossible, but there is always something you can do instead of waiting till the next turn. Kill some models that might get in the way later. Take out key support pieces, or their few models in scenario to force others to take their place (or they risk losing scenario). Slam or throw things, especially if you can cause collateral damage and force them to stand again next turn. But most importantly of all, fight for board position. When movement is one of the best tricks your caster has, having a mastery of positioning really exploits your own strengths and makes it hard(er) for opponents to effectively respond.

Complexity By now some of you are probably already scratching your heads at this caster and they’re not even on the battlefield yet. This complexity can (and frequently will) be their absolute downfall. The difference between them, and say, somebody like Scaverous is not so much that their options are complex (you aren’t really burdened with 8 different things you want to do on a given turn) but more than actually engaging them is a daunting sequence of events.

After all, on a given turn, you can easily be looking at doing all of the following:

  • Allocate focus. This seems duh but is actually really complex, because you have to balance how much the jacks need vs. what you need to keep for delivery, which upkeeps to drop/keep, what the Skarlock/Siren(s) will handle and god help you if you lost a witch and you’re struggling to make do with less focus, a smaller control area (which the jacks are probably out of now!) and no perfect conjunction. Other Cryx casters get off easy with their “Huh, no focus left, guess the Siren’s will just throw the nodes a focus and we’ll call it a day”.
  • Moving the ladies AND maintaining perfect conjunction at exactly the times you want spells. This is just a nuisance frankly, because even though you want to ideally sit still, Killbox is a thing and jacks need to be in control to get their focus. I really hope one day this just becomes “If at any time during their activations they form the triangle, you get -1 to spell costs” or something similar, because trying to navigate the battlefield without blocking LOS, giving yourself Stealth at the end and staying calm/rational (believe me, this is hard when you suddenly realize there is rough terrain ahead and Ghost Walk affects only 1 lady at a time!)…well, it’s a challenge. Never mind the feat turn when you want the Egregore up field for max coverage but without breaking PC till the ladies are done, bringing him back next turn…ugh! Nothing you can do about that one.
  • Clear the lanes. Biles need to move up, Curse/Veil needs to go down and you generally need to clear the path for your jack bullet (who also needs to be fully loaded, have IM and often Ghost Walk too, so plan all that out). Compared to the complexities above, this bit seems almost easy now!
  • Staying alive. And of course, unless you win the game on that turn, you have to think carefully about your defense. Are the ladies safe? Do I need an opportune Veil, Occultation, Clouds (other models), blocked LOS…is it a feat turn? Is the feat enough?

You will be pleased to know though that actually a lot of this gets much easier with practice, becoming almost second nature after a while. You usually really only have a couple of key plans to engage on a given turn, it’s just that the chain of events to get there has a lot of steps which can be easily forgotten. So practice just moving the ladies around on an empty board, or under Mangled Metal conditions for a while, and eventually it does get easier. Write it all down if you have to. But forgetting something crucial absolutely kills this caster, so that I think is enough to make the list of weaknesses.

Matchups:

So now we’re onto one of the most requested sections in a Part 2 article (along with my list breakdown, below) – how to handle all the horrendous matchups. A lot of these you will notice revolve around some of the weaknesses as highlighted above, but here we’ll look at some of the more scary particulars and either come up with ways to deal with them, or at the very least, look for ways to minimize their impact. Some of this is re-written from that first thread to avoid duplicated effort, but I think it will be worth mentioning. In general, of course you should be avoiding these matchups if you can, but this should give some rough ideas for when you’re forced to take them on.

Ravagores– Ah the dreaded Ravagore. This beast haunts the ladies dreams at night, because in a way, it almost seems designed specifically to kill them. Long range, ignores Stealth, Blast (to catch them all benefiting from Black Mantle) and of course, the dreaded continuous fire effect. Ouch. In fact a Ravagore landing a boosted to hit shot (he needs an 8, unless aiming, which is unlikely unless you just forgot about him!) with continuous fire on the Egregore spells some serious trouble, dealing at least 5 damage to the Egregore, 2 damage to each Witch, setting them all on fire and leaving him 2 fury to boost damage on 2 of the models as he chooses. When you consider that you have very good odds of seeing Ravagores in pairs and that they threaten 20” unassisted…yeah you can see how this goes down.  

So what do we do? Well for a start, dropping B2B placing for Black Mantle might be a really good start, as it clusters you up unnecessarily and you aren’t getting Stealth anyway vs. Eyeless Sight (of course, watch out for non eyeless sight things like Raptors/Striders, as they will end the ladies pretty quickly if they’re around). Next, you can consider not moving up so much T1 and skirting the edges of the table. 20” unassisted threat sounds like a lot, but considering moving diagonally away from them to create greater distance if you need to (skirt the opposite edge basically) and don’t move up more than you have to. If you do plan on moving less than the full distance T1, (and thus deploying further up on the baseline to avoid Killboxing T2 for any witches at the back of PC in the triangle), deploy them in a line make sure none of the witches are more than 2″ deep into your deployment, then you should be good go. (E.g. start them all on the baseline, move up into perfect conjunction just slightly out of deployment, then mess around with any spells). Of course you need to watch out for cases where the legion player can threaten even further (AD such as the Abby tier, Leash, Snipe, Escort etc. and plan accordingly).

Next, the feat is your turn of safety so feat earlier if you have to. In many cases you will still be safe Turn 1, but you need to know exactly how far your opponent is capable of threatening you effectively to be absolutely sure (you control is very close to their threat range, so measure ahead of time). With such long running/charging threat ranges, after that, any Ravagores can easily be engaged or jammed quickly by your faster elements and hopefully you can take them out before they create problems later in the game.

Finally, I would mention that this is a very good reason to consider investing in a shield. Obviously as I taking something JUST as a dedicated shield is a waste of points, but if you can block LOS you are already helping a lot. A lot of people use the Kraken for this role which is probably the best (but most expensive option) and definitely a good idea. I personally use the WE, and between Stealth (more for the other matchups mind!) and Incorporeal timing with the feat, I can present some durable options to keep the ladies (and using clouds, often the rest of the army) alive. This is less awesome in Legion where some of the strengths are mitigated, but he can still survive 2 Ravagore shots if need be, which I’ll take if it buys me another turn. E.g. 1 turn feat, 1 turn Ravagore shots, after that…well hopefully by then, I can kill the damn things!

A lot of this just plain doesn’t work vs. eLylyth unfortunately, and you really are going to be out in the cold on that one unless running a Kraken (and even then, once it dies you are in real trouble). You can threaten some crazy distances and hopefully catch her (or powerful shooting elements) after your feat turn, but it really is a huge uphill struggle I’m afraid. I know none of the above is ideal, and that it doesn’t make it less of a bad matchup, but I have beaten Legion options this way so hopefully it helps a little anyway.

p/e FeoraThese 2 can be a right nuisance for one simple reason – fire you can do very little to stop. pFeora is often the first to spring to many newer players minds as being scarier for being able to set you on fire right away, but I’d argue that with the greater threat range (Fire Step), the dreaded Caustic presence (you can’t luck out and have the fire go out), the Warjack bond (more fire + potential damage) and of course that the feat (she can just move fire from anything onto the ladies) eFeora is far scarier. For example, I had a friend realize he could win simply by shifting fire onto my ladies, charge to put them in control and know I was going to burn to death regardless even though he had 0 camp out in the open. Finally, eFeora is generally a lot more popular and balanced for the tournament scene, so you are that much more likely to bump into her. Ultimately though, the reason I cover both together is that you are going to suffer similar problems and need similar solutions.

So, first of all, understanding their threat ranges is crucial. With smallish CTRL areas, you can usually get the first hit on them with your speedy jacks, as they need to ideally put your backfield caster in a 12” CTRL area for maximum effect, meaning that to get the threat on your backline, they are almost certainly right beside your front line. There is no reason not to have your jacks at least 12”+ in front of your caster, so to get that close to the Coven, their caster really does have to dive right into the danger zone and lead from the front. Doing such a thing is incredibly dangerous… as we’ve mentioned in great detail just how good the Coven are at assassinating casters and getting the first hit in with superior threat ranges. In this sense, you can actually use your caster as a lure, because the only way they are going to threaten an assassination is to come further forward than they really should (or normally would) forcing them to find ways to avoid you getting the first hit on them or skulking around at the back which is often cramping the effectiveness of their feat.

The rest of the tactics for playing against those casters is fairly standard of course and the usual advice applies, but I just figured I’d touch upon what makes them particularly annoying for the Coven and how best to cope with that. Otherwise, most of your jacks are going to find taking a fire damage roll annoying, but little else. Bile Thralls can often be spread out or have done their job already, solos should be further back from trouble and Bane Riders don’t mind too much about getting lit up really either.

SiegeThis guy is an absolute pain, and as far as caster matchups go, definitely one of the worst. Mage Sight is very powerful alone for a list that relies so much on denial, but combo that with Groundpounder shots and the ladies really want nothing to do with him (they get splattered horribly if that lands on them). The rest of his abilities are also difficult to stomach, with Foxhole removing intervening models that are blocking LOS if he wants to (goodbye screening WE/Kraken), Force Hammer slamming your jacks to irritate you and finally the feat to really crack the jacks ARM pretty quickly (and to squish the ladies just that little bit more if really necessary). At this point, Explosivo and Rift are just icing on the cake really, sharing the magic weapons/damage, more blasts and forcing you to commit your pathfinder options too.

So what can we do about this guy? Well scary though all of these abilities are, the vast majority of them depend on his CTRL area, so at the least the threat range is predictable and you can stay the hell away from that to buy yourself some time. Again, depending on the composition of the rest of the list, you have a very good reason to not bother with Black Mantle either (and in this case, it can be worse than Eyeless Sight due to Mage Sight working for the whole rest of the list), so spreading out minimizes the risk of blast damage, collateral from Force Hammer, Groundpounder and being caught in Mage Sight’s effect. Like p/e Feora he is going to have to come to you to bring this level of nastiness (so again, your caster is a lure), which definitely puts him in the danger zone for all of your jacks to at least try and get the first hit in.

Finally, like many casters, he can’t do all this at once. Mage Sight + Groundpounder might be cheap, but both Rift and Force Hammer are expensive spells, and maximizing the use of the feat will often see him wanting extra focus to boost damage vs. your jacks to get the most out of that Armor Piercing. This makes camping difficult, fueling jacks a nuisance and of course brings him into a vulnerable spot where if you apply the pressure evenly, he can’t cover all the varied threats you are presenting while trying to stay alive and threaten you in return. As always, the feat is partially at least your turn of safety (for most of your army anyway, even though it does little vs. many of his personal abilities), so if you advance under it and stop him advancing in return due to concern about his own personal survivability, you’ve already come a long way. Unfortunately what you do ultimately have to recognize is that this is always an uphill matchup, and although these things help and are things you can take advantage of, you’re in for one hell of a fight.

Kaelyssa  Last among my poor caster matchups, Kaelyssa is interesting because I actually don’t see a lot of people talk about her in reference to the Coven, which is odd. This might partly be due to generally fewer people playing Retribution compared to other factions, but I would say that played properly, Kaelyssa is a pretty nasty matchup (I would know, being a Ret player as well…)

So what are we looking at here? For a start, Kaelyssa has some pretty frightening personal assassination with innate True Sight, a ROF 3 gun (3 witches, 3 shots…you can see how this goes down) and the ability to give herself Phantom Seeker to straight up ignore any of the LOS tricks you might try to rely upon.  While she cannot steal focus from the Egregore, a few boosted shots are clearly capable of bringing down a witch or 2, and a Rift (with Sylyss) is very likely to follow with damage easily being enough to kill you off. Much like Siege then, you can expect her to circumvent your defenses pretty handily and kill you if she gets the chance without breaking too much of a sweat.

As for the rest of the matchup, the feat is pretty brutal when trying to deliver a jack bullet (no charging) and can be used effectively to counter yours, reducing the advantage bought from your round of protection to stop you utilizing it properly the turn after. Her numerous anti magic tricks (Arcane Reckoning, Banishing Ward and of course Witch Hound) make it very difficult to get Curse of Shadows/Stygian Abyss where you want them to go or punishes you accordingly, so that can make assassinations very difficult. Phantom Seeker also completely steps around your feat, and although you can still reduce their RAT, both her and Strike Force stand a good chance of getting powerful shots straight through. Finally, Arcantrik bolt (Stationary on a jack) and/or Backlash are the last things a jack heavy list wants to run into, especially when most of your jacks rely on higher DEF to survive.

Well what can we do in return? Kaelyssa is pretty squishy on the whole, so aside from the aforementioned feat and spell hate, if you can deliver anything to her she is likely not long destined for this world. Even fully camped (unlikely) she only makes it to ARM 21, which is definitely within the realm of killable for Nightmare/Stalkers, and a camping Kaelyssa is actually not doing very much to stop you. Much of her army support is also defensively oriented, so her forces do rely quite a bit on being self sufficient and, although she personally handles Stealth quite well, the rest of the list might struggle with stealth jacks (note: Stealth infantry are rarely a problem in Ret) which you can deliver en-masse.
Finally I think I’ll just make a quick comment on Issyria here as there are some interesting parallels. In many ways she will be similarly scary for her ability to remove your Stealth (Feat, so use yours first to buy a turn of safety), negate spells (Arcane Vortex) and avoid assassination (Admonition, plus other possible defensive tech depending on the list). It’s a bit early to say at this point much more than that, but this is definitely one to keep an eye on in the future.

Other matchups:

So I think I’ve probably covered enough some of the worst offenders and could really go on about this all day, but I think I’ll just skim through a couple of other things to watch out for and we can probably wrap that up.

Gun Mages (especially with Deadeye)These will be annoying for ignoring Stealth, doing decent damage from a distance, bringing magic weapons (always something to watch in Cryx) and of course, the CRA blast option if they want it. Generally these are pretty commonplace, and while they are unlikely to get close enough to the Coven unhindered, they will no doubt do their best to pick of things like Biles or weaker jacks where possible. They are however pretty flimsy, have few options in melee (so jam where possible) and don’t ignore LOS without some help.

AOEs, Bounce/Auto hit Effects (Chain Lightning, Ashes to Ashes, Stormcallers etc.) and Sprays – These are usually irritating for ignoring Stealth, generating a high number of hits or avoiding the hit altogether. Bounce effects you mostly need to be aware of things like arc nodes and try to keep the Coven away from lower DEF models if they will make an easy target to bounce hits from. AOEs usually aren’t too bad given the restrictions of blocked LOS, Stealth and unreliable scattering, but be aware of anything that can get around those effects, channel effectively, have continuous effects and especially those deadly blasts with fully boosted results (Fire for Effect, Feats/Spells that boost damage etc). Sprays are interesting, because unlike the others they will have to roll to hit each model, but they can be used effectively to negate some targeting restrictions or come from angles that are difficult to predict (Crevasse). In all these cases, knowing is almost the entire battle, so spread out if you have to, tie up or kill anything too dangerous, and be mindful of your positioning on the field.

Eyeless Sight – Always a pain for Cryx to deal with, you see this mostly with Legion but also Skorne (Extoller) and is most dangerous when coming from shooting units. The first thought again is knowledge, and trying to find other defenses besides Stealth (Cover for example is highly desirable in such situations, and remember that other Stealth models do block LOS from Eyeless Sight shooting so they can screen you if need be). Clouds similarly won’t do anything vs. those models, but that doesn’t mean you can’t use them to block off options for non-Eyeless Sight models or to do something else instead (e.g. don’t cast Veil unless for movement, save souls on the Wraith Engine for attacking, Death Strike with Blood Witches, run with Gorman etc.) As with the Ravagores above, watch carefully for the models that have it, keep an eye on their threat ranges, and ideally try to take them out. After all, not all Eyeless Sight models are a problem for you Coven/Black Mantle/Occultation models, so prioritize those with long range guns first and foremost and go from there, using the feat to buy some time. With Skorne for example they rely on the Extoller to distribute it, so killing him early might be worthwhile if they have a large shooting component.   

Really, by now, you probably get the idea in all of this, so we can summarize the weaknesses & bad matchups as follows – things that ignore/reduce the effects of your denial (Clouds, Stealth, LOS blocking, terrain) or make it difficult to make an impact are what you need to keep an eye on.

Gameplay Introduction:

So by now you probably have a pretty solid understanding of what awaits you on the tabletop, but we still have to translate all of that into actual gameplay. What to move where, things to look for, how to gain board control…these are all things we need to know and I shall now try to go over some of the basics. Please note that there is no way I can possibly cover every single situation, every matchup, every opponent or every piece of terrain etc… so what I am trying to do here is convey some general deployment, setup and maneuvering tactics that you can hopefully use as a rough guideline and then alter with each specific battle that you get into.

Also I am going to again remind you of a quick disclaimer: a lot of this is now stepping from the world of straight facts into the world of analysis. If it makes you feel better, imagine me saying “IMO” with every sentence. If you don’t want an opinion, well I’m not sure why you’d be reading this? Perhaps the internet is not for you? I don’t know. Anyway we’re all friends here, and none of this is meant to be authoritative, it is simply what I have found works over many games of testing and so on.

Finally, I think the Coven are largely a jack heavy (meaning 50/50 jack: infantry ratio, as per Part 1 of my article for an analysis) assassination caster, so this guide reflects that accordingly. If your list is completely different from this setup, you will want to adjust your gameplay accordingly. I also generally think the Coven attrition poorly (little personal muscle, rely on key pieces to win, few ways to protect beyond denial) and struggle with scenarios as well (squishy caster, lack of bodies, poor personal mobility). That isn’t to say that you CAN’T play towards these goals, but it is more to say that assassination is your primary strength, and I think casters are best off looking to maximize what they are good at when hitting the table.

Going 1st/2nd:

So, assuming I won the roll off (otherwise it doesn’t matter!) do I prefer to go first or second? In a nutshell, it depends for me on when I hope to use the feat, which as a benchmark, I’d say is ideally Turn 2 (Turn 1 if I am going second and they ran quickly up the board or threaten me too much right away, Turn 3 if they have low threat ranges such as some brick lists). I’d say that the important thing is that I want to be on a certain place on the board when the feat goes off, which is ideally a place that is too far from my opponent to walk to + engage (or walk + shoot, depending on their models) and of course out of LOS for a charge. Note that running to engage rarely concerns me much with numerous ways to disengage from melee anyway.

Usually I’d say this ends up being just over 10-12” from a more shooting opponent (basically I need to be their walking speed +5.1” away from them) and can be less so vs. melee models (again, depending on their base walking speed, Reach, and any movement buffs that don’t affect charging).

Ok, so what is my point? Well ideally I’m looking to go first if I can to project maximum threat across the board, but obviously that is entirely dependent on how quick my opponent is and how long there threat ranges are. If I’m ideally looking to pop the feat once I reach that magic number of X’ from my opponent’s models, do I need to go 1st or 2nd to do that in the fewest number of turns possible? If they are likely to rush up the field quickly, I can probably go second and pop my feat turn 1.

If they are slower however, perhaps advancing cautiously, then I might choose to go first and project threats early on. Either way though, as you’ll see soon enough, with most jacks running a massive 16-18” on the first turn off the deployment line with IM, I haven’t found whether going first or second is so much of a problem, because I’m going to get to where I want to be regardless soon enough and have the feat to doubly make sure I get the alpha. In general, I think I’d probably rather go first. After all, I have the raw speed, mobility and feat to help ensure I get the alpha, so it’s really nice to get that early board control and play less reactively to my opponent. This limits his options nice and early when the jacks are so far up field, which is always nice.

Deployment:

Coven Deployment Basic

(Note, Soulhunters represent Bane Riders in this image. From left to right: Stalker, Node, Nightmare, Skarlock, Wraith Engine, Coven, Riders/Biles, Siren, Node, Stalker. Forgive my use of Vassal, for I don’t actually use it all that often)

This is just a basic template, with most of the jacks spread out for maximum threat vectors but obviously deployment is always a very flexible thing depending on what faces you across the table.  The important thing to take note of is this: The Coven wants to stay behind the Wraith Engine (or Kraken if in your list) as much as possible (he will run ahead T1 to shield them assuming they aren’t in immediate danger, which is fine as he moves quicker anyway). Usually both of them will want to be the near the center, as the ladies want maximum coverage of the feat or direct casting where needed, while the huge base often wants to play centrally to maximize both offensive and defensive options. But feel free to deploy further to the side if there is a key threat across the table.

Really the rest of the list doesn’t matter too much in deployment, especially the jacks as they will be running really quickly T1 so have enormous repositioning options, even more so if you don’t need to move up the full distance. The only other thing to watch for is deploying the support so you get a good amount of coverage from the nodes/siren/skarlock and so the jacks don’t stray too far from their field of influence. Finally, Riders, Nightmare and Biles all deploy centrally and look for key threats across the table, moving to intercept general combat (Riders), Casters and heavies (Nightmare) and opposing infantry (Biles).  Finally, Nightmare preys usually something up field (for the extra movement) but if your opponent is slow or particularly tough, Prey that target instead if you prefer.

Early Turns:

 Coven Early Turns Basic

Usually I start off by spending most of my focus giving it out to jacks (1 each, Nightmare gets 2 if terrain will be a problem) so that is 4-5 depending on whether the Siren assists or prefers to run as well. That leaves at least 4(plus the Skarlock), which usually ends up being for either 2 cycles of IM and 1 Veil (to shield something important) and the Skarlock does Occultation or 4 cycles of IM (Witch 1, Witch 2, Witch 3, Skarlock) and one of the Witches does Occultation. Ideally Nightmare finishes with IM for maximum impact. The Egregore will either go last and run up full distance (if it’s a feat turn) or it will trail with the witches.

That’s it for spells/focus, and otherwise the rest is simple. The WE uses Apparition, chooses Incorporeal (unless I really need to block LOS to the Coven from something stealthy) so he can be Corporeal on feat turn and runs ahead of the ladies. Riders run, Biles run, with one or the other having Occultation depending on opponents threats in the early game. Usually Biles aren’t in trouble till T2 onwards, so this is usually the riders. Sirens, Skarlocks and Nodes just go where they need to for max coverage.

Roughly then, you’ll probably be looking at something like this:

(Nightmare has IM and Veil/Node in front, Wraith Engine has Black Mantle, Riders have Occultation)

This is probably as far up as you will ever want to go with your forces, but demonstrates nicely just how quickly you can pace it up the board. Please note that this is just a template (being this far up will probably qualify for overextension if going second and get you killed) designed to show maximum aggression values. Obviously then you will adjust this template heavily depending on what the board looks like and what your opponent is doing. Here for example is probably a more reasonable board position accounting for enemy models. (You’ll see I tried to pick a fairly balanced list with a bit of everything – 2 units, 3 jacks, defensive and offensive troops with Weapon Master/Shield Wall, both ranged and melee threats, spell threats, usual support to watch for etc). Anyway:

(Quick guide – This is bottom of Turn 1, after Coven feat, going second against a very aggressive Menoth player who mostly ran T1 (not uncommon). pSeverius cast Vision on the Reckoner, DW on Errants and Eye on himself, allocating the rest to run the 3 heavies. In response, the WE went Incorporeal and ran, I allocated 4 to run all but one of the nodes (the Siren power boosted the remainder) and spent the last 5 focus putting down Veil, Occultation on Biles (Riders were already in melee with an AD unit under feat so wouldn’t need it) and cycled IM twice to the 2 stalkers. The Skarlock finishes a final cycle of IM onto Nightmare who ran up.)

Now a lot of this is very adjustable but you get the idea. The Errants are too jammed up to clear the Riders (and still have to contend with essentially DEF 14 under the feat) and will very likely end up being purged on next turn. The Reckoner can walk up and smack the Stalker (everything else is too far under feat and the WE is Incorporeal), but being essentially DEF 18 really doesn’t make that a fun prospect. The other jacks won’t be doing that much either, being too far away to threaten and though arcing is a possibility, it doesn’t look good. TFG are unable to charge due to feat, so may as well move up to jam, engage and likely Shield Wall and/or Minifeat.

Later Turns:

 Coven Early Turns - With Models

So the point of that little demonstration is to show how you want to position things carefully to get some board control, pop the feat to cement your position, and threaten dangerous opposing models with your own. All those little assassin pieces present solid threats on the enemy caster, so he has to plan his own position very carefully while trying not to give up too much control of the board, lose too much of his army and ideally kill as much of my stuff in return.

Returning to this example then, there are plenty of things that can happen over the next few turns. Next turn the riders can come through the Errants (if I kill the banner and put down Curse or just reposition Veil) and go for jacks, Nightmare can go after pSeverius (Upkeeping Veil to get past, plus Ghostly and Curse if need be) unless he moves away, which he will want to consider as he is in charge range now…(into Killbox though. Choices…).  Or he can always go for a heavy if that doesn’t pan out. At this point I can maybe even use the WE to kill off another jack depending on how the board looks after his turn, as I need not worry about screening the Coven too much in this match.

You get the idea. Conversely, If I was going second in this game, I think I would probably save the feat for the following turn, moving the Riders up T1 so I can hopefully charge the errants on the following turn (and of course the Errants might want to consider staying further back to avoid this). My own jacks would likely stay further back T1 (Stalkers less so, as Stealth still keeps them safe, and Nightmare or a node maybe considering grabbing Black Mantle if needed) and compensate by moving up more aggressively T2 under the protection of the feat. The WE will also likely be corporeal and further back to benefit from Black Mantle just like in the 2nd image, then he could advance more quickly on the following turn and debuff, drop clouds or engage in melee as needed.

The important thing to take away from all of this is not that you can plan out a game like this (you obviously can’t), decide what you “would” do in advance (again, you can’t) or cover every possibility (no way that’s happening). What you can see from the above though is roughly where everything is supposed to be, what it is going to do on a given turn and what options you have to counter varied threats in your opponent’s army. While I can’t cover every possible combination of going 1st/2nd, aggressive/cautious players and every caster/list combination, hopefully this should give you a nice outline to go off in terms of basic gameplay.

List Construction:

One day I’ll come up with a name for the list I’ve developed, but for now, it’ll just have to be something unimaginative like “Lazarus’s Coven list” or whatever. As probably my most played caster during my time in the Nightmare Empire, this list has evolved repeatedly over the many months of playtesting, clocking in a sizable number of games that (bad matchups aside, which should be obvious to anybody looking at this caster) have generally panned out really well.

Earlier I mentioned how I’ve come a long way from earlier incarnations of this list, trying out a number of elements until I was happy with the end result. As you can see from the list I put at the beginning of the article, there isn’t that much in common with where I started beyond the basic Nodes, Nightmare, Skarlock & Siren combination, but I’ll explain the thought process behind it soon enough.

Anyway, onto the list:

System: Warmachine
Faction: Cryx
Casters: 1/1
Points: 50/50
The Witch Coven of Garlghast (*5pts)
* Deathripper/Nightwretch (4pts)
* Stalker (4pts)
* Stalker (4pts)
* Nightmare (10pts)
* Skarlock Thrall (2pts)
Bane Riders (Leader and 4 Grunts) (11pts)
Bile Thralls (Leader and 5 Grunts) (5pts)
Warwitch Siren (2pts)
Wraith Engine (9pts)

Originally, I tried some of the typical Coven lists that were floating around, looking at some of the more normal Cryx builds with more units (add second unit of Banes/Satyxis) or even more jack heavy builds (really doesn’t go as well as focus 9 would suggest) and in the end struck this delicate balance. It was only during a 15 point Mangled Metal playtest I conducted with a friend a while back that I stumbled onto the key core of assassin jacks backed up by the usual Cryx forces to discover a winning combination.

This is a list then that is very good at jack bullet assassination while holding their own against assorted threats. Most of the jacks in the list are SPD 8/9, MAT 9+ and can go through terrain, models, free strikes and even each other should it come to it. High focus stats combined with excellent delivery (Stealth + Clouds + Feat) ensures that many of them get to a target intact, and wreck face once they get there.

But, as promised then, a breakdown:

Why 2 arc nodes? Well this is a fairly obvious reason: Squishy caster, lots of spells that need to be thrown/cycled around, also a backup win condition as a spell assassination if everything else is lost (because FOCUS 9 = 3 boosted POW 12s or 2 fully boosted, usually enough to kill a few casters out there). In smaller games around 15 or so I get by with only the 1 (as it can have Occultation anyway) but beyond that I always want a second.

Why Stalkers (+Scavengers in smaller games)?  At the 15 point level I use 2x Stalker, 2x Scavenger and a Node. By the time I get to bigger games, the Scavengers get dropped  in favor of Nightmare, because the need for a heavy hitter becomes more apparent and trying to take both is just too jack heavy for them to run. Originally I tried different ratios of Stalkers/Scavengers and found that having variety between them gives me diverse threat potential while making them harder to avoid. Generally speaking, Stalkers are better at the actual assassination part vs. most casters out there, but the Flight from the Scavenger is nice for a less linear threat range and Finisher really helps if the Scavenger is part 2 of any attempt. Most of the game, these guys just need 1 focus to run, 3 when they commit (which is often an end game by itself) so they aren’t that much of a strain in all honesty.

Why Nightmare?  Reach, Infernal Machine, Prey and Ghostly. With IM, Nightmare can go smash targets at an incredible 15” away (providing he is in Prey range, so Prey something in the midfield if you need the threat), swinging MAT 10 (12 if vs. a prey target), easily fully loaded and he has the option to combo-strike if you need to smack something really hard. Nightmare is just an incredible monster with the Coven, pulling the double duty of being a serious assassination threat and a problem solver in cracking harder targets or drawing out key opposing threats. Originally I had a Harrower in the list as well, but with the way the rest of the list evolved + inclusion of Biles, I felt that I had my anti-infantry bases covered nicely and felt much better off with the 2x Stalker for the assassination vector and the utility of adding in a Siren.

Why Bane Riders? Until they were spoiled, I used to run Bane Knights in the list*, as I wanted something hard hitting, with decent threat, reach for jamming potential and something that could operate fairly independently. The release of Bane Riders has really given me my dream unit, and actually the 2 are remarkably comparable on the whole in terms of threat range and damage potential (that’s really a topic for another thread though). Crucially however, they come with their own Curse, which means I don’t feel compelled to be taking Tartarus. This not only saves me the points but also importantly gives me that character option for another list, which is important considering my Coven often want to run light on characters anyway. Bane Riders are really everything the Coven could dream for, bringing a lot of innate movement tricks to the table, decently hard hitting attacks (especially with Curse & Dark Shroud on the WE), screening on your approach (large bases) and jamming pretty hard as well (large base + Reach). The other option I ran with for the longest time was also Bane Thralls, but I found that with the feat to ensure delivery and the importance of mobility/jamming over muscle, I switched them out pretty quickly as they struggled to keep up. I have yet to regret this decision either.

Why Bile Thralls? Bile Thralls are a wonderful attrition tool for obvious reasons, and few things give you that perfect answer to infantry, high DEF and mass impact on the table all for such a cheap package. In this list they play an extra special role in clearing charge lanes and helping keep opposing scenario play/aggressive rushes at bay, so it’s often worth keeping a few around in case you need to remove some crucial pieces later in the game. Delivery with the Coven is actually really easy, as often they have Stealth (when the Riders no longer need it), are screened behind the Cavalry (obviously less so if the Riders have Stealth) and I have the feat on a crucial turn to advance them up the board. All in all, they are very hard to stop, absolutely devastating, and they just fulfill many roles in clearing house and handling high DEF softer targets.

Why the Skarlock? He’s a typical support piece really. The Skarlock is wonderful for free Ghost Walk alone, but sometimes it is nice to have the extra cycle even if only to save more focus for other spells/allocation. He is also an absolute life saver if one of the ladies dies (or you otherwise lose Perfect Conjunction) as the cost of the spells get’s much more uncomfortable and you appreciate him being there that much more. This is even more important considering their control area dips as well, allowing him to operate like a mini node and keep things functional. The fact that he has FOCUS 9 if he needs to land an offensive spell is super sweet as well.

Why the Siren? The Siren is primarily there to power boost the odd bonejack that needs to position rather than attack (otherwise he’d be fully loaded) but can do a very good job in board control by locking down heavies, seducing models out of the way or spraying infantry if Bile Thralls can’t get to them. High DEF & Stealth makes her a right nuisance to remove (especially on feat turn) and like the Skarlock above her, she really is a nice added bit of insurance in case you can’t get Perfect Conjunction or lose a witch as that extra focus really comes in handy.

Why the Wraith Engine? This is probably my most contentious inclusion, but I find he really works here when you build around him properly and think carefully about his role. Mainly I bring him as a shield, but he has a lot of utility which works nicely in the list, and of course he can hit decently hard if I need the extra “heavy” in a pinch. As a shield, part of his job is to block LOS to the Coven when models can ignore Stealth, so that definitely helps when you find yourselves in poor matchups. Obviously in such cases you will time your Incorporeal carefully (as Incorporeal models don’t block LOS) so bear that in mind and also consider the feat as well when timing the best time to become a ghost. Interestingly enough though, I find his screening is usually most useful for protecting the ladies from melee threats. Even if an opponent can see through the WE on a charge (when Incorporeal) they cannot end on his base, he is still capable of making freestrikes (and thus vs. a unit, he freestrikes the first model and now others cannot get through) and he drops clouds out on a regular basis.**

In return, the Coven are actually very good at keeping him alive as well, which I know is a concern for most people looking at the Wraith Engine. Black Mantle provides him with Stealth (and he apparitions out afterwards to avoid blocking Perfect Conjunction) and if he times Wraith Walker around the feat (Incorporeal, Feat, Incorporeal) he can be a nuisance to remove. In most games, he will still die despite these defenses, but I’ve found that it is rare that he hasn’t already done his job by then and saved my caster a lot of grief. After all, even when Incorporeal he can still contribute plenty to the battle, including dropping clouds (which this list absolutely loves!), debuffing with Dark Shroud on a huge base (amazing for Nightmare, Riders or even casters if you’re lucky) and of course occupying plenty of space. On the offense, he can still hit reasonably hard (especially when loaded with souls, which is easy with Biles in the list who can purge through him without a hitch and nothing else in the list competes for souls either), especially when Curse is involved.

*A side discussion about my choice of Riders as the main combat unit can be seen towards the end of this article.

**A quick aside on the Wraith Engine shield and its effectiveness in keeping the Coven alive as it’s come up before in many discussions.

In all my games, the number of models that have charged through him is actually really low, because infantry tend to die in freestrikes, so the biggest concern is heavies, and I’m not in a habit of ending my turn with the WE (and Coven immediately behind it) a few inches away from a potentially fully loaded heavy. Even if I wanted the WE that close to the enemy, I certainly wouldn’t have the Coven follow right up behind, because I obviously won’t be needing to make him Stealth anymore! In short: If the Coven are more in danger (e.g. the aforementioned ignore Stealth Shooting, or certain melee), then I will have him stay Corporeal, whereas if the WE is more in danger (which is usually the case), then he uses Incorporeal, Black Mantle and the Feat to stay alive. In most cases, both of them are quite safe, so it is only in cases where the shooting bypasses Stealth (or melee after the feat) that I have to make difficult decisions. That’s what is so nice about the WE in this setup: he is only Stealth or Incorporeal when I want him to be, and I can choose to turn either of those abilities off depending on what works best in that turn/game.

Anyway, this is my recommended setup for most games, but like any recommendation, it obviously changes based on battlefield setup and the opponent… The point is though that the defense is adaptive, I don’t have to commit to that approach, because the WE chooses when to be Incorporeal according to what threats are out there. If being Incorporeal is going to be a liability for their survival, the angry ghost stays Corporeal to form a shield (he can even do the normal plan in reverse and go Corporeal/Feat/Corporeal). Most of the time though, it is his durability I need to be concerned about, being further forward, a large model and having a low number of boxes etc…hence my recommended setup.

Variations:

After many games of playtesting then you can see I arrived at my preferred setup above, but let’s look at for a minute what else I tried along the way and what other approaches can be successful.

Most of the key variations I think rotate around 2 key concepts, namely:

  1. The choice of main combat unit.
  2. The choice of jack setups (WE included).

So let’s look at some of these:

The Kraken – Usually this involves dropping Nightmare and the WE, but you can obviously fiddle around with the Stalkers and something else instead if you prefer). I know a lot of people are a fan of the Kraken with the Coven and it’s not particularly difficult to see why – it screens a squishy caster, provides fire support, moves quickly under IM and even gains some protection under the feat.  I’m personally not one of the biggest proponents of the Kraken with the Coven (not because there is anything wrong with this approach, but because it changes the dynamic of the list dramatically and ultimately just doesn’t suit my playstyle). Essentially you trade in a bit of maneuverability and threat (it’s a quick colossal, but you can only put a huge base in so many places) for concentrated force, ranged weapons and durability in return. Even though I’m personally not a fan, I would say it is a successful build if you want to go in that direction, and indeed Lamoron has done some fairly extensive coverage of his experiences with it if you would like to see the end results.

More bonejacksNormally this will involve dropping Nightmare or the WE for further bonejacks, such as the paired Scavengers that I run at 15. As I’ve mentioned briefly before, I find that in bigger games it becomes harder to pull off a successful skew, and in this case where you rely on delivering smaller jacks to a key location, this can become quite challenging if opponents are just too well entrenched for you to reach them. This is why in bigger games I find that a heavy hitter becomes more paramount, as sometimes you really have to have a key piece turned to scrap or need the threat projection that only it can bring. Similarly, the WE brings a bit of support as well as muscle to balance out the list, and when I tried wielding more jacks instead (e.g. 2x Node, 2x Stalker, 2x Scavenger, Nightmare) it was just too jack heavy for the Coven to properly wield effectively.

Second Combat UnitThis is obviously very nice for a more balanced approach if you go in this direction over the Wraith Engine. Previously I used to run 2 combat units and 2 heavies, but I found that projecting enough assassination threat was difficult in that setup, and that ultimately, I don’t feel the Coven support infantry as well as some of our other casters (specifically eDenny). Obviously you can go this route, and indeed I did as you can see above with my earlier list involving 2 heavies and 2 main combat units. Ultimately though, I felt the list was a bit of a disaster really, with opponents able to push back more aggressively vs. less assassination fear, generally doing better than me at attrition anyway and I found it too difficult to utilize the many movement tricks I had. This isn’t the easiest thing to explain really , but in short I found that most of my models just arrived piecemeal or were too easy to target prioritize effectively, and ultimately, yes, I too wished I had just brought eDenny. So by all means, you can try this variation, and indeed you might prefer that setup. I just don’t find that personally it appeals as much to the casters strengths or my own playstyle.

Support optionsThe are plenty of other good support choices that can make a decent inclusion with the Coven, so I think I’ll give these a quick review. All of these choices I have tested pretty extensively with the Coven and they make excellent choices if you want to try out something for a little variation.

  1. Withershadow Combine – Free upkeep for an upkeep heavy caster, Puppet Strings for a solid assassination piece or spell reliability, spot removal shooting and upkeep removal are all fantastic draws to this unit. Ultimately though, with character restrictions usually forcing them to play where they are more needed in the other list, I have tried to get by without them, and actually the Coven usually do just fine. Focus burdens are far less of an issue than for most, FOCUS 9 is usually pretty reliable for landing spells, and high MAT does help ensure attacks land reliably, while their denial tricks often keep opposing debuffs somewhat at bay. A very solid choice… but unfortunately there isn’t enough room to fit them in.
  2. Pistol Wraiths – Again a really solid choice, these are wonderful in a list that focuses on denial by shutting off opposing heavies, contributing to assassinations and of course spot removing annoying models to let your jacks get through if you don’t want Curse/Veil involved. Again, there is absolutely nothing wrong with this choice, I just struggle to fit them in with the points constraints I have.
  3. Gorman – As well as locking down heavies like the PW’s above, Gorman is fantastic to have for that extra cloud and his own personal threat projection on the field. Like the other support options here I have played with him extensively, and while he works quite well, points and character restrictions usually find him with a home elsewhere.
  4. Darragh Wrathe – Another character, whose wonderful ability to make your army more durable and more mobile is often well sought after. Like the Combine he is very rarely going to be available when running the Coven as a second list, but he is a very solid pick as with most casters to help things run that much more fluidly throughout the game. In particular he works incredibly well with Bane Riders, helping get that important positioning advantage for a Cavalry charge or making them even more difficult to remove than they already are.

And there are many more. As mentioned, all of these are perfectly legitimate options, so give them a shot if you prefer that setup or have these models available in a non-character restricted formats.

More Specific Breakdowns:

So I was asked a few times about a few of the choices that I’ve made, particularly with the recent release of Bane Riders and the way the list has evolved over time with the inclusion of different models. Here then are some of the interesting comparisons that came up that I thought might as well be included for reference sake, as well as to give further reasoning for anybody who’s still interested. Please note, again these are going to be mostly my opinions and analysis, and of course this only considers those choices with the Coven setup above.

Riders vs. Other BanesUsually this is a bit tricky to explain why the Riders mesh so well with the Coven, but hopefully I’ll be able to shed some light on my decision to include them as a combat unit over anything else. I find that running the Coven, I want to be very fast, aggressive and ideally deliver a jack-bullet to their caster as the win-condition for most games. To this end, Bane Cavalry carry a nice mix of speed, resilience and hard hitting power that is needed to make it across the table, destroy/tie up dangerous elements long enough for the Biles to arrive and thin out the board before a jack can get to their caster. With the feat, Stealth (if needed) and ARM 18, they can keep going long enough to do the job, and even though they lack Tough like Thralls, their near immunity to blast damage and ARM/boxes is more than enough to make up the difference. On the attack, the combination of high MAT (Cavalry charge + Curse, not to mention operating independently without Tartarus) and decent hitting power (POW 15 charge, 17 if Curse, 19 if absolutely needed via Dark Shroud from the WE) they can crack heavies +casters alike. In many ways, the large base is wonderful too, both for their jamming potential and screening on the approach, and once they get stuck in, it usually takes at the very least charging WMs or jacks to break them out again. Like the WE, they will die (eventually) but usually after they’ve already done their job.

Compared to their foot brethren, it isn’t just durability but mobility that is really key. Obviously we know by now that the Coven are really swimming in delivery options (and coming with Ghostly already is always nice) so this meshes really nicely with their playstyle. Originally I tried running both Knights and Thralls in my Coven build, but what I ended up thinking was that actually, the Coven do support jacks that much better, and on the whole, my army was just too numerous and unwieldy to take advantage of the fantastic mobility options they provided while being easy to pick off with their many anti-infantry weapons in return. The Riders really were exactly what the Coven needed, and being able to go without Tartarus was wonderful considering my plans to use him in a second list. Anyway I could go on all day about the details of Riders vs. Banes, but it’s going to end up losing context and is probably better suited to another topic.

Soulhunters vs. Riders – This is an interesting comparison, because both units share a lot of similarities and both are good for different reasons. Obviously Soulhunters win in terms of sheer number of consistent attacks (again depending on impacts, but Soulhunters generally win that one) and the ability to boost with souls, but, in the end, I need the Riders for the harder hitting power and higher ARM values in the list. The thing is, because I’m not playing tier, I rarely (if ever) have to worry about my anti-infantry capabilities as I have Biles and plenty of bonejacks who can go around picking off a couple if need be. What I usually do need though is something capable of cracking harder targets (or at least presenting a real threat to them) while sticking around long enough to be a nuisance (Light Cavalry wouldn’t work here in a jamming role nearly as well), is fast enough to get in there early and dangerous enough to threaten any kind of model on the table. Bane Cavalry do that beautifully.

A quick aside on Bane Riders depending on Curse of Shadows here… as it did come up in a previous Coven thread… discussing if Soulhunters won out due to having Incorporeal in activation. I would say that it’s actually pretty complicated, as while Riders do appreciate the CoS support, they certainly don’t depend on it when they have impact attacks to go on. The thing to understand here however is that introducing Bane Cavalry hasn’t really changed the plan for CoS much at all. Half the time, Curse was going on enemy front rank troops anyway to let the jacks and other forces through (or escape jamming) so Bane Riders can exploit something that was going to be there anyway in doing what they want to do. The other half of the time, Curse was being put on a crucial enemy heavy so that it could either be killed or because it was preventing something from reaching squishy support. Again, Bane Riders benefit either way, because it only helps them with breaking harder targets or impacting their way through as they reach squishy support models further back.

I will say that when going tier though you rely much more on Soulhunters in an anti infantry capacity due to lacking Biles and you generally want plenty of them around to make the tier worth taking… so their multiple attacks are ideal for chewing through troops on the table. In this sense, Bane Cavalry (even if you could take them) wouldn’t work better because you wouldn’t be playing to the strengths/weaknesses of the tier, not to mention you can then supplement the Soulhunters with better anti-ARM elements (other heavies, Kraken, Knights using Curse etc.) which I just can’t fit in after the assassination pieces of my Coven list. When looking at non-tier though, I probably wouldn’t take Soulhunters. Not because they are bad or anything, but more due to the fact that they get such a bonus in the tier and require such a points investment (1 max or 2 min + Darragh is a chunk of any list) that if I commit to using them, I might as well go tier and drop any elements that are disallowed to make the points… then I get more bang for the buck so to speak.

Wrongeye & Snapjaw – I’ve been asked a couple of times if the gator duo work well with the Coven instead of a heavy/the WE, given that they fit nicely into the denial theme, take no focus to run and of course are generally pretty self sufficient. Generally, I would say that they are not my favorite pick with the ladies… as the other list usually needs them more, IM is nice to have and they rarely need the focus savings that running a beast provides. Also of note – they don’t benefit from Black Mantle and do get LOS blocked/don’t get pathfinder from Veil. None of these things need to be a problem, but I’ll mention it all the same. When you can afford to screen/protect your heavies and have the focus to feed them anyway, the main appeals of WE&SJ (Submerge, focus savings) don’t make them quite such an easy choice as they are for most other Cryx casters. So they are a good choice here, but I think you could argue there are better options with the Coven.

Conclusion:

Anyway I promised a Part 2 of my Coven writeup due to popular demand, and though you probably all think I’m absolutely crazy for putting this much content into it… I hope the effort I put into compiling it together was well worth the wait! In the end there really is a lot of depth to this caster, but I find them deeply fascinating and rewarding to play on the tabletop as well as allowing me to use something that is fun, crazy and oddly powerful all the same. As always, please feel free to write me with your questions, and I hope this very detailed breakdown will come in use to many of you in the future.

🙂